

本文实例为大家分享了vue实现按钮切换图片的具体代码,供大家参考,具体内容如下
Tab选项卡
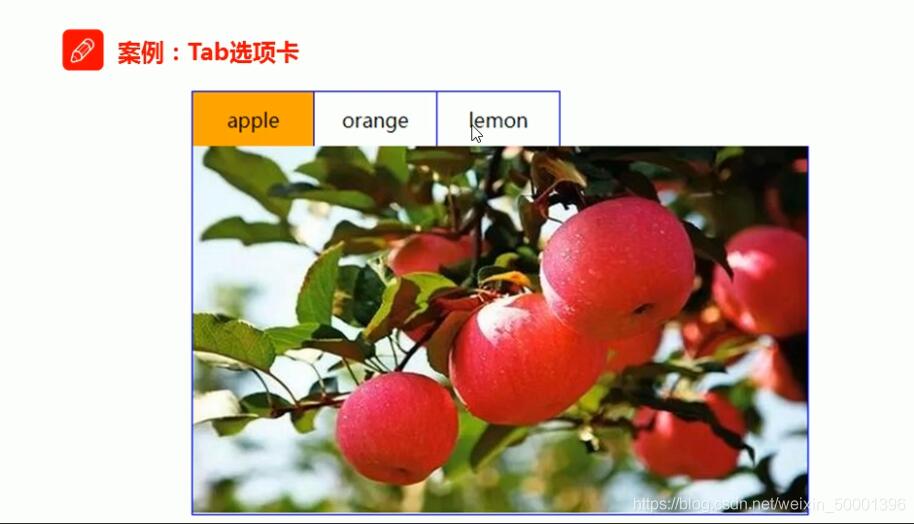
1、实现静态UI效果
用传统的方式实现标签结构和样式
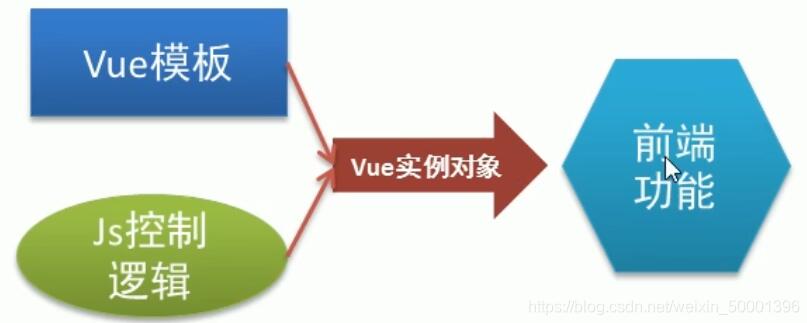
2、基于数据重构UI效果
将静态的结构和样式重构为基于Vue模板语法的形式
处理事件绑定和js控制逻辑
{
 overflow: hidden;
 padding: 0;
 margin: 0;
 }

 .tab ul li {
 box-sizing: border-box;
 padding: 0;
 float: left;
 width: 100px;
 height: 45px;
 line-height: 45px;
 list-style: none;
 text-align: center;
 border-top: 1px solid #ccc;
 border-right: 1px solid #ccc;
 cursor: pointer;
 }

 .tab ul li.active {
 background-color: orange;
 }

 .tab ul li:first-child {
 border-left: 1px solid blue;
 }

 .tab div {
 width: 500px;
 height: 300px;
 display: none;
 text-align: center;
 font-size: 30px;
 line-height: 300px;
 border: 1px solid blue;
 border-top: 0px;
 }

 .tab div.current {
 display: block;
}
<div id="app">
 <button v-on:click="handla">向前切换</button>
 <button v-on:click="handlc">单向循环切换</button>
 <button v-on:click="handle">向后切换</button>

 <div class="tab">
 <ul>
 <li :class="currentIndex==index?'active':''" :key="item.id" v-for="(item,index) in list">{{item.title}}
 </li>
 </ul>
 <div :class="currentIndex==index?'current':''" :key="item.id" v-for="(item,index) in list">
 <img :src="item.path">
 </div>
 </div>

</div>
<script type="text/javascript" src="../js/vue.js"></script>
 <script type="text/javascript">
 /* */
 var vm = new Vue({
 el: '#app',
 data: {
 currentIndex: 0,
 list: [{
  id: 1,
  title: 'apple',
  path: 'img/apple.png'
 }, {
  id: 2,
  title: 'orange',
  path: 'img/orange.png'
 }, {
  id: 3,
  title: 'lemon',
  path: 'img/lemon.png'
 }]
 },
 methods: {
 handle: function () {
  if (this.currentIndex < 2) {
  this.currentIndex = this.currentIndex + 1
  }
 },

 handla: function () {
  if (this.currentIndex > 0) {
  this.currentIndex = this.currentIndex - 1
  }

 },
 handlc: function () {
  this.currentIndex = this.currentIndex + 1
  if (this.currentIndex > 2) {
  this.currentIndex = 0
  }

 },

 }
 })
</script>
最终效果

以上就是本文的全部内容,希望对大家的学习有所帮助,也希望大家多多支持站长技术。

1. 安装 $ cd /usr/local/bin $ wget https://cs.symfony.com/download/php-cs-f...
在众多代码编辑工具中,我最喜欢的就是微软的vscode。首先它十分轻便,不吃硬件...
今天遇到个小问题,纠结了很久,分享下 a标签添加背景图,需要给a添加display:bl...
marquee标签,它是成对出现的标签,首标签marquee和尾标签/marquee之间的内容就...
Linux 发行版的爱好者们又有全新的 Linux 可以体验了,日前一款名为 TeLOS 的 Li...
前言 在mysql中设计表的时候,mysql官方推荐不要使用uuid或者不连续不重复的雪花i...
php有一组进程控制函数(编译时需要–enable-pcntl与posix扩展),使得php能在ngin...
Yii2框架在目前而言,网络上好评不断,最主要的原因,不管是新的框架,还是回顾...
捕获组(capturing group)是正则表达式里比较常用,也是比较重要的概念,我个人...
添加必要的注释,对一个有责任心、有道德模范的前端必须具备的好习惯,可以大大...


