

讲师:Mr-老鬼,QQ:1156346325
EasyClick 原生UI教程电梯直达: EasyClick 原生UI教程总纲
图一
图二
贴一下目录文件
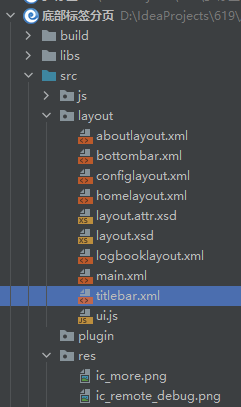
main.xml
<?xml version="1.0" encoding="UTF-8" ?>
<!--
  ~ Copyright(c) 2021,
  ~    项目名称:底部标签栏
  ~    文件名称:main.xml
  ~    创建时间:2021/4/17 下午6:12
  ~    作者:laogui
  -->

<LinearLayout xmlns:xsi="http://www.w3.org/2001/XMLSchema-instance"
              xmlns:android="http://schemas.android.com/apk/res/android"
              xsi:noNamespaceSchemaLocation="layout.xsd"
              android:layout_height="match_parent"
              android:layout_width="match_parent"
              android:background="#0066ff"
              android:orientation="vertical"
              android:paddingTop="10dp">
    <!-- 顶部标题栏布局-->
    <include android:layout="@layout/titlebar" />
    <!-- 第一界面布局   默认显示界面  -->
    <include android:layout="@layout/homelayout" />
    <!-- 第二界面布局 -->
    <include android:layout="@layout/configlayout" />
    <!-- 第三界面布局-->
    <include android:layout="@layout/logbooklayout" />
    <!-- 第四界面布局-->
    <include android:layout="@layout/aboutlayout" />
    <!-- 底部标签布局 -->
    <include android:layout="@layout/bottombar" />

</LinearLayout>
titlebar.xml
<?xml version="1.0" encoding="utf-8"?><!--
  ~ Copyright(c) 2021,
  ~    项目名称:619
  ~    文件名称:titlebar.xml
  ~    创建时间:2021/4/17 下午6:12
  ~    作者:laogui
  -->

<LinearLayout xmlns:xsi="http://www.w3.org/2001/XMLSchema-instance"
              xmlns:android="http://schemas.android.com/apk/res/android"
              xsi:noNamespaceSchemaLocation="layout.xsd"
              android:layout_height="40dp"
              android:layout_width="match_parent"
              android:orientation="horizontal"
              android:paddingLeft="10dp"
              android:paddingRight="10dp"
              android:background="#0066ff">
    <!--我是标题栏的标题-->
    <TextView android:layout_width="wrap_parent"
              android:layout_height="match_parent"
              android:gravity="center"
              android:textColor="#FFFFFF"
              android:background="#0066ff"
              android:textSize="20sp"
              android:text="底部标签框架" />
    <TextView android:layout_width="0dp"
              android:layout_height="match_parent"
              android:layout_weight="1"
              android:textColor="#FFFFFF"
              android:background="#0066ff"
              android:text="" />
    <!-- DeBug 启动远程调试按钮 -->
    <Button android:layout_width="30dp"
            android:layout_height="30dp"
            android:tag="remotedebug"
            android:gravity="center"
            android:textColor="#FFFFFF"
            android:background="#0066ff"
            android:textSize="20sp"
            android:text=""
            android:layout_marginRight="5dp" />
    <!-- settings 启动EC系统设置按钮 -->
    <Button android:layout_width="30dp"
            android:layout_height="30dp"
            android:tag="settings"
            android:gravity="center"
            android:textColor="#FFFFFF"
            android:background="#0066ff"
            android:textSize="20sp"
            android:text="" />

</LinearLayout>
bottombar.xml
<?xml version="1.0" encoding="utf-8"?><!--
  ~ Copyright(c) 2021,
  ~    项目名称:619
  ~    文件名称:bottombar.xml
  ~    创建时间:2021/4/17 下午6:12
  ~    作者:laogui
  -->

<LinearLayout xmlns:xsi="http://www.w3.org/2001/XMLSchema-instance"
              xmlns:android="http://schemas.android.com/apk/res/android"
              xsi:noNamespaceSchemaLocation="layout.xsd"
              android:layout_height="40dp"
              android:layout_width="match_parent"
              android:orientation="horizontal"
              android:layout_margin="2dp">
    <Button android:layout_width="0dp"
            android:layout_weight="1"
            android:layout_height="match_parent"
            android:tag="btn1"
            android:text="首页"
            android:textColor="#FFFFFF"
            android:background="#0066ff" />
    <View android:layout_height="match_parent"
          android:layout_width="1dp"
          android:background="#FFFFFF" />
    <Button android:layout_width="0dp"
            android:layout_weight="1"
            android:layout_height="match_parent"
            android:tag="btn2"
            android:text="配置"
            android:textColor="#FFFFFF"
            android:background="#0066ff" />
    <View android:layout_height="match_parent"
          android:layout_width="1dp"
          android:background="#FFFFFF" />
    <Button android:layout_width="0dp"
            android:layout_weight="1"
            android:layout_height="match_parent"
            android:tag="btn3"
            android:text="日志"
            android:textColor="#FFFFFF"
            android:background="#0066ff" />
    <View android:layout_height="match_parent"
          android:layout_width="1dp"
          android:background="#FFFFFF" />
    <Button android:layout_width="0dp"
            android:layout_weight="1"
            android:layout_height="match_parent"
            android:tag="btn4"
            android:text="关于"
            android:textColor="#FFFFFF"
            android:background="#0066ff" />
</LinearLayout>
homelayout.xml
<?xml version="1.0" encoding="utf-8"?><!--
  ~ Copyright(c) 2021,
  ~    项目名称:619
  ~    文件名称:homelayout.xml
  ~    创建时间:2021/4/17 下午6:12
  ~    作者:laogui
  -->

<ScrollView xmlns:xsi="http://www.w3.org/2001/XMLSchema-instance"
            xmlns:android="http://schemas.android.com/apk/res/android"
            xsi:noNamespaceSchemaLocation="layout.xsd"
            android:layout_width="match_parent"
            android:layout_height="wrap_content"
            android:layout_weight="1"
            android:padding="20dp"
            android:tag="sv1"
            android:background="#FFFFFF">
    <LinearLayout android:layout_height="wrap_content"
                  android:layout_width="match_parent"
                  android:orientation="vertical">
        <!-- 添加布局控件 在这里-->
        <TextView android:layout_width="match_parent"
                  android:layout_height="wrap_content"
                  android:text="第一个界面" />
        <!-- 脚本启动运行按钮  可自行修改样式 -->
        <TextView android:layout_width="match_parent"
                  android:layout_height="wrap_content"
                  android:tag="startjob"
                  android:gravity="center"
                  android:text="运  行"
                  android:textSize="26sp"
                  android:textColor="#FFFFFF"
                  android:background="#0066ff" />
        <!-- 脚本停止运行按钮  可自行修改样式-->
        <TextView android:layout_width="match_parent"
                  android:layout_height="wrap_content"
                  android:tag="stopjob"
                  android:gravity="center"
                  android:text="停  止"
                  android:textSize="26sp"
                  android:textColor="#FFFFFF"
                  android:background="#0066ff"
                  android:visibility="gone" />
    </LinearLayout>
</ScrollView>
configlayout.xml
<?xml version="1.0" encoding="utf-8"?><!--
  ~ Copyright(c) 2021,
  ~    项目名称:619
  ~    文件名称:configlayout.xml
  ~    创建时间:2021/4/17 下午6:12
  ~    作者:laogui
  -->

<ScrollView xmlns:xsi="http://www.w3.org/2001/XMLSchema-instance"
            xmlns:android="http://schemas.android.com/apk/res/android"
            xsi:noNamespaceSchemaLocation="layout.xsd"
            android:layout_width="match_parent"
            android:layout_height="match_parent"
            android:layout_weight="1"
            android:padding="20dp"
            android:background="#FFFFFF"
            android:tag="sv2"
            android:visibility="gone">


    <LinearLayout android:layout_height="wrap_content"
                  android:layout_width="match_parent"
                  android:orientation="vertical">
        <!-- 添加布局控件 在这里 -->
        <TextView android:layout_width="match_parent"
                  android:layout_height="wrap_content"
                  android:text="第二个界面" />
    </LinearLayout>
</ScrollView>
logbooklayout.xml
<?xml version="1.0" encoding="utf-8"?><!--
  ~ Copyright(c) 2021,
  ~    项目名称:619
  ~    文件名称:logbooklayout.xml
  ~     创建时间:2021/4/17 下午6:12
  ~    作者:laogui
  -->

<ScrollView xmlns:xsi="http://www.w3.org/2001/XMLSchema-instance"
            xmlns:android="http://schemas.android.com/apk/res/android"
            xsi:noNamespaceSchemaLocation="layout.xsd"
            android:layout_width="match_parent"
            android:layout_height="match_parent"
            android:layout_weight="1"
            android:padding="20dp"
            android:background="#FFFFFF"
            android:tag="sv3"
            android:visibility="gone">
    <LinearLayout android:layout_height="wrap_content"
                  android:layout_width="match_parent"
                  android:orientation="vertical">
        <!-- 添加布局控件 在这里 -->
        <TextView android:layout_width="match_parent"
                  android:layout_height="wrap_content"
                  android:text="第三个界面" />
    </LinearLayout>

</ScrollView>
aboutlayout.xml
<?xml version="1.0" encoding="utf-8"?><!--
  ~ Copyright(c) 2021,
  ~    项目名称:619
  ~    文件名称:aboutlayout.xml
  ~    创建时间:2021/4/18 下午9:04
  ~    作者:laogui
  -->

<ScrollView xmlns:xsi="http://www.w3.org/2001/XMLSchema-instance"
            xmlns:android="http://schemas.android.com/apk/res/android"
            xsi:noNamespaceSchemaLocation="layout.xsd"
            android:layout_width="match_parent"
            android:layout_height="match_parent"
            android:layout_weight="1"
            android:padding="20dp"
            android:background="#FFFFFF"
            android:tag="sv4"
            android:visibility="gone">

    <LinearLayout android:layout_height="wrap_content"
                  android:layout_width="match_parent"
                  android:orientation="vertical">
        <!-- 添加布局控件 在这里 -->
        <TextView android:layout_width="match_parent"
                  android:layout_height="wrap_content"
                  android:text="第四个界面" />
    </LinearLayout>
</ScrollView>
文中图片资源可以自行制作成你想要的图片即可。
/*
 * Copyright(c) 2021,
 *    项目名称:底部标签栏
 *    文件名称:ui.js
 *    创建时间:2021/4/17 下午6:12
 *    作者:laogui
 */

function main() {
    ui.layout("参数设置", "main.xml");
    ui.resetUIVar();
    // 获取res 目录下的 png图 转为Android 资源
    let bgRemote = ui.resResAsDrawable("ic_remote_debug.png");
    let bgSettings = ui.resResAsDrawable("ic_more.png");
    //  设置背景图
    ui.remotedebug.setBackgroundDrawable(bgRemote);
    ui.settings.setBackgroundDrawable(bgSettings);
    //----------------------   固定内容 请勿随意修改  -------------------------------
    /**
     * 说明 :
     * 原创作者 :Mr、老鬼 ,QQ:1156346325
     * 本框架基于Android viwe的Visibility 属性 参数为 View.VISIBLE(显示控件或布局) View.GONE(隐藏控件或布局)
     * 使用最简单的办法解决标签不在底部的问题
     * 加入顶部标题栏 可自定义标题
     * 新建项目一定是单标签项目
     */
    //----------------------------页面切换按钮  ------------------
    importPackage(android.view);//导入 view 包
    importPackage(android.widget); // 导入 widget 包

    //  第一个功能界面
    ui.setEvent(ui.btn1, "click", function (view) {
        setvis(0)
    });
    //  第二个功能界面
    ui.setEvent(ui.btn2, "click", function (view) {
        setvis(1)
    });
    //  第三个功能界面
    ui.setEvent(ui.btn3, "click", function (view) {
        setvis(2)
    });
    //  第四个功能界面
    ui.setEvent(ui.btn4, "click", function (view) {
        setvis(3)
    })
    //-------------------------------------------------------

    //------------------------ EC 系统设置按钮------------------
    ui.setEvent(ui.settings, "click", function (view) {
        openECSystemSetting();
    })
    //-------------------------------------------------------

    //------------------------ EC 脚本运行 按钮  ------------------
    ui.setEvent(ui.startjob, "click", function (view) {

        ui.run(1000, function (view) {
            let stopView = ui.stopjob;
            stopView.setVisibility(View.VISIBLE);
            let statView = ui.startjob;
            statView.setVisibility(View.GONE);
        })
        sleep(1000);
        ui.start();
    })
    //-------------------------------------------------------

    //------------------------ EC 脚本停止 按钮  ------------------
    ui.setEvent(ui.stopjob, "click", function (view) {
        ui.run(1000, function (view) {
            let stopView = ui.stopjob;
            stopView.setVisibility(View.GONE);
            let statView = ui.startjob;
            statView.setVisibility(View.VISIBLE);
        })
        sleep(1000);
        ui.stopTask();

    })
    //----------------- EC DeBUg 远程调试按钮    ----------------
    ui.setEvent(ui.remotedebug, "click", function (view) {
        //  远程调试 界面com.android.ui.RemoteDebugActivity
        ui.toast("dianle ");
        //远程调试activity 类名 "com.android.ui.RemoteDebugActivity");

        try {
            let androidId = device.getSdkInt();
            logd(androidId);
            if (androidId < 29) {
                importClass(android.content.Intent);
                importClass(android.net.Uri)
                importClass(android.app.PendingIntent)
                var intent = new Intent();
                intent.setClassName(context, "com.android.ui.RemoteDebugActivity");

                context.startActivity(intent);
            } else {
                ui.logd("当前Android版本不小于10,请手动点击远程调试")
                swipeToPoint(0, device.getScreenHeight() / 3, device.getScreenWidth() / 2, device.getScreenHeight() / 3, 1000);
                toast("当前Android版本不小于10,请手动点击远程调试");
            }
        } catch (e) {
            loge(e)
        }
    });
    //-----------------------------------  固定内容结束 ------------------------------
    // ----------------  这里开始添加 UI 内容  --------------------


}

/**
 * 选择打开页面控制函数 默认底部四个标签 请勿随意修改
 * @param svtag 底部标签标记
 */
function setvis(svtag) {
    let sv = ui.sv1;
    switch (svtag) {
        case 0:
            sv.setVisibility(View.VISIBLE);
            sv = ui.sv2;
            sv.setVisibility(View.GONE);
            sv = ui.sv3;
            sv.setVisibility(View.GONE);
            sv = ui.sv4;
            sv.setVisibility(View.GONE);
            break;
        case 1:
            sv.setVisibility(View.GONE);
            sv = ui.sv2;
            sv.setVisibility(View.VISIBLE);
            sv = ui.sv3;
            sv.setVisibility(View.GONE);
            sv = ui.sv4;
            sv.setVisibility(View.GONE);
            break;
        case 2:
            sv.setVisibility(View.GONE);
            sv = ui.sv2;
            sv.setVisibility(View.GONE);
            sv = ui.sv3;
            sv.setVisibility(View.VISIBLE);
            sv = ui.sv4;
            sv.setVisibility(View.GONE);
            break;
        case 3:
            sv.setVisibility(View.GONE);
            sv = ui.sv2;
            sv.setVisibility(View.GONE);
            sv = ui.sv3;
            sv.setVisibility(View.GONE);
            sv = ui.sv4;
            sv.setVisibility(View.VISIBLE);
            break;

    }

}

main();
/*
 * Copyright(c) 2021,
 *    项目名称:619
 *    文件名称:main.js
 *    创建时间:2021/4/17 下午6:12
 *    作者:laogui
 */

function main() {
    //开始再这里编写代码了!!
    toast("Hello World");
    //如果自动化服务正常
    if (!autoServiceStart(3)) {
        logd("自动化服务启动失败,无法执行脚本")
        exit();
        return;
    }
    logd("开始执行脚本...")
    home();
    while(true){
        logd("我是循环执行的任务,需要停止请点停止按钮!");
        sleep(5*1000);
    }
}

function autoServiceStart(time) {
    for (var i = 0; i < time; i++) {
        if (isServiceOk()) {
            return true;
        }
        var started = startEnv();
        logd("第" + (i + 1) + "次启动服务结果: " + started);
        if (isServiceOk()) {
            return true;
        }
    }
    return isServiceOk();
}

main();
到此结束,这是个初级版的代码框架,不完美,效果丑了点,后期会继续完善。
Android原生view 动态调整布局。xml编写布局 线性布局做外层,线性布局做顶部标题栏和底部标签栏,多个scrollview做切换的界面。
新增 include标签
<include android:layout="@layout/titlebar" />
说明: 引用 titlebar.xml布局文件 没有其他特异功能就是引用 另外的xml布局
我是Mr-老鬼、QQ1156346325 。交流QQ群:620028786,647082990
------------------------------------------------版权声明------------------------------------------------------
本文版权所有~Mr-老鬼 ~转载请注明原文地址

vbs:把一段文字中指定字符颜色变成红色的正则 functionc(Tstr,Word) Dimre Setre...
前言 相信大家都知道在IDE中代码的智能提示几乎都是标配,虽然一些文本编辑器也...
一、正则表达式概述 二、正则表达式在VBScript中的应用 三、正则表达式在VavaScr...
计算属性computed: 支持缓存,只有依赖数据发生改变,才会重新进行计算 不支持...
一石激起千层浪,继中国区浩浩荡荡的大裁员告一段落之后,甲骨文并未因此收起手...
ADO对象: Connection Command Recordset Record Stream ASP支持的对象很多,可...
【排序算法】之lowb三人组冒泡、插入、选择 什么是lowb三人组 冒泡排序bubble so...
歌词编辑器 歌词编辑器 第一步:选择要播放的歌曲并播放 第二步:填写全部的歌词...
本文将研究 ES6 的 for ... of 循环。 旧方法 在过去,有两种方法可以遍历 javas...
微信文件传输助手是微信电脑版与手机微信之间相互传输图片等文件的好工具,但很...

