【玩转Arm-2D】为什么说“得蒙版者得GUI”
【玩转Arm-2D】为什么说“得蒙版者得GUI”

在上一篇文章《【玩转Arm-2D】零基础Arm-2D API绘图入门无忧》的最后,我们展示了如何使用Arm-2D在RGB565环境下显示带有Alpha通道的图片的(比如png格式的图片)方法:
其代码也不复杂:
static
IMPL_PFB_ON_DRAW(__pfb_draw_scene0_handler)
{
    user_scene_0_t *ptThis = (user_scene_0_t *)pTarget;
    ARM_2D_UNUSED(ptTile);
    ARM_2D_UNUSED(bIsNewFrame);

    arm_2d_canvas(ptTile, __top_canvas) {
    /*-----------------------draw the foreground begin-----------------------*/

        /* following code is just a demo, you can remove them */

        arm_2d_rgb16_fill_colour(ptTile, NULL, GLCD_COLOR_WHITE);

        arm_2d_align_centre(__top_canvas, c_tileCMSISLogoRGB565.tRegion.tSize) {
            /* draw the cmsis logo in the centre of the screen */
            arm_2d_rgb565_tile_copy_with_src_mask_only(
                &c_tileCMSISLogoRGB565,
                &c_tileCMSISLogoMask,
                ptTile,
                &__centre_region);
            arm_2d_op_wait_async(NULL);
        }

    /*-----------------------draw the foreground end  -----------------------*/
    }
    arm_2d_op_wait_async(NULL);

    return arm_fsm_rt_cpl;
}
主要是:
- 借助 arm_2d_rgb16_fill_colour() 给整个屏幕背景填充白色;
- 借助 arm_2d_align_centre() 计算出一个能将目标贴图 c_tileCMSISLogoRGB565 居中的一个区域 __centre_region;
- 借助 arm_2d_rgb565_tile_copy_with_src_mask_only() 将贴图 c_tileCMSISLogoRGB565连同它自带的透明蒙版 c_tileCMSISLogoMask 绘制在白色背景上。
- 由于 __centre_region 是一个局部变量,考虑到API可能会工作在“异步”模式下,因此必须要借助 arm_2d_op_wait_async() 来确保实际的绘制工作在 __centre_region 还“人生在世” 的时候进行。
如果你对上述技术细节还有疑问,推荐首先阅读前一篇文章后,再继续今天的内容。
【从剪影开始说起……】
借助img2c.py的帮助,很多带有alpha通道的图片可以被转化为Arm-2D的API能直接“食用”的数据结构 arm_2d_tile_t——也就是我们所说的“贴图”——这里的贴图当然是一个名词,有时为了避免冲突,不妨约定用 tile 来指代好了。
对一个png文件来说,img2c.py可以将它的Alpha通道单独提取出来,生成一个独立的tile,一般以 "Mask"为后缀,比如前面例子中,c_tileCMSISLogoRGB565 是颜色通道,而c_tileCMSISLogoMask就是对应的透明蒙版。
很多时候,相比RGB颜色信息,透明蒙版可能对我们的用处更大。举个不恰当的例子:抛开二刺螈的纸片老婆们不谈,三次元世界中,直男给女神们拍照最好选背影或者剪影——除非你对自己的摄影天分有着“女神认可”的能力,否则还是不要过分自信为好。

同样道理,在GUI设计中,我们其实可以看到大量使用透明蒙版建立剪影的例子,比如:
是不是突然就有点高大上的感觉了?其代码也不复杂:
static
IMPL_PFB_ON_DRAW(__pfb_draw_scene0_handler)
{
    user_scene_0_t *ptThis = (user_scene_0_t *)pTarget;
    ARM_2D_UNUSED(ptTile);
    ARM_2D_UNUSED(bIsNewFrame);

    arm_2d_canvas(ptTile, __top_container) {
    /*-----------------------draw the foreground begin-----------------------*/

        /* following code is just a demo, you can remove them */

        arm_2d_fill_colour(ptTile, NULL, GLCD_COLOR_WHITE);

        /* draw the cmsis logo using mask in the centre of the screen */
        arm_2d_align_centre(__top_container, c_tileCMSISLogoMask.tRegion.tSize) {
            arm_2d_rgb565_fill_colour_with_mask(
                      ptTile,
                      &__centre_region,
                      &c_tileCMSISLogoMask,
                      (__arm_2d_color_t){GLCD_COLOR_BLACK});
        }

    /*-----------------------draw the foreground end  -----------------------*/
    }
    arm_2d_op_wait_async(NULL);

    return arm_fsm_rt_cpl;
}其实就是将原本的arm_2d_rgb565_tile_copy_with_src_mask_only() 替换成了arm_2d_rgb565_fill_colour_with_mask()。该函数顾名思义,就是根据给定的透明蒙版(mask)来填充指定的颜色,其(伪)函数原型为:
extern
ARM_NONNULL(1,3)
arm_fsm_rt_t arm_2d_rgb565_fill_colour_with_mask(
      const arm_2d_tile_t   *ptTarget,
      const arm_2d_region_t *ptRegion,
      const arm_2d_tile_t   *ptMask,
      arm_2d_color_rgb565_t tColour);
其中:
- ptTarget 为指向目标缓冲区(目标画布)的指针,且不能为NULL;
- ptRegion 为目标区域的地址,如果其为NULL,则表示整个目标缓冲区;
- ptMask 为指向透明蒙版的指针,且不能为NULL;
- tColour 为我们要填充的颜色
怎么样,并不复杂吧?
本质上,上述API只是借助透明蒙版来实现“抗锯齿的效果”——一般仅在图形的边缘处存在Alpha小于255的情况——实际上,在图形的大部分区域,透明蒙版的Alpha值都是255,当我们根据蒙版进行颜色填充时,本质上只是一种染色而已。
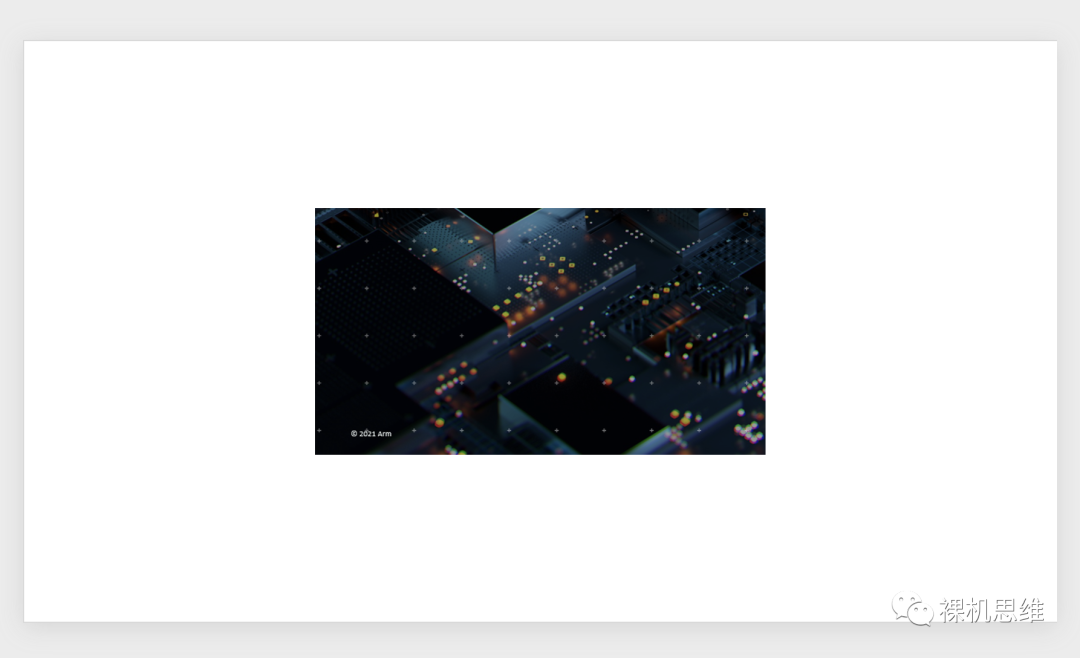
单纯这么说,你也许并没有察觉这里可能存在的问题,我们不妨来看一个更为常见的情形:假设我们的界面存在一个“烘托气氛”,看起来高大上的背景图片,比如:

看起来不错对吧?借助 img2c.py,我们很容易就可以将其加入我们的素材库。不妨就起名叫 c_tileBackground:
extern const arm_2d_tile_t c_tileBackground;修改代码,我们可以使用它来轻松取代我们已有的白色背景:
extern const arm_2d_tile_t c_tileBackground;

...

static
IMPL_PFB_ON_DRAW(__pfb_draw_scene0_handler)
{
    user_scene_0_t *ptThis = (user_scene_0_t *)pTarget;
    ARM_2D_UNUSED(ptTile);
    ARM_2D_UNUSED(bIsNewFrame);

    arm_2d_canvas(ptTile, __top_container) {
    /*-----------------------draw the foreground begin-----------------------*/

        arm_2d_rgb16_tile_copy_only(&c_tileBackground,
                                    ptTile,
                                    &__top_container);

        /* draw the cmsis logo using mask in the centre of the screen */
        arm_2d_align_centre(__top_container, c_tileCMSISLogoMask.tRegion.tSize) {
            arm_2d_rgb565_fill_colour_with_mask(
                      ptTile,
                      &__centre_region,
                      &c_tileCMSISLogoMask,
                      (__arm_2d_color_t){GLCD_COLOR_BLACK});
        }

    /*-----------------------draw the foreground end  -----------------------*/
    }
    arm_2d_op_wait_async(NULL);

    return arm_fsm_rt_cpl;
}
其效果不能说有那味儿了,只能说是味道太冲了:

说到界面设计,怎么会缺席了“甲方爸爸”呢?

于是呢,甲方爸爸提出了一个“很简单”的需求:
- 这个Logo能不能放到黄金分隔比的位置上
“您可真是行家”,你笑脸相迎,阿谀奉承:“行!安排上!”
黄金分割比其实并不是什么难题,本质上就是要替换掉原本的 __centre_region ——因为它代表的是把 c_tileCMSISLogoRGB565放到正中央。
“这有何难?”,你心理低估:“不就是个region计算么?”
修改后的代码如下:
extern const arm_2d_tile_t c_tileBackground;

...

static
IMPL_PFB_ON_DRAW(__pfb_draw_scene0_handler)
{
    user_scene_0_t *ptThis = (user_scene_0_t *)pTarget;
    ARM_2D_UNUSED(ptTile);
    ARM_2D_UNUSED(bIsNewFrame);

    arm_2d_canvas(ptTile, __top_container) {
    /*-----------------------draw the foreground begin-----------------------*/

        arm_2d_rgb16_tile_copy_only(&c_tileBackground,
                                    ptTile,
                                    &__top_container);

        arm_2d_region_t tGoldenRatioRegion = {
            .tSize = c_tileCMSISLogoMask.tRegion.tSize,
            .tLocation = {
                .iX = (float)(  __top_container.tSize.iWidth
                             -  c_tileCMSISLogoMask.tRegion.tSize.iWidth)
                    *  0.618f
                    +  __top_container.tLocation.iX,
                .iY = (float)(  __top_container.tSize.iHeight
                             -  c_tileCMSISLogoMask.tRegion.tSize.iHeight)
                    *  0.618f
                    +  __top_container.tLocation.iY,
            },
        };

        arm_2d_rgb565_fill_colour_with_mask(
                  ptTile,
                  &tGoldenRatioRegion,
                  &c_tileCMSISLogoMask,
                  (__arm_2d_color_t){GLCD_COLOR_LIGHT_GREY});

        arm_2d_op_wait_async(NULL);
    /*-----------------------draw the foreground end  -----------------------*/
    }
    arm_2d_op_wait_async(NULL);

    return arm_fsm_rt_cpl;
}
效果如下:

“好像也并不咋样?”,你虽然满心腹诽,但仍然保持着营业式的笑容,扭头看向同样一脸疑惑的甲方爸爸。
“嗯……很微妙呢……要不再往右下方挪挪?”
你麻溜的给 tGoldenRatioRegion.tLocation上添了一些偏移量:
arm_2d_region_t tGoldenRatioRegion = {
    .tSize = c_tileCMSISLogoMask.tRegion.tSize,
    .tLocation = {
        .iX = (float)(  __top_container.tSize.iWidth
                     -  c_tileCMSISLogoMask.tRegion.tSize.iWidth)
            *  0.618f
            +  __top_container.tLocation.iX
            +  40,
        .iY = (float)(  __top_container.tSize.iHeight
                     -  c_tileCMSISLogoMask.tRegion.tSize.iHeight)
            *  0.618f
            +  __top_container.tLocation.iY
            +  40,
    },
};
“不错不错!这才是真正的黄金分割比嘛?你之前一定是弄错了”
“哦哦,还是老板您比较厉害!”——多年的摸爬滚打已经让你小嘴儿抹了蜜,但又没全抹上……
正当你洋洋得意之时,“爸爸”又提出了“一个简单的想法”:
- 你这个Logo不够黑啊……能不能再黑一点……
- 能不能有一种若有似无的感觉?就是不注意看不到,但又不是完全看不到的那种……
- ……
听到这里,你心中已然有千万头草泥马飞奔而过:你说黑一点,我就把Logo的填充颜色变得再黑一点,问题不大,但你说的若有似无是个什么东西?如果只是借助 arm_2d_rgb565_fill_colour_with_mask()真的是“臣妾做不到啊”!
面对这样的需求,虽然 fill_colour_with_mask()做不到,但该函数的“超进化版本” fill_colour_with_mask_and_opacity()可以做到,其对应rgb565的(伪)函数原型如下:
extern
ARM_NONNULL(1,3)
arm_fsm_rt_t arm_2d_rgb565_fill_colour_with_mask_and_opacity(
                const arm_2d_tile_t   *ptTarget,
                const arm_2d_region_t *ptRegion,
                const arm_2d_tile_t   *ptMask,
                arm_2d_color_rgb565_t tColour,
                uint8_t               chOpacity);
简单来说,它就是在原本 fill_colour_with_mask 的基础上增加了一个 Opacity参数(也就是Alpha),其取值范围是0~255,表示不透明度。借助它的帮助,我们可以将原本的“实心”颜色填充替换为“透明玻璃”效果:
对应的代码为:
extern const arm_2d_tile_t c_tileBackground;

...

static
IMPL_PFB_ON_DRAW(__pfb_draw_scene0_handler)
{
    user_scene_0_t *ptThis = (user_scene_0_t *)pTarget;
    ARM_2D_UNUSED(ptTile);
    ARM_2D_UNUSED(bIsNewFrame);

    arm_2d_canvas(ptTile, __top_container) {
    /*-----------------------draw the foreground begin-----------------------*/

        arm_2d_rgb16_tile_copy_only(&c_tileBackground,
                                    ptTile,
                                    &__top_container);

        arm_2d_region_t tGoldenRatioRegion = {
            .tSize = c_tileCMSISLogoMask.tRegion.tSize,
            .tLocation = {
                .iX = (float)(  __top_container.tSize.iWidth
                             -  c_tileCMSISLogoMask.tRegion.tSize.iWidth)
                    *  0.618f
                    +  __top_container.tLocation.iX
                    +  40,
                .iY = (float)(  __top_container.tSize.iHeight
                             -  c_tileCMSISLogoMask.tRegion.tSize.iHeight)
                    *  0.618f
                    +  __top_container.tLocation.iY
                    +  40,
            },
        };

        arm_2d_rgb565_fill_colour_with_mask_opacity(
                  ptTile,
                  &tGoldenRatioRegion,
                  &c_tileCMSISLogoMask,
                  (__arm_2d_color_t){GLCD_COLOR_LIGHT_GREY},
                  128);

        arm_2d_op_wait_async(NULL);
    /*-----------------------draw the foreground end  -----------------------*/
    }
    arm_2d_op_wait_async(NULL);

    return arm_fsm_rt_cpl;
}
【冷淡风的图标……】
当今的图形界面中,不知从何时流行起了一种以剪影为主要手段实现的“性冷淡风”,其中一个典型的例子就是以透明蒙版的形式展示某些图标的剪影,例如:

图片中央的播放按钮——聪明的你可能已经看出来了——本质上就是两个透明蒙版的叠加:
- 一个三角形的透明蒙版,其填充颜色为白色,不透明度为50%;
- 一个圆形的透明蒙版,其填充颜色为白色,其不透明度为25%
那么我们如何才能轻松的获取这些蒙版素材呢?来来来,你们这些常年厚着脸皮在简历上写着“精通PPT”的人给我听好了:
1、打开PPT,建立一个什么都没有的空白页;并在中央放置一个背景图片(或者干脆偷懒放一个黑色的背景色做填充);
2、在“插入”->“形状”中找到所需的基本形状,比如圆和三角形
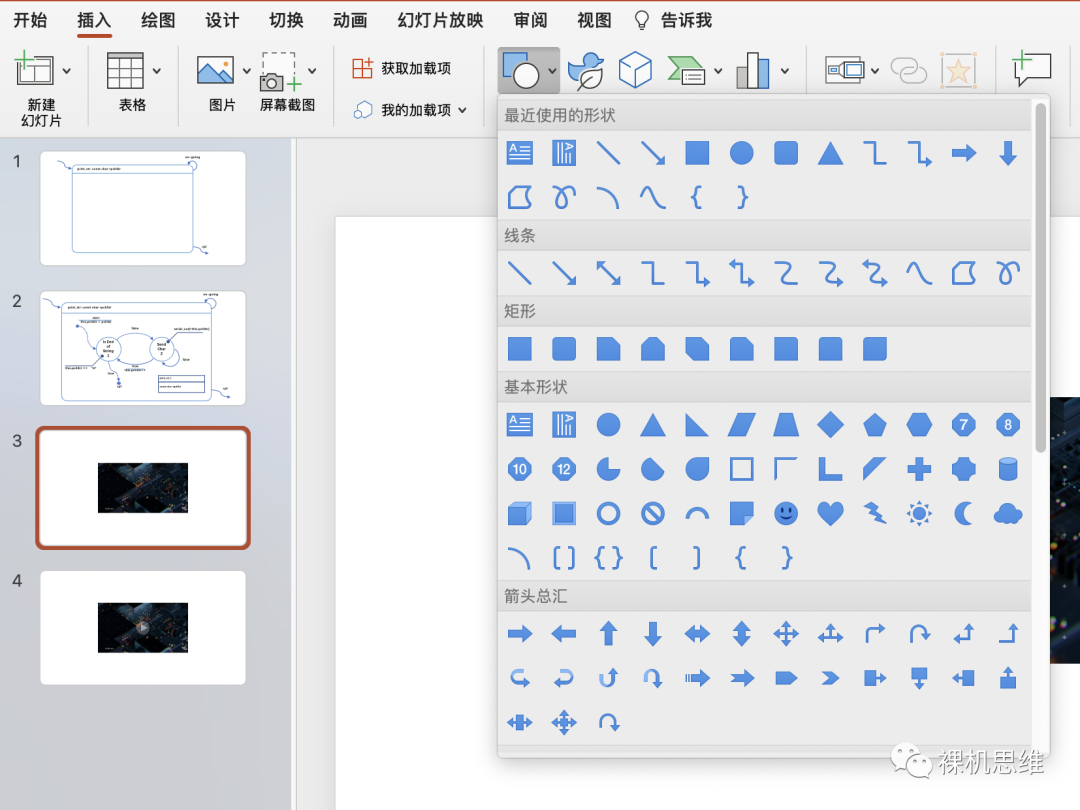
3、将它们的填充颜色设置为白色,边框颜色设置为“无边框”;
4、觉得效果满意后,单独选中一个形状(比如三角形),在右键菜单中选择“另存为图片”:
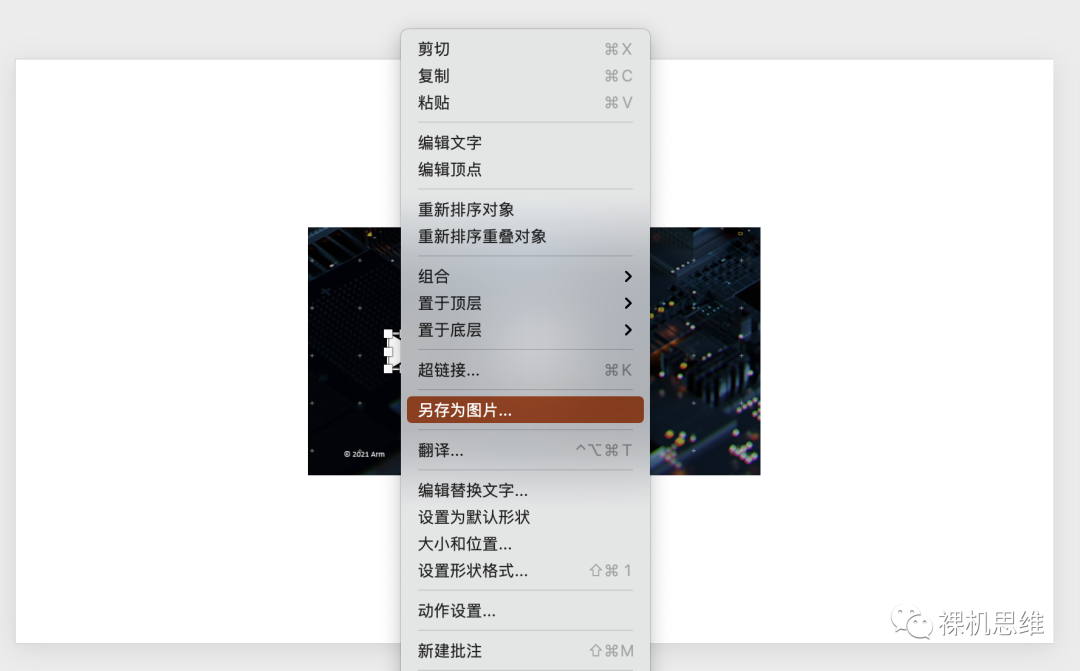
你会发现,该图形被保存成了我们熟悉的 PNG格式。我们可以以此类推保存好圆形。
5、借助 img2c.py 将 png 格式转化为Arm-2D可以使用的tile数据结构。如果有必要,我们可以同时利用 img2c.py 的 --dim 参数来对图片进行等比例尺寸调整,以适应LCD的需要,比如:
python img2c.py -i ..\examples\smart-phone-like-GUI\asset\triangle.png --dim 33 39 --name Triangle在所生成的 triangle.c 中,我们可以看到所需的透明模板:
extern const arm_2d_tile_t c_tileTriangleMask;
const arm_2d_tile_t c_tileTriangleMask = {
    .tRegion = {
        .tSize = {
            .iWidth = 33,
            .iHeight = 39,
        },
    },
    .tInfo = {
        .bIsRoot = true,
        .bHasEnforcedColour = true,
        .tColourInfo = {
            .chScheme = ARM_2D_COLOUR_8BIT,
        },
    },
    .pchBuffer = (uint8_t *)c_bmpTriangleAlpha,
};同理,我们可以将圆形调整为大小为60*60:
python img2c.py -i ..\examples\smart-phone-like-GUI\asset\circle.png --dim 60 60 --name Circle7、将生成的两个 c 资源文件加入工程参与编译:

8、接下来就是单纯的透明蒙版使用了。修改代码为:
extern const arm_2d_tile_t c_tileTriangleMask;
extern const arm_2d_tile_t c_tileCircleMask;
extern const arm_2d_tile_t c_tileBackground;

...

static
IMPL_PFB_ON_DRAW(__pfb_draw_scene0_handler)
{
    user_scene_0_t *ptThis = (user_scene_0_t *)pTarget;
    ARM_2D_UNUSED(ptTile);
    ARM_2D_UNUSED(bIsNewFrame);

    arm_2d_canvas(ptTile, __top_container) {
    /*-----------------------draw the foreground begin-----------------------*/

        arm_2d_rgb16_tile_copy_only(&c_tileBackground,
                                    ptTile,
                                    &__top_container);

        //! 绘制圆圈(图标背景)
        arm_2d_align_centre(__top_container, c_tileCircleMask.tRegion.tSize) {
            arm_2d_rgb565_fill_colour_with_mask_and_opacity(
                            ptTile,
                            &__centre_region,
                            &c_tileCircleMask,
                            (arm_2d_color_rgb565_t){GLCD_COLOR_WHITE},
                            64 );    //!< 25% 不透明度
            arm_2d_op_wait_async(NULL);
        }

        //! 绘制三角形(图标本体)
        arm_2d_align_centre(__top_container, c_tileTriangleMask.tRegion.tSize) {
            //! 适当偏移点,否则丑
            __centre_region.tLocation.iX += 5;

            arm_2d_rgb565_fill_colour_with_mask_and_opacity(
                            ptTile,
                            &__centre_region,
                            &c_tileTriangleMask,
                            (arm_2d_color_rgb565_t){GLCD_COLOR_WHITE},
                            128);    //!< 50% 不透明度
            arm_2d_op_wait_async(NULL);
        }

    /*-----------------------draw the foreground end  -----------------------*/
    }
    arm_2d_op_wait_async(NULL);

    return arm_fsm_rt_cpl;
}
最终效果如下:

相信看到这里,聪明的小伙伴已经知道如何建立各种“性冷淡风”的图标和按钮了吧?
【蒙版的尺寸优化】
Arm-2D为颜色填充函数(fill-colour)提供了对A8、A4以及A2 蒙版的支持,以RGB565为例,对应的API分别是:
- arm_2d_rgb565_fill_colour_with_a4_mask()
- arm_2d_rgb565_fill_colour_with_a4_mask_and_opacity()
- arm_2d_rgb565_fill_colour_with_a2_mask()
- arm_2d_rgb565_fill_colour_with_a2_mask_and_opacity()
而 img2c.py 也在默认情况下会为PNG图片生成对应的A4和A2蒙版,比如:
extern const arm_2d_tile_t c_tileCMSISLogoMask;
extern const arm_2d_tile_t c_tileCMSISLogoA2Mask;
extern const arm_2d_tile_t c_tileCMSISLogoA4Mask;
以场景蒙版的默认代码为例:
extern const arm_2d_tile_t c_tileCMSISLogoMask;
extern const arm_2d_tile_t c_tileCMSISLogoA2Mask;
extern const arm_2d_tile_t c_tileCMSISLogoA4Mask;

static
IMPL_PFB_ON_DRAW(__pfb_draw_scene0_handler)
{
    user_scene_0_t *ptThis = (user_scene_0_t *)pTarget;
    ARM_2D_UNUSED(ptTile);
    ARM_2D_UNUSED(bIsNewFrame);

    arm_2d_canvas(ptTile, __top_container) {
    /*-----------------------draw the foreground begin-----------------------*/

        arm_2d_fill_colour(ptTile, NULL, GLCD_COLOR_WHITE);
        /* draw the cmsis logo using mask in the centre of the screen */
        arm_2d_align_centre(__top_container, c_tileCMSISLogo.tRegion.tSize) {
            arm_2d_fill_colour_with_a4_mask_and_opacity(
                ptTile,
                &__centre_region,
                &c_tileCMSISLogoA4Mask,
                (__arm_2d_color_t){GLCD_COLOR_BLACK},
                64);
        }

    /*-----------------------draw the foreground end  -----------------------*/
    }
    arm_2d_op_wait_async(NULL);

    return arm_fsm_rt_cpl;
}
值得强调的是A2蒙版虽然尺寸是A8蒙版的四分之一,但它很可能会带来用户肉眼可见的马赛克感,因此在存储空间允许的情况下,并不特别推荐——请大家酌情使用。
【说在后面的话】
透明蒙版是现代界面设计中的基本手段和要素,考虑到它每个像素只占用一个字节的特性,保存图形(或图标)的蒙版而不是携带了完整颜色信息的RGB图片在资源紧张的嵌入式系统中就成为一个非常划算的技巧。
然而,即便只保存蒙版,一个100 * 100大小的蒙版仍然会占用10K的ROM资源,这在很多时候也是不可容忍的。下一章,我们将以界面设计中更为常用的圆角矩形为例,向大家介绍一鱼多吃的实用界面实现技巧。敬请期待。