react-dnd 从入门到手写低代码编辑器

拖拽是常见的需求,在 react 里我们会用 react-dnd 来做。
不管是简单的拖拽,比如拖拽排序,或者复杂的拖拽,比如低代码编辑器,react-dnd 都可以搞定。
这篇文章我们就来用 react-dnd 来实现一下这些功能吧。
我们这篇文章会实现 3 个案例:
入门案例:

拖拽排序:
低代码编辑器:
我们先入个门:
npx create-react-app --template=typescript react-dnd-test
新建个 react 项目
安装 react-dnd 相关的包:
npm install react-dnd react-dnd-html5-backend
然后改一下 App.tsx
import './App.css';

function Box() {
  return <div className='box'></div>
}

function Container() {
  return <div className="container"></div>
}

function App() {
  return <div>
    <Container></Container>
    <Box></Box>
  </div>
}

export default App;
css 部分如下:
.box {
  width: 50px;
  height: 50px;
  background: blue;
  margin: 10px;
}

.container {
  width: 300px;
  height: 300px;
  border: 1px solid #000;
}
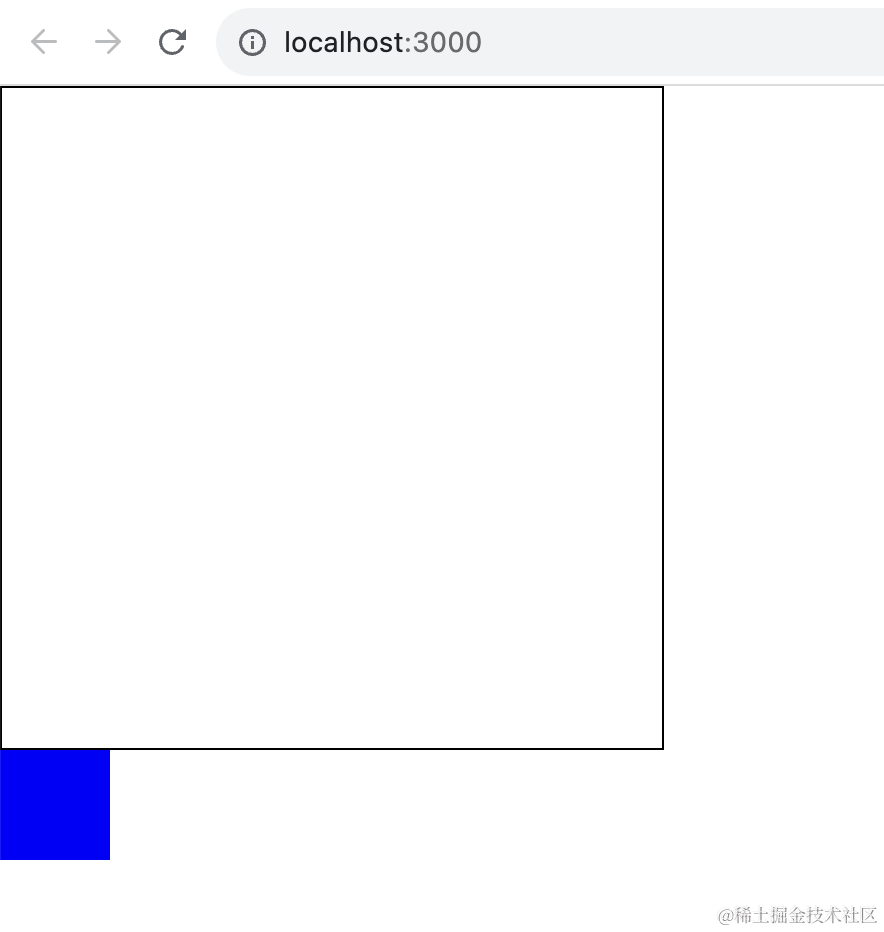
把它跑起来:
npm run start
是这样的:
现在我们想把 box 拖拽到 container 里,用 react-dnd 怎么做呢?
dnd 是 drag and drop 的意思,api 也分有两个 useDrag 和 useDrop。
box 部分用 useDrag 让元素可以拖拽:
function Box() {
  const ref = useRef(null);

  const [, drag]= useDrag({
    type: 'box',
    item: {
      color: 'blue'
    }
  });

  drag(ref);

  return <div ref={ref} className='box'></div>
}
用 useRef 保存 dom 引用,然后用 useDrag 返回的第二个参数处理它。
至于 type 和 item,后面再讲。
然后是 Container:
function Container() {
  const ref = useRef(null);

  const [,drop] = useDrop(() => {
    return {
      accept: 'box',
      drop(item) {
        console.log(item);
      }
    }
  });
  drop(ref);

  return <div ref={ref} className="container"></div>
}
用 useDrop 让它可以接受拖拽过来的元素。
接收什么元素呢?
就是我们 useDrag 的时候声明的 type 的元素。

在 drop 的时候会触发 drop 回调函数,第一个参数是 item,就是 drag 的元素声明的那个。
只是这样还不行,还要在根组件加上 Context:
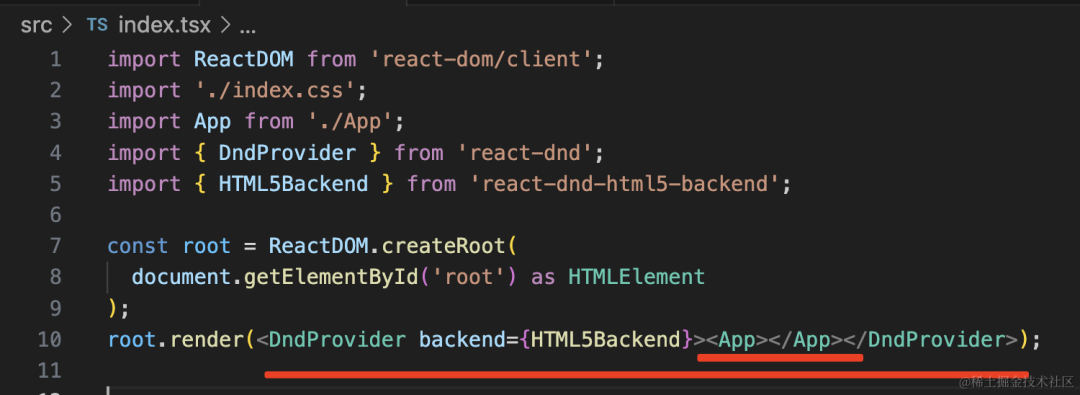
import ReactDOM from 'react-dom/client';
import './index.css';
import App from './App';
import { DndProvider } from 'react-dnd';
import { HTML5Backend } from 'react-dnd-html5-backend';

const root = ReactDOM.createRoot(
  document.getElementById('root') as HTMLElement
);
root.render(<DndProvider backend={HTML5Backend}><App></App></DndProvider>);
之前是直接渲染 App,现在要在外面加上 DndProvider。
这个就是设置 dnd 的 context的,用于在不同组件之间共享数据。
然后我们试试看:

确实,现在元素能 drag 了,并且拖到目标元素也能触发 drop 事件,传入 item 数据。
那如果 type 不一样呢?
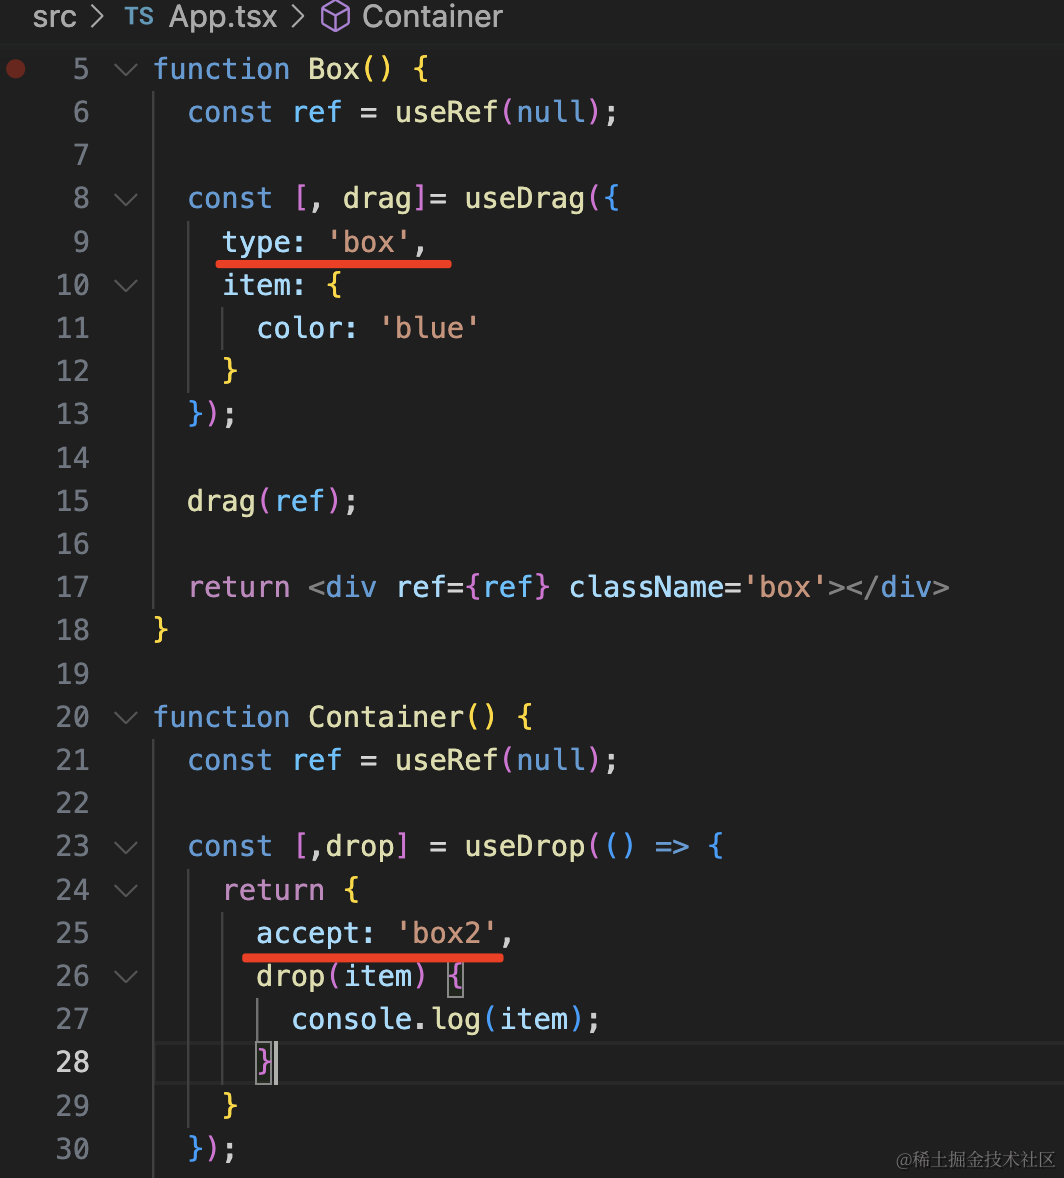
那就触发不了 drop 了。
然后我们给 Box 组件添加一个 color 的 props,用来设置背景颜色:
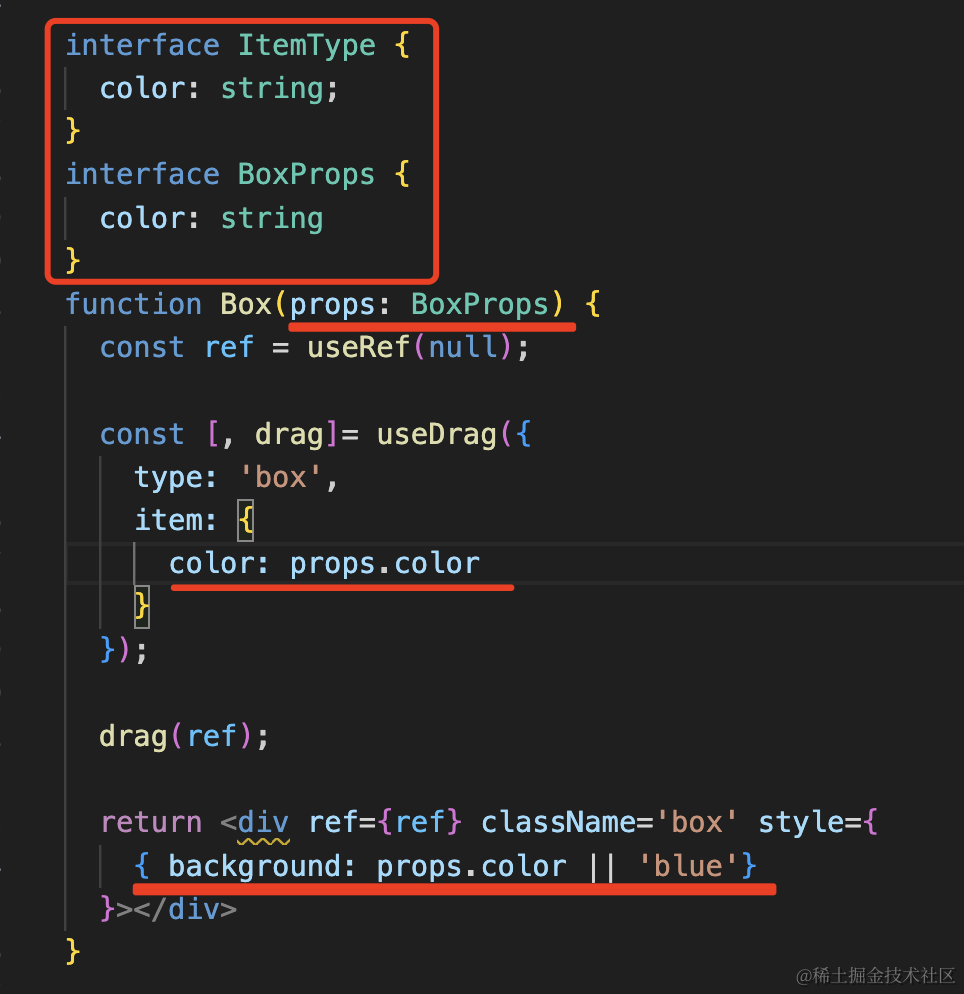
并且给 item 的数据加上类型。
interface ItemType {
  color: string;
}
interface BoxProps {
  color: string
}
function Box(props: BoxProps) {
  const ref = useRef(null);

  const [, drag]= useDrag({
    type: 'box',
    item: {
      color: props.color
    }
  });

  drag(ref);

  return <div ref={ref} className='box' style={
    { background: props.color || 'blue'}
  }></div>
}
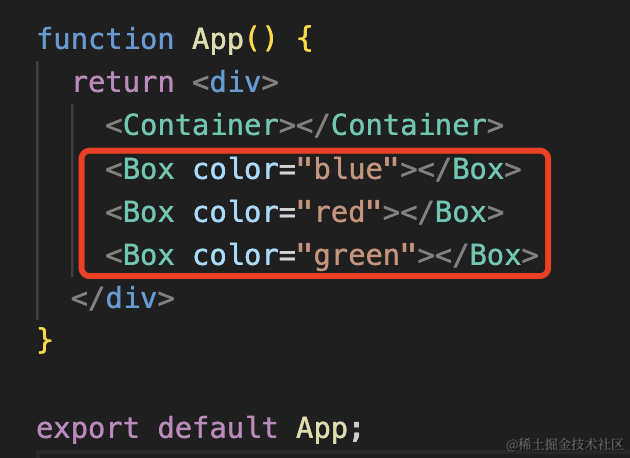
添加几个 Box 组件试一下:
没啥问题。
然后我们改下 Container 组件,增加一个 boxes 数组的 state,在 drop 的时候把 item 加到数组里,并触发渲染:
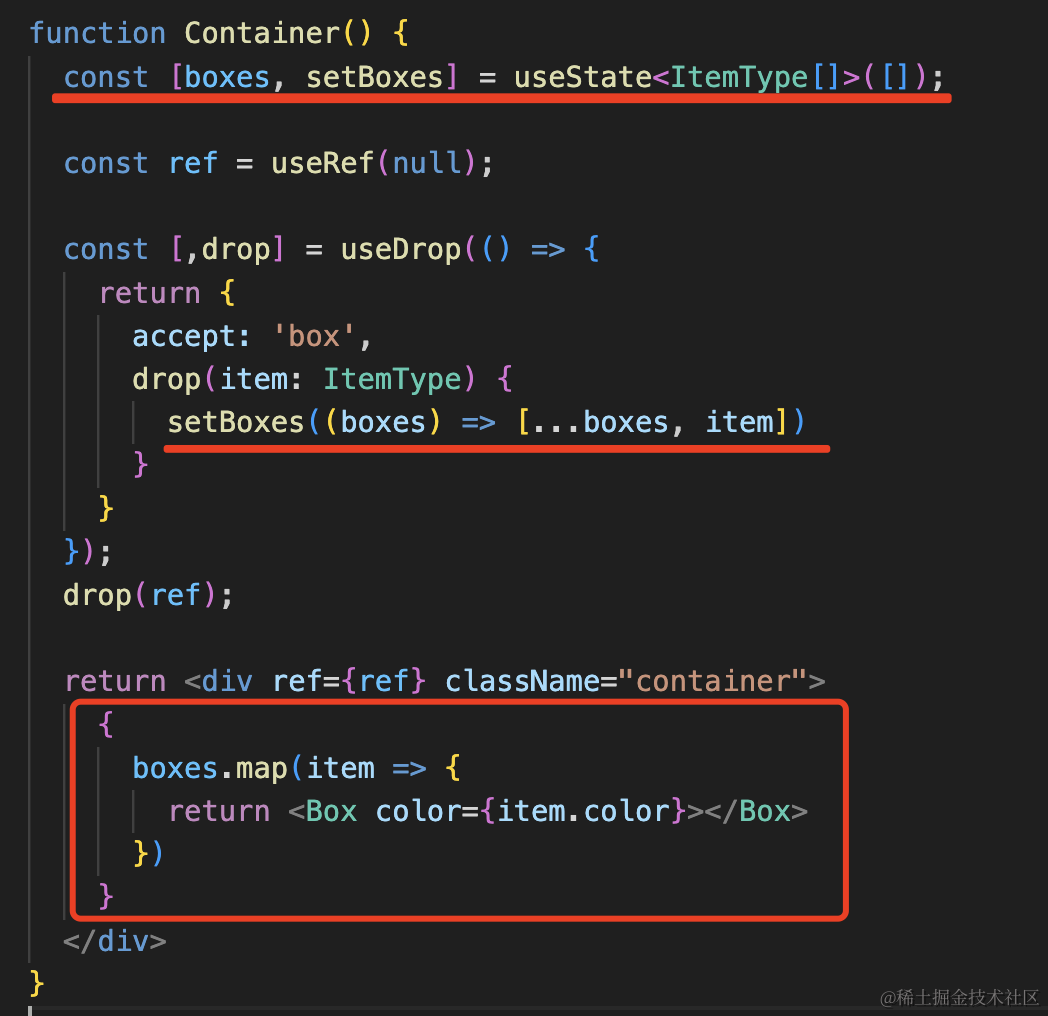
function Container() {
  const [boxes, setBoxes] = useState<ItemType[]>([]);

  const ref = useRef(null);

  const [,drop] = useDrop(() => {
    return {
      accept: 'box',
      drop(item: ItemType) {
        setBoxes((boxes) => [...boxes, item])
      }
    }
  });
  drop(ref);

  return <div ref={ref} className="container">
    {
      boxes.map(item => {
        return <Box color={item.color}></Box>
      })
    }
  </div>
}
这里 setBoxes 用了函数的形式,这样能拿到最新的 boxes 数组,不然会形成闭包,始终引用最初的空数组。
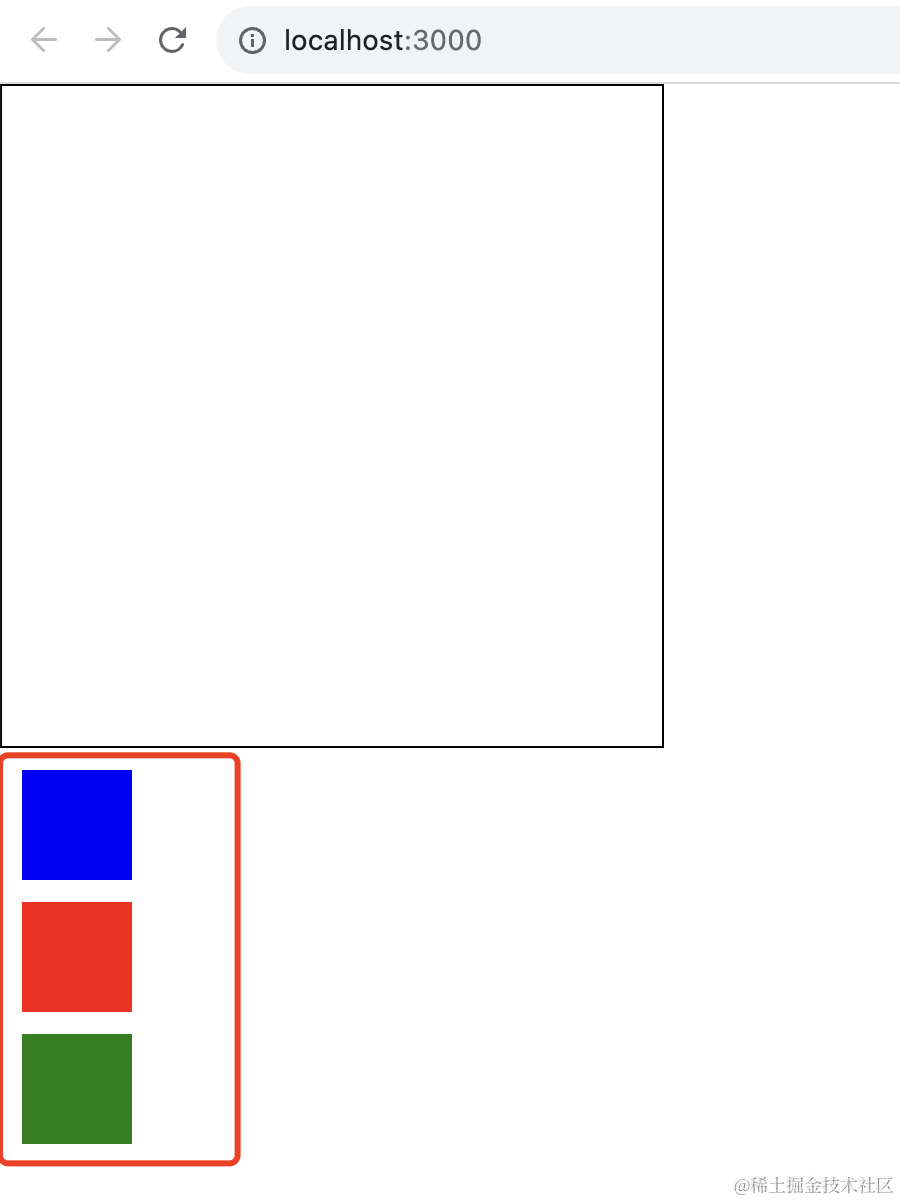
测试下:
这样,拖拽到容器里的功能就实现了。
我们再加上一些拖拽过程中的效果:
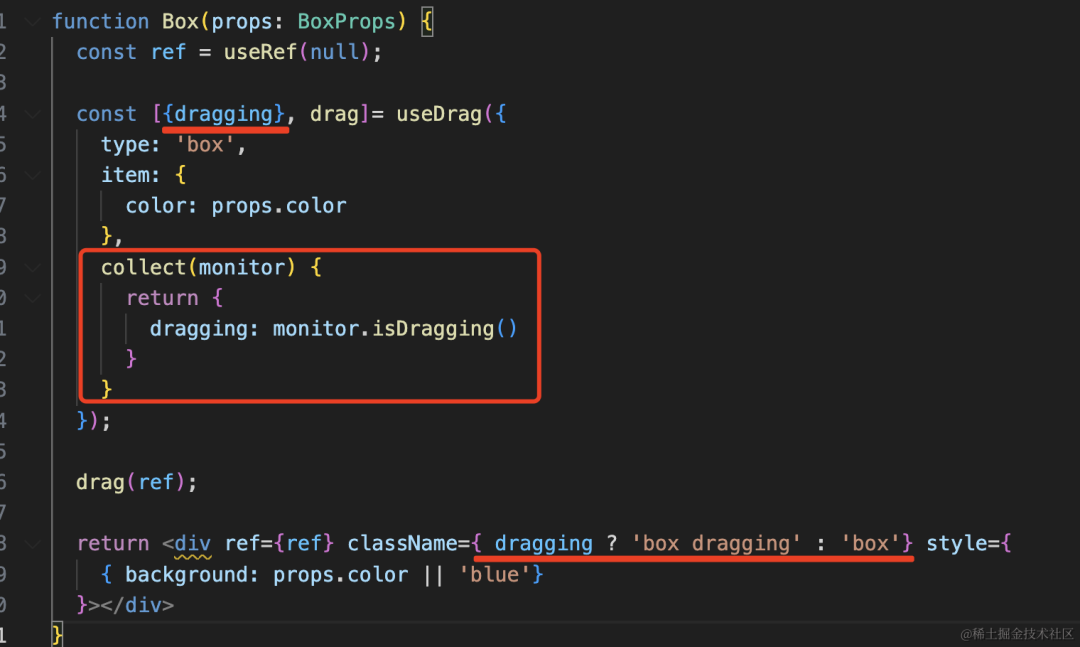
useDrag 可以传一个 collect 的回调函数,它的参数是 monitor,可以拿到拖拽过程中的状态。
collect 的返回值会作为 useDrag 的返回的第一个值。
我们判断下,如果是在 dragging 就设置一个 dragging 的 className。
function Box(props: BoxProps) {
  const ref = useRef(null);

  const [{dragging}, drag]= useDrag({
    type: 'box',
    item: {
      color: props.color
    },
    collect(monitor) {
      return {
        dragging: monitor.isDragging()
      }
    }
  });

  drag(ref);

  return <div ref={ref} className={ dragging ? 'box dragging' : 'box'} style={
    { background: props.color || 'blue'}
  }></div>
}
然后添加 dragging 的样式:
.dragging {
  border: 5px dashed #000;
  box-sizing: border-box;
}
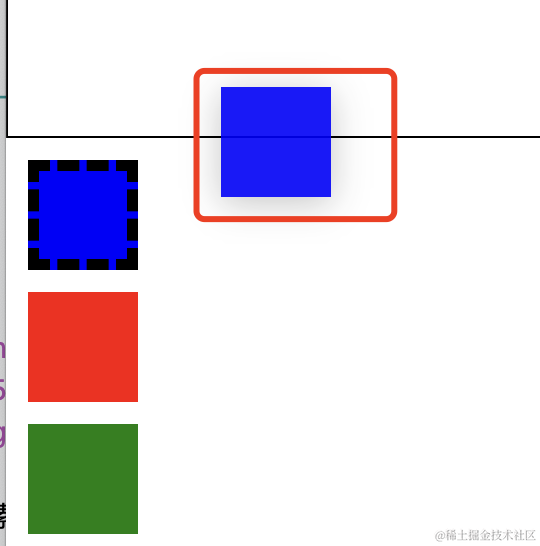
测试下:
确实,这样就给拖拽中的元素加上了对应的样式。
但如果我们想把这个预览的样式也给改了呢?
这时候就要新建个组件了:
const DragLayer = () => {
  const { isDragging, item, currentOffset} = useDragLayer((monitor) => ({
      item: monitor.getItem(),
      isDragging: monitor.isDragging(),
      currentOffset: monitor.getSourceClientOffset(),
    }));

    if (!isDragging) {
      return null;
    }
    return (
      <div className='drag-layer' style={{
        left: currentOffset?.x,
        top: currentOffset?.y
      }}>{item.color} 拖拖拖</div>
    );
}
useDragLayer 的参数是函数,能拿到 monitor,从中取出很多东西,比如 item、isDragging,还是有 clientOffset,也就是拖拽过程中的坐标。
其中 drag-layer 的样式如下:
.drag-layer {
  position: fixed;
}
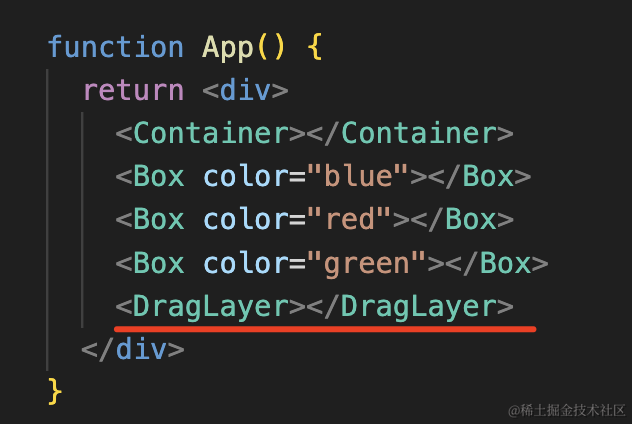
引入下这个组件:
现在的效果是这样的:
确实加上了自定义的预览样式,但是原来的还保留着。
可以这样去掉:
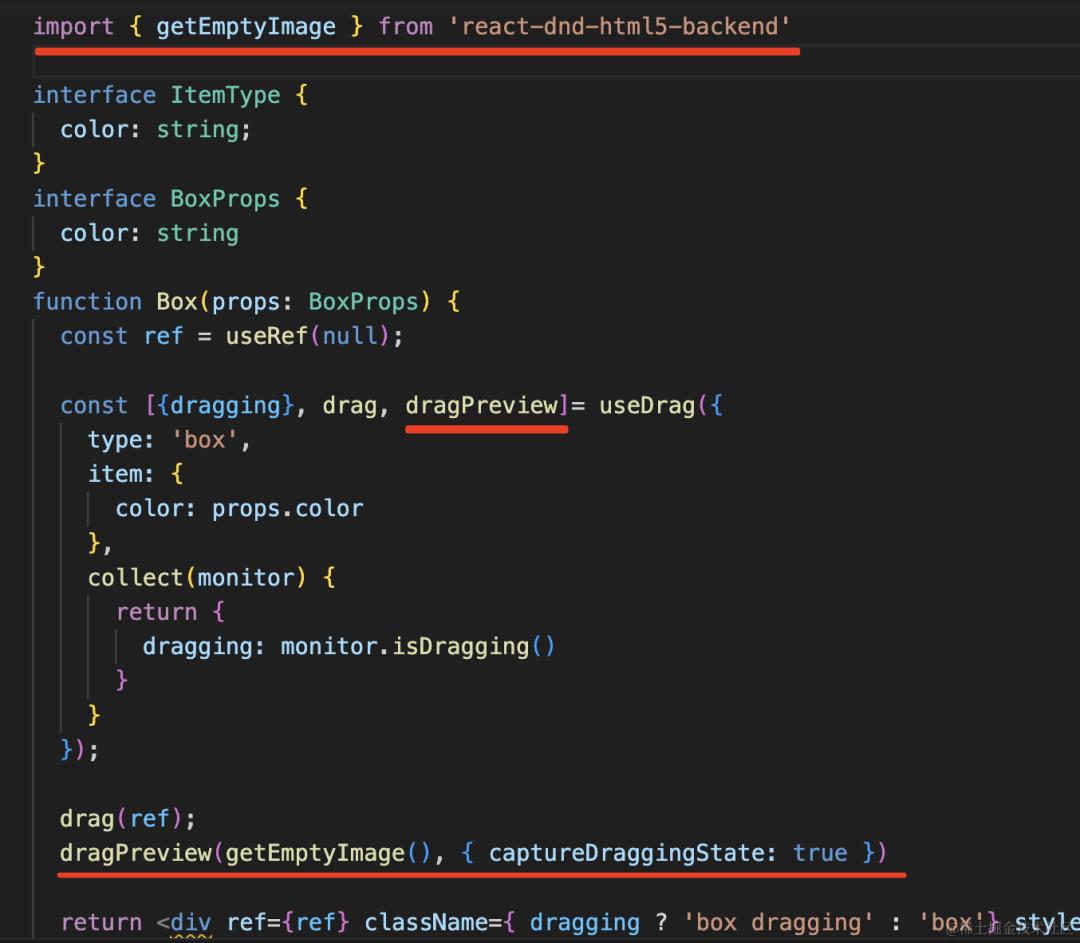
useDrag 的第三个参数就是处理预览元素的,我们用 getEmptyImage 替换它,这样就看不到了。
但是依然要捕获 dragging 状态。
也就是这样:
dragPreview(getEmptyImage(), { captureDraggingState: true })
这样就只有我们自定义的预览样式了:
但其实这种逻辑只要执行一次就行了,我们优化一下:
useEffect(() => {
    drag(ref);
    dragPreview(getEmptyImage(), { captureDraggingState: true });
}, [])
drop 的逻辑也同样:
useEffect(()=> {
    drop(ref);
}, []);
这样,我们就学会了 react-dnd 的基本使用。
总结下:
- 使用 useDrag 处理拖拽的元素,使用 useDrop 处理 drop 的元素,使用 useDragLayer 处理自定义预览元素
- 在根组件使用 DndProvider 设置 context 来传递数据
- useDrag 可以传入 type、item、collect 等。type 标识类型,同类型才可以 drop。item 是传递的数据。collect 接收 monitor,可以取拖拽的状态比如 isDragging 返回。
- useDrag 返回三个值,第一个值是 collect 函数返回值,第二个是处理 drag 的元素的函数,第三个值是处理预览元素的函数
- useDrop 可以传入 accept、drop 等。accept 是可以 drop 的类型。drop 回调函数可以拿到 item,也就是 drag 元素的数据
- useDragLayer 的回调函数会传入 monitor,可以拿到拖拽的实时坐标,用来设置自定义预览效果
全部代码如下:
import { useDrag, useDragLayer, useDrop } from 'react-dnd';
import './App.css';
import { useEffect, useRef, useState } from 'react';
import { getEmptyImage } from 'react-dnd-html5-backend'

interface ItemType {
  color: string;
}
interface BoxProps {
  color: string
}
function Box(props: BoxProps) {
  const ref = useRef(null);

  const [{dragging}, drag, dragPreview]= useDrag({
    type: 'box',
    item: {
      color: props.color
    },
    collect(monitor) {
      return {
        dragging: monitor.isDragging()
      }
    }
  });

  useEffect(() => {
    drag(ref);
    dragPreview(getEmptyImage(), { captureDraggingState: true });
  }, [])

  return <div ref={ref} className={ dragging ? 'box dragging' : 'box'} style={
    { background: props.color || 'blue'}
  }></div>
}

function Container() {
  const [boxes, setBoxes] = useState<ItemType[]>([]);

  const ref = useRef(null);

  const [,drop] = useDrop(() => {
    return {
      accept: 'box',
      drop(item: ItemType) {
        setBoxes((boxes) => [...boxes, item])
      }
    }
  });

  useEffect(()=> {
    drop(ref);
  }, []);

  return <div ref={ref} className="container">
    {
      boxes.map(item => {
        return <Box color={item.color}></Box>
      })
    }
  </div>
}


const DragLayer = () => {
  const { isDragging, item, currentOffset} = useDragLayer((monitor) => ({
      item: monitor.getItem(),
      isDragging: monitor.isDragging(),
      currentOffset: monitor.getSourceClientOffset(),
    }));

    if (!isDragging) {
      return null;
    }
    return (
      <div className='drag-layer' style={{
        left: currentOffset?.x,
        top: currentOffset?.y
      }}>{item.color}拖拖拖</div>
    );
}

function App() {
  return <div>
    <Container></Container>
    <Box color="blue"></Box>
    <Box color="red"></Box>
    <Box color="green"></Box>
    <DragLayer></DragLayer>
  </div>
}

export default App;
css:
.box {
  width: 50px;
  height: 50px;
  background: blue;
  margin: 10px;
}

.dragging {
  border: 5px dashed #000;
  box-sizing: border-box;
}
.drag-layer {
  position: fixed;
}

.container {
  width: 300px;
  height: 300px;
  border: 1px solid #000;
}
入了门之后,我们再来做个进阶案例:拖拽排序
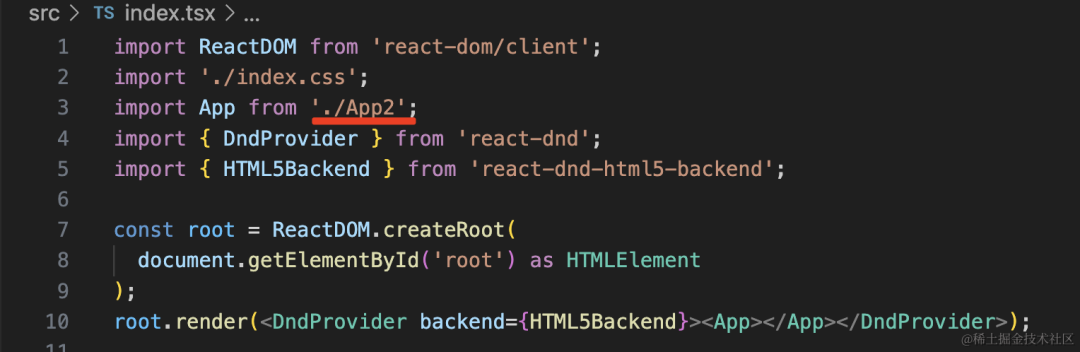
我们写个 App2.tsx
import { useState } from "react";
import './App2.css';

interface CardItem {
    id: number;
    content: string;
}

interface CardProps {
    data: CardItem
}
function Card(props: CardProps) {
    const { data } = props;
    return <div className="card">{data.content}</div>
}
function App() {
    const [cardList, setCardList] = useState<CardItem[]>([
        {
            id:0,
            content: '000',
        },
        {
            id:1,
            content: '111',
        },
        {
            id:2,
            content: '222',
        },
        {
            id:3,
            content: '333',
        },
        {
            id:4,
            content: '444',
        }
    ]);

    return <div className="card-list">
        {
            cardList.map((item: CardItem) => (
                <Card data={item} key={'card_' + item.id} />
            ))
        }
    </div>
}

export default App;
还有 App2.css:
.card {
  width: 200px;
  line-height: 60px;
  padding: 0 20px;
  border: 1px solid #000;
  margin: 10px;
  cursor: move;
}
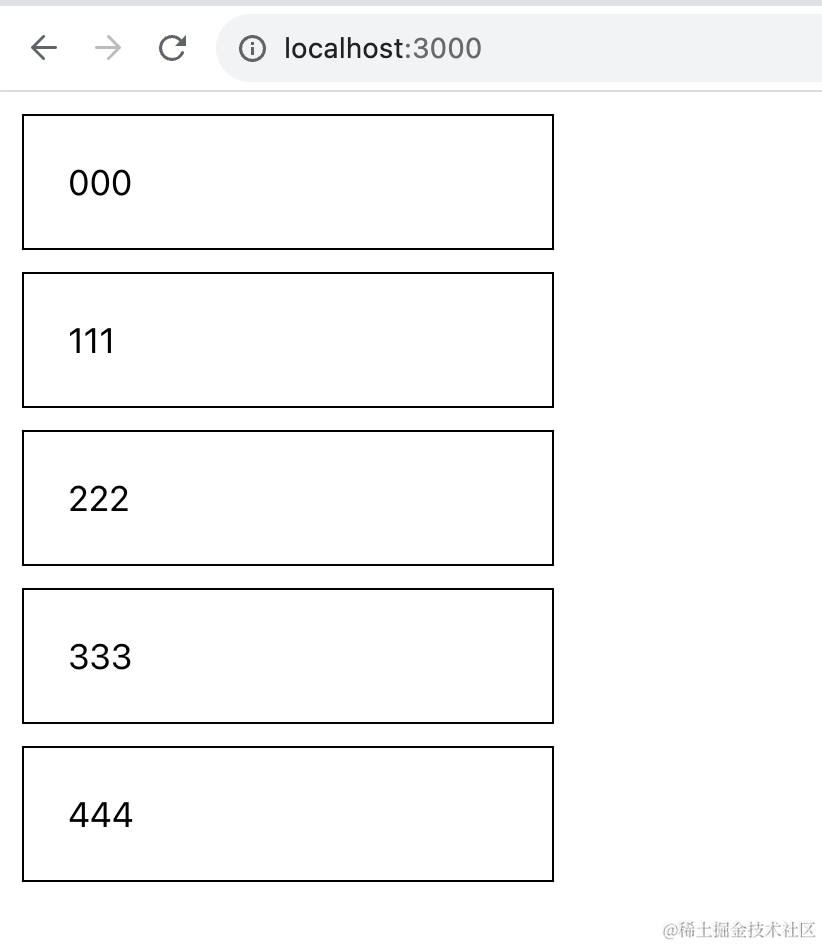
就是根据 cardList 的数据渲染一个列表。
把它渲染出来是这样的:
拖拽排序,显然 drag 和 drop 的都是 Card。
我们给它加上 useDrag 和 useDrop:
function Card(props: CardProps) {
    const { data } = props;

    const ref = useRef(null);

    const [, drag] = useDrag({
        type: 'card',
        item: props.data
    });
    const [, drop] = useDrop({
        accept: 'card',
        drop(item) {
            console.log(item);
        }
    });

    useEffect(() => {
        drag(ref);
        drop(ref);
    }, []);

    return <div ref={ref} className="card">{data.content}</div>
}
接下来做的很显然就是交换位置了。
我们实现一个交换位置的方法,传入 Card 组件,并且把当前的 index 也传入:
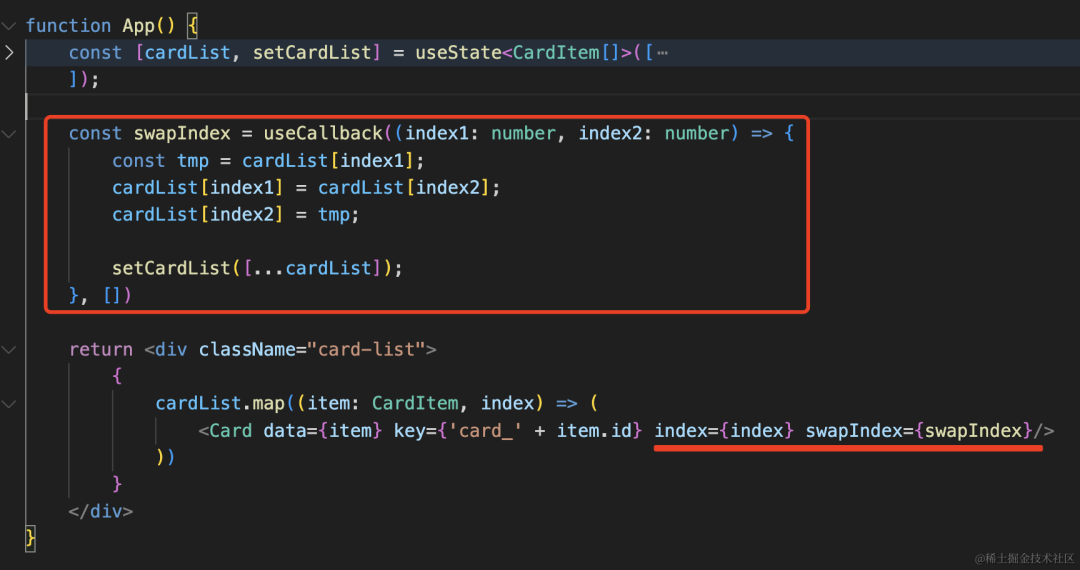
const swapIndex = useCallback((index1: number, index2: number) => {
    const tmp = cardList[index1];
    cardList[index1] = cardList[index2];
    cardList[index2] = tmp;
    setCardList([...cardList]);
}, [])
这里 setState 时需要创建一个新的数组,才能触发渲染。
然后在 Card 组件里调用下:
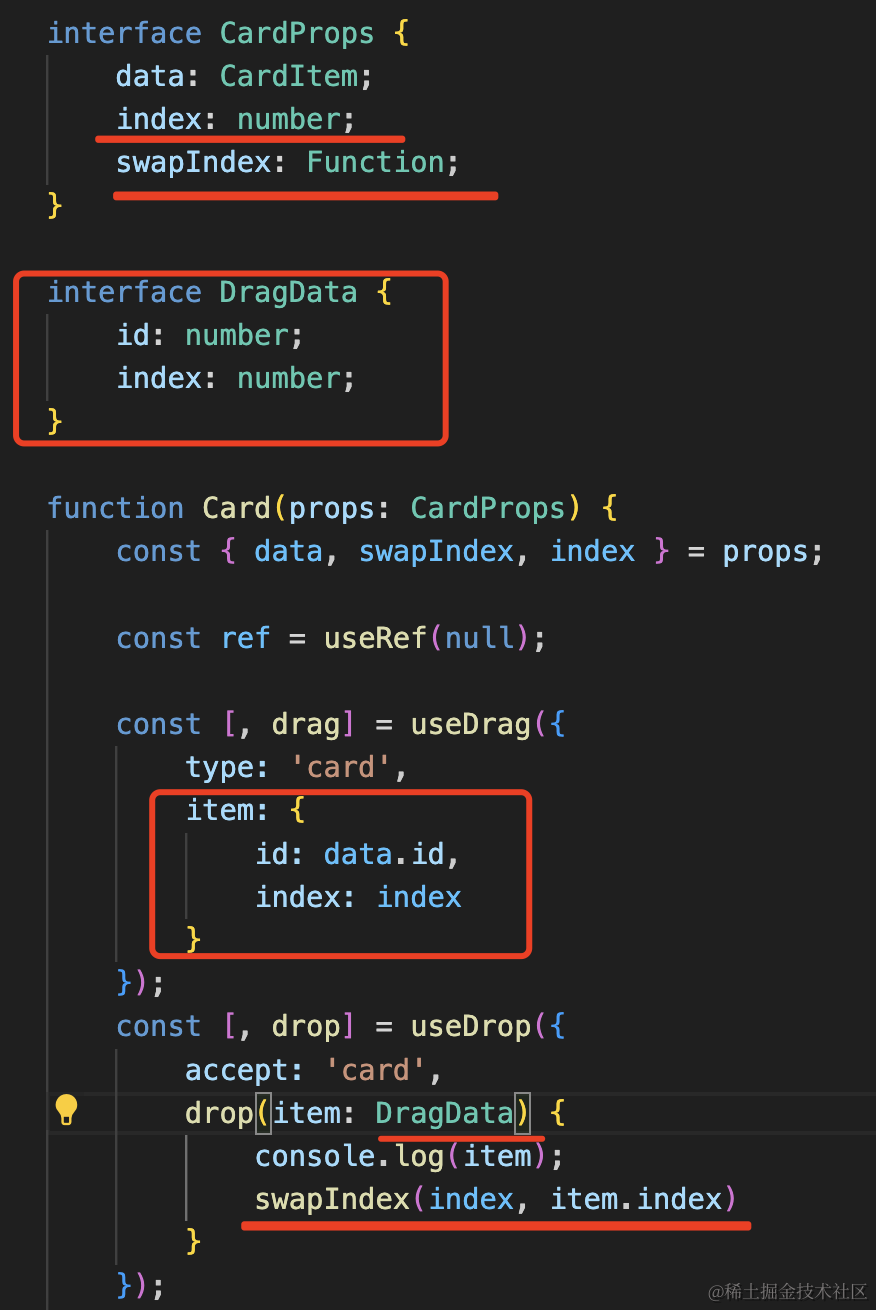
增加 index 和 swapIndex 两个参数,声明 drag 传递的 item 数据的类型
在 drop 的时候互换 item.index 和当前 drop 的 index 的 Card
interface CardProps {
    data: CardItem;
    index: number;
    swapIndex: Function;
}

interface DragData {
    id: number;
    index: number;
}

function Card(props: CardProps) {
    const { data, swapIndex, index } = props;

    const ref = useRef(null);

    const [, drag] = useDrag({
        type: 'card',
        item: {
            id: data.id,
            index: index
        }
    });
    const [, drop] = useDrop({
        accept: 'card',
        drop(item: DragData) {
            swapIndex(index, item.index)
        }
    });

    useEffect(() => {
        drag(ref);
        drop(ref);
    }, []);

    return <div ref={ref} className="card">{data.content}</div>
}
这样就实现了拖拽排序。
不过因为背景是透明的,看着不是很明显。
我们设置个背景色:
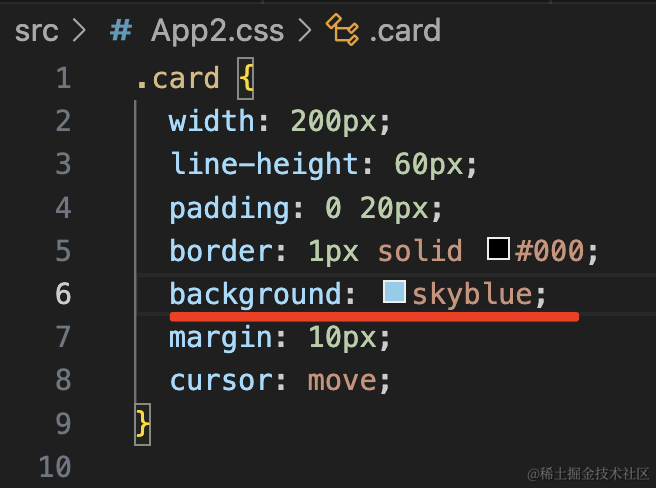
清晰多了。
但是现在是 drop 的时候才改变位置,如果希望在 hover 的时候就改变位置呢?
useDrop 有 hover 时的回调函数,我们把 drop 改成 hover就好了:
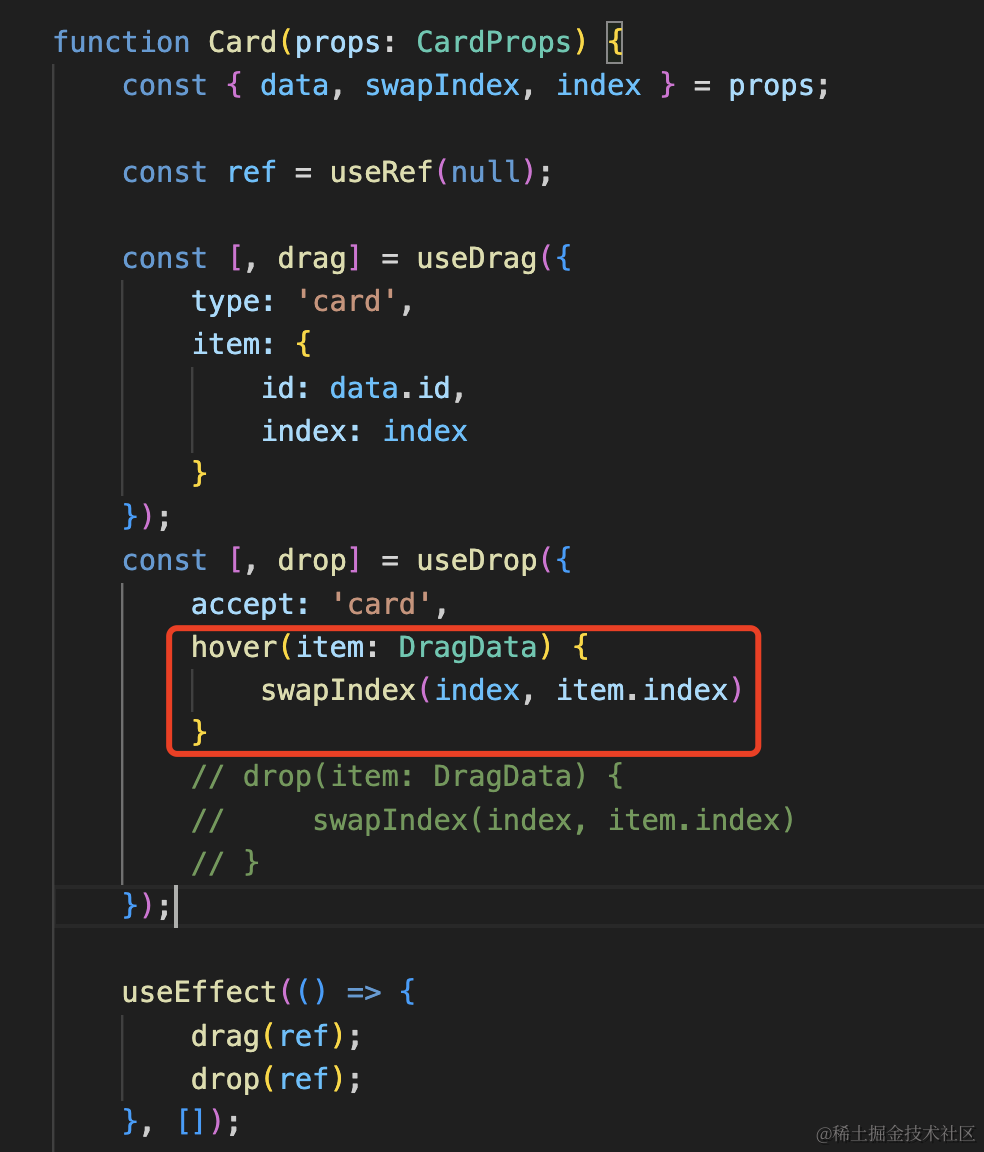
但现在你会发现它一直在换:
那是因为交换位置后,没有修改 item.index
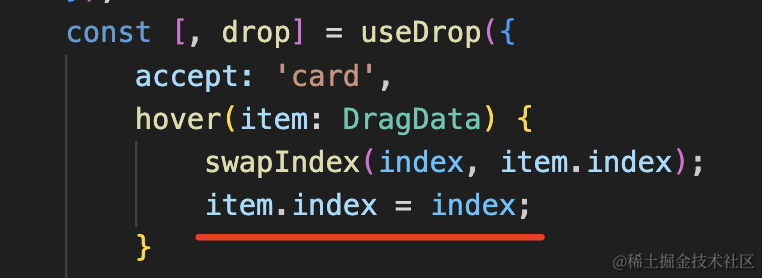
在 hover 时就改变顺序,体验好多了。
然后我们再处理下拖拽时的样式。
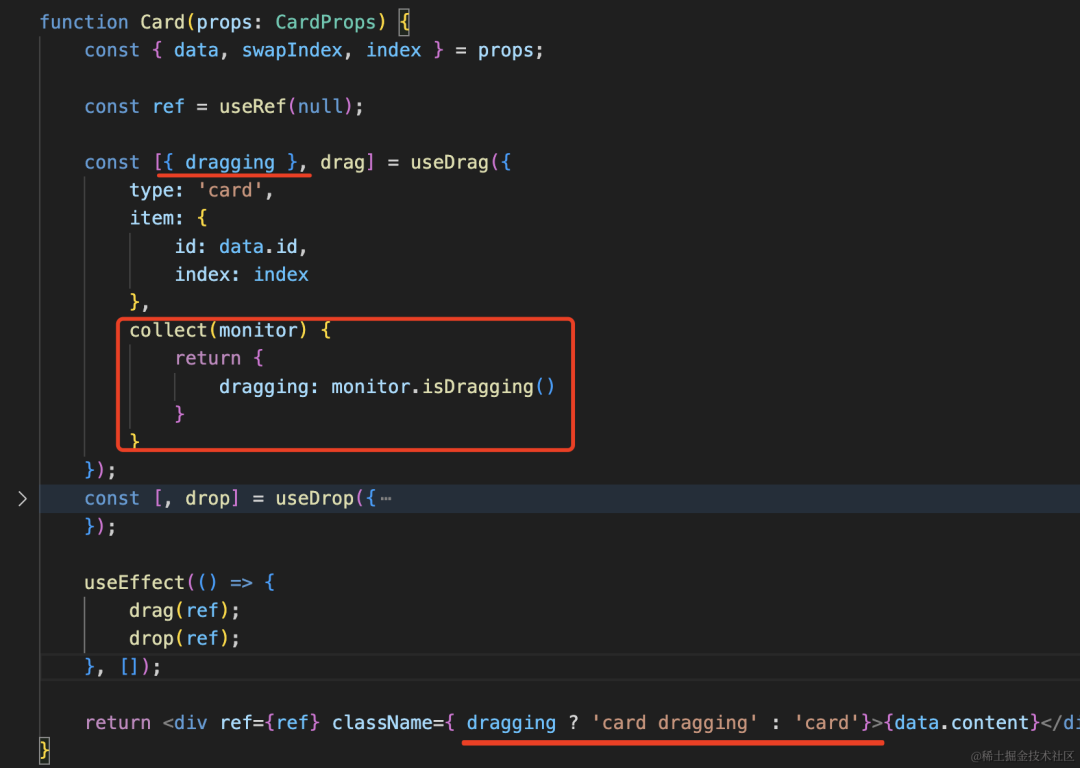
样式如下:
.dragging {
  border-style: dashed;
  background: #fff;
}
效果是这样的:
这样,拖拽排序就完成了。
我们对 react-dnd 的掌握又加深了一分。
这个案例的全部代码如下:
import { useCallback, useEffect, useRef, useState } from "react";
import './App2.css';
import { useDrag, useDrop } from "react-dnd";

interface CardItem {
    id: number;
    content: string;
}

interface CardProps {
    data: CardItem;
    index: number;
    swapIndex: Function;
}

interface DragData {
    id: number;
    index: number;
}

function Card(props: CardProps) {
    const { data, swapIndex, index } = props;

    const ref = useRef(null);

    const [{ dragging }, drag] = useDrag({
        type: 'card',
        item: {
            id: data.id,
            index: index
        },
        collect(monitor) {
            return {
                dragging: monitor.isDragging()
            }
        }
    });
    const [, drop] = useDrop({
        accept: 'card',
        hover(item: DragData) {
            swapIndex(index, item.index);
            item.index = index;
        }
        // drop(item: DragData) {
        //     swapIndex(index, item.index)
        // }
    });

    useEffect(() => {
        drag(ref);
        drop(ref);
    }, []);

    return <div ref={ref} className={ dragging ? 'card dragging' : 'card'}>{data.content}</div>
}

function App() {
    const [cardList, setCardList] = useState<CardItem[]>([
        {
            id:0,
            content: '000',
        },
        {
            id:1,
            content: '111',
        },
        {
            id:2,
            content: '222',
        },
        {
            id:3,
            content: '333',
        },
        {
            id:4,
            content: '444',
        }
    ]);

    const swapIndex = useCallback((index1: number, index2: number) => {
        const tmp = cardList[index1];
        cardList[index1] = cardList[index2];
        cardList[index2] = tmp;

        setCardList([...cardList]);
    }, [])

    return <div className="card-list">
        {
            cardList.map((item: CardItem, index) => (
                <Card data={item} key={'card_' + item.id} index={index} swapIndex={swapIndex}/>
            ))
        }
    </div>
}

export default App;
css:
.card {
  width: 200px;
  line-height: 60px;
  padding: 0 20px;
  border: 1px solid #000;
  background: skyblue;
  margin: 10px;
  cursor: move;
}

.dragging {
  border-style: dashed;
  background: #fff;
}
最后我们来实现个低代码的编辑器。
这种拖拽修改布局的功能,有实现思路么?
其实做完拖拽排序后你应该就有思路了。
这个不也是拖拽到可以 drop 的区域的时候,触发 hover 事件,然后改变数据触发重新渲染么?
只不过上面的案例是修改数组的元素顺序,而这个是修改一个树形 json 的元素顺序。
我们来写写看:
新建个 App3.tsx
import { useState } from "react";
import './App3.css';
const ROW = 'row';
const COLUMN = 'column';
const COMPONENT = 'component';
interface LayoutItem {
type: string;
id: string;
children?: LayoutItem[];
component?: {
type: string;
}
}
const initialLayout = [
{
type: ROW,
id: "row0",
children: [
{
type: COLUMN,
id: "column0",
children: [
{
type: COMPONENT,
id: "component0",
component: {
type: 'aaa'
}
},
{
type: COMPONENT,
id: "component1",
component: {
type: 'bbb'
}
}
]
},
{
type: COLUMN,
id: "column1",
children: [
{
type: COMPONENT,
id: "component2",
component: {
type: 'aaa'
}
}
]
}
]
},
{
type: ROW,
id: "row1",
children: [
{
type: COLUMN,
id: "column2",
children: [
{
type: COMPONENT,
id: "component3",
component: {
type: 'bbb'
}
},
{
type: COMPONENT,
id: "component0",
component: {
type: 'aaa'
}
},
{
type: COMPONENT,
id: "component2",
component: {
type: 'bbb'
}
}
]
}
]
}
];
interface ComponentProps {
data: LayoutItem
}
function Component(compProps: ComponentProps) {
const { component } = compProps.data;
return <div className="component">
{
component?.type
}
</div>
}
interface ColumnProps {
data: LayoutItem;
}
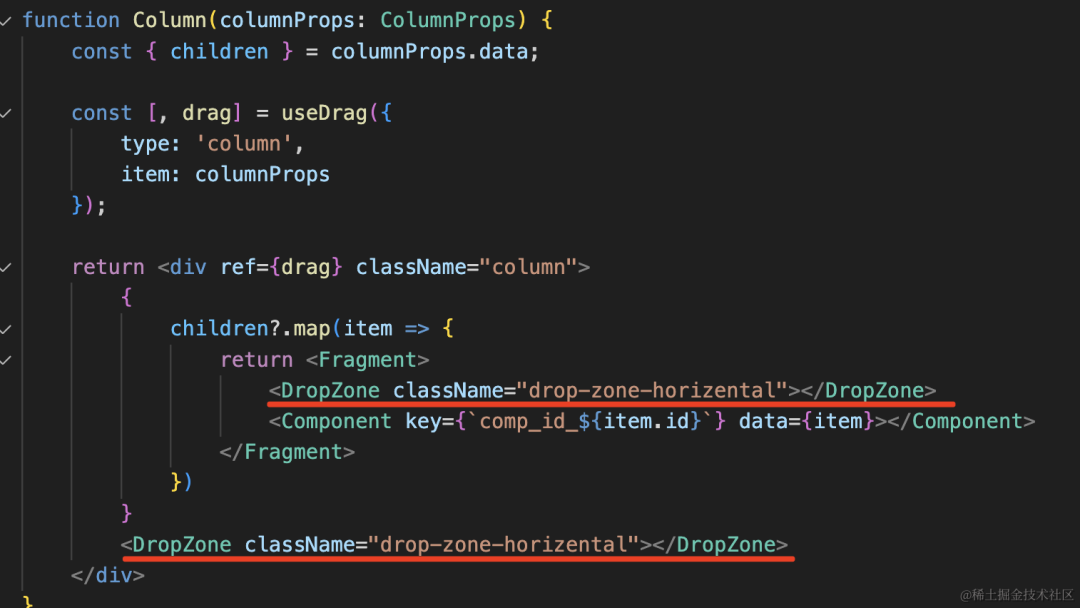
function Column(columnProps: ColumnProps) {
const { children } = columnProps.data;
return <div className="column">
{
children?.map(item => {
return <Component key={`comp_id_${item.id}`} data={item}></Component>
})
}
</div>
}
interface RowProps {
data: LayoutItem
}
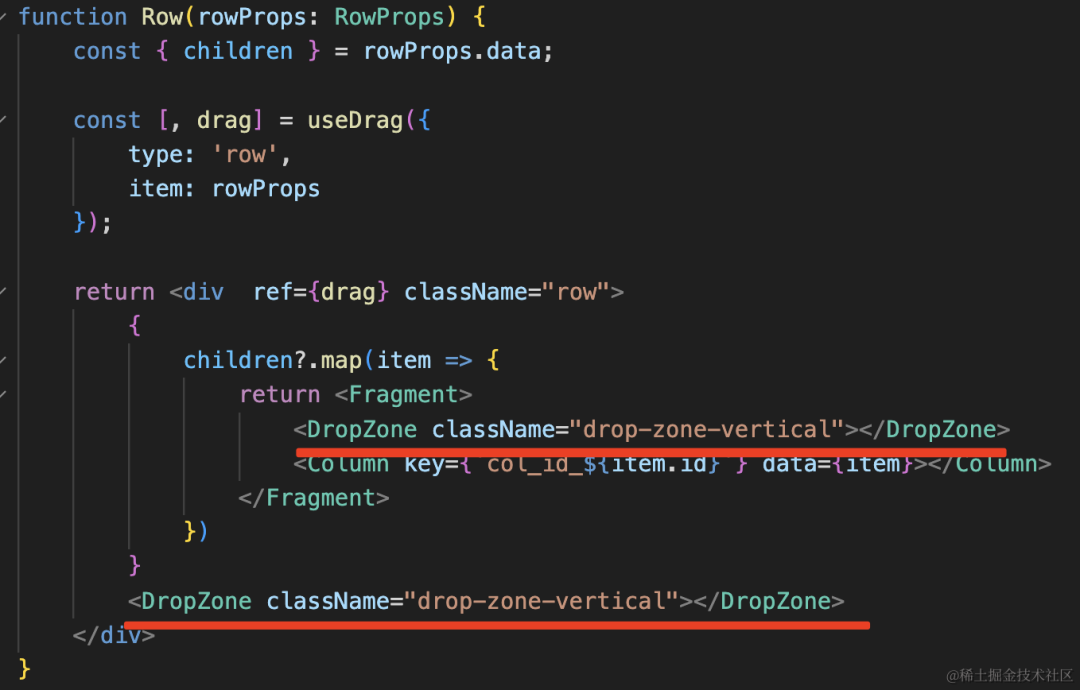
function Row(rowProps: RowProps) {
const { children } = rowProps.data;
return <div className="row">
{
children?.map(item => {
return <Column key={`col_id_${item.id}`} data={item}></Column>
})
}
</div>
}
function App() {
const [layout, setLayout] = useState<LayoutItem[]>(initialLayout);
return <div className="container">
{
layout.map(item => {
return <Row key={`row_id_${item.id}`} data={item}></Row>;
})
}
</div>
}
export default App;
比较容易看懂,就是 Row、Column、Component 的三层渲染。
css 如下:
.row {
    padding: 10px;
    border: 1px solid #000;
    display: flex;
}
.column{
    flex: 1;
    padding: 10px;
    border: 1px solid blue;
}
.column:not(:last-child) {
    margin-right: 10px;
}
.component {
    height: 60px;
    margin: 10px;
    border: 1px dashed #000;
}
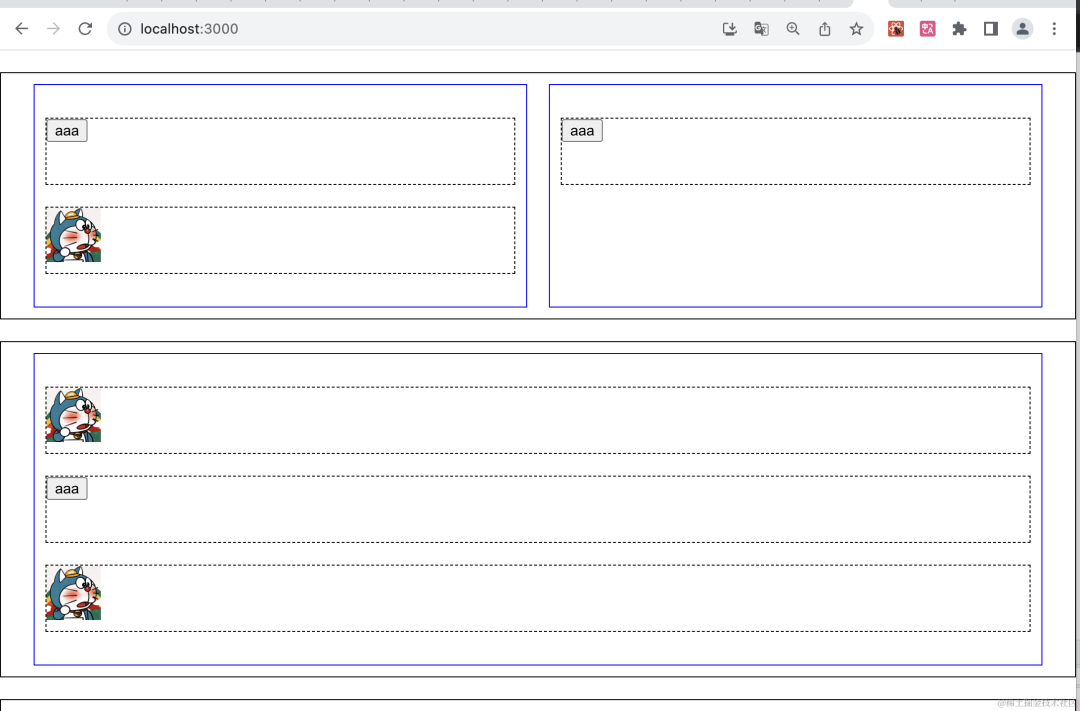
把它渲染出来:

是这样的:
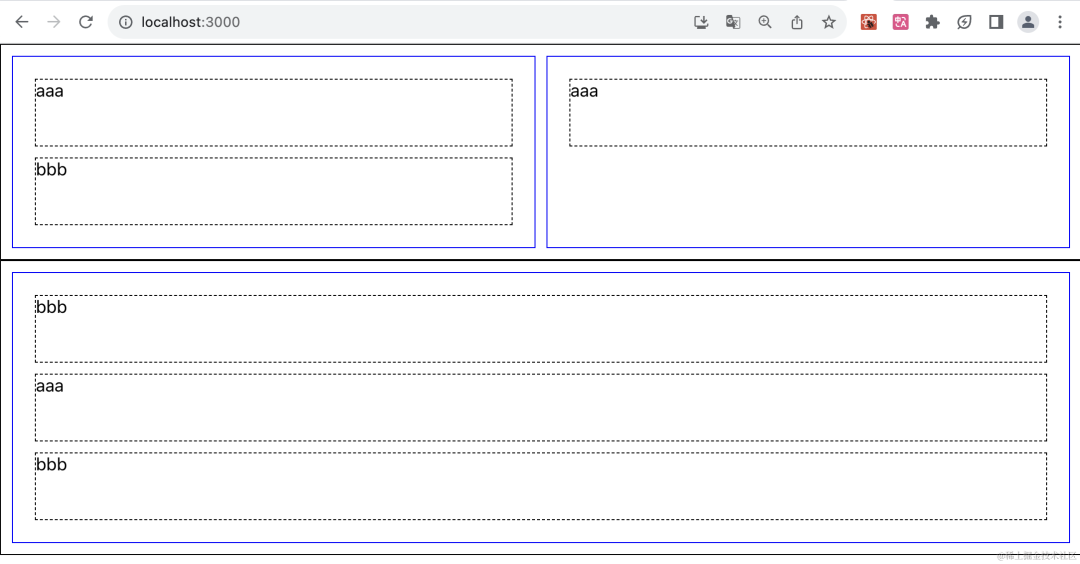
这里我们没有直接渲染对应的组件,只是显示了组件类型:
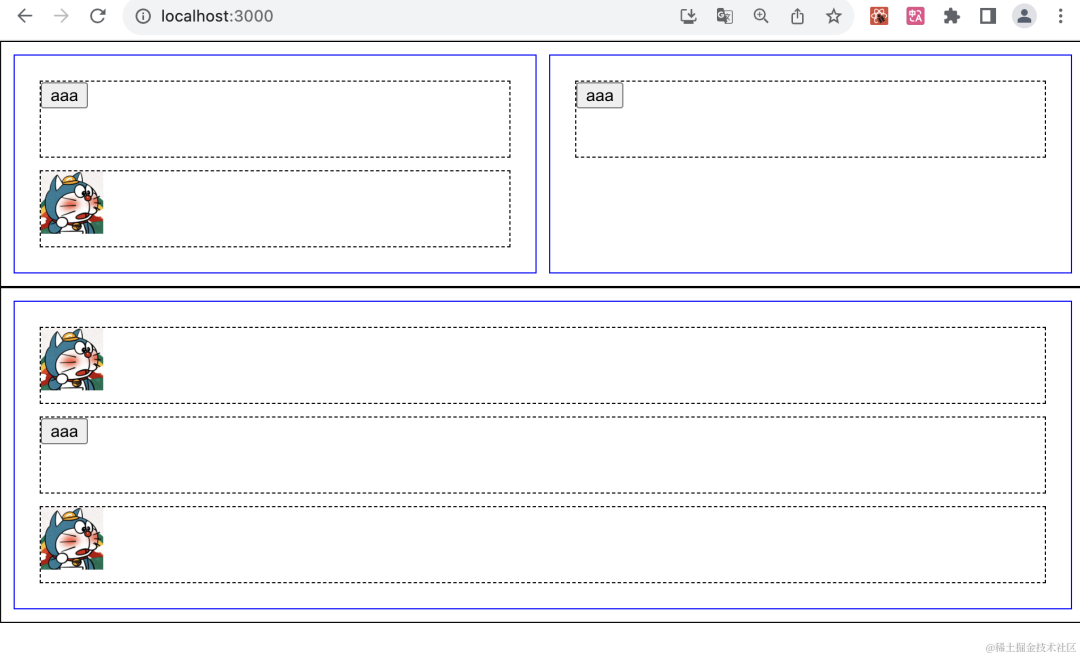
我们加几个组件:
function Aaa() {
    return <button>aaa</button>
}
function Bbb() {
    return <img alt="哆啦A梦" width="50" height="50" src="https://img0.baidu.com/it/u=3610760552,2286123102&fm=253&fmt=auto&app=138&f=JPEG?w=500&h=500"/>
}

function Ccc() {
    return <input type="range"></input>
}

const registeredComponent: Record<string, any> = {
    aaa: Aaa,
    bbb: Bbb,
    ccc: Ccc
}
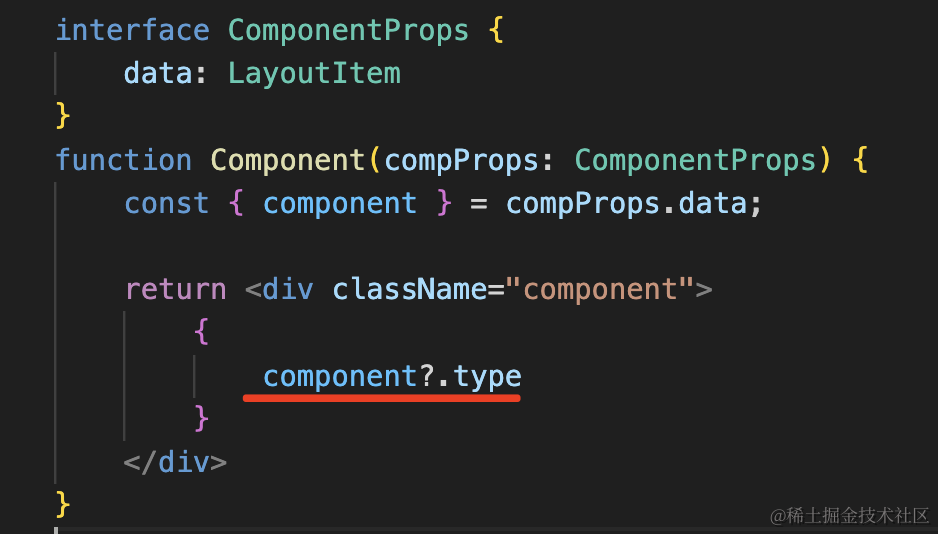
在 Component 里把它们渲染出来:
function Component(compProps: ComponentProps) {
    const { component } = compProps.data;

    const Comp = registeredComponent[component!.type];

    return <div className="component">
        {
            <Comp></Comp>
        }
    </div>
}
然后在编辑器下面添加个候选组件区:
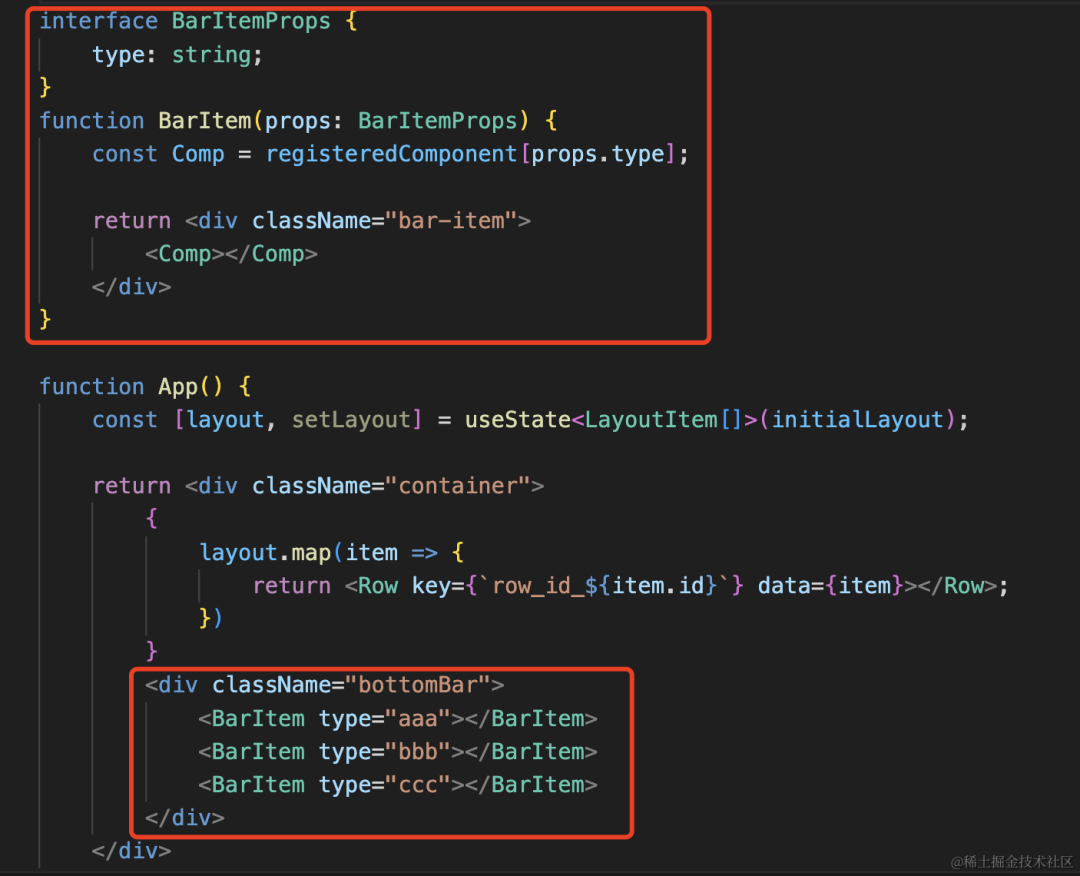
interface BarItemProps {
    type: string;
}
function BarItem(props: BarItemProps) {
    const Comp = registeredComponent[props.type];

    return <div className="bar-item">
        <Comp></Comp>
    </div>
}
<div className="bottomBar">
    <BarItem type="aaa"></BarItem>
    <BarItem type="bbb"></BarItem>
    <BarItem type="ccc"></BarItem>
</div>
写下样式:
.bottomBar {
    border: 1px solid #000;
    display: flex;
}
.bottomBar .bar-item {
    border: 1px solid blue;
    margin: 10px;
}
渲染出来是这样的:

布局写完之后,我们想一下:
什么元素可以 drag ,什么元素可以 drop 呢?
很明显,Row、Column、Component、SideBar 都可以 drag。
而可以 drop 的是空白的区域。
我们先分别给 Row、Column、Component、SideBar 加上 useDrag
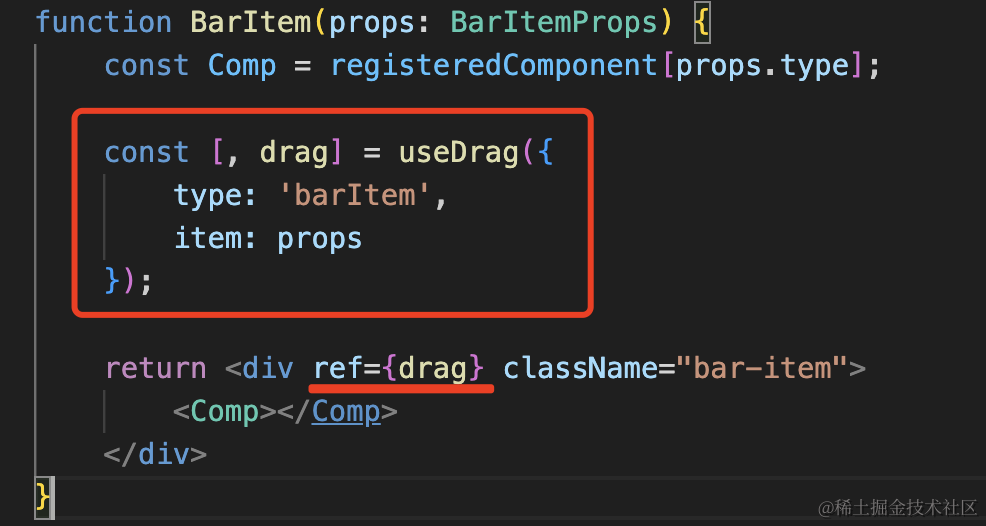
这里给元素添加拖拽,可以直接把 useDrag 返回的第二个值作为 ref 参数的值,这种写法比之前的方式更简便一些。
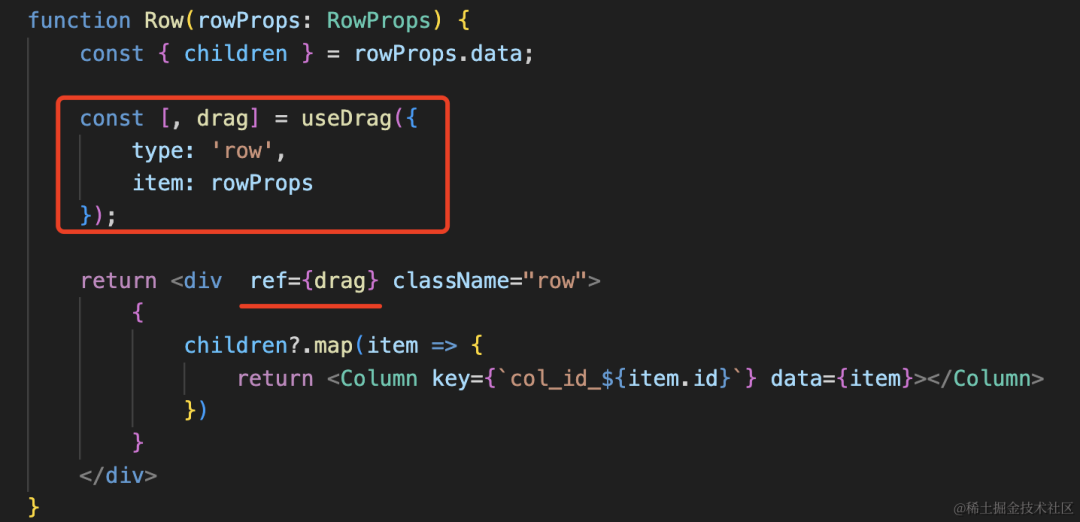
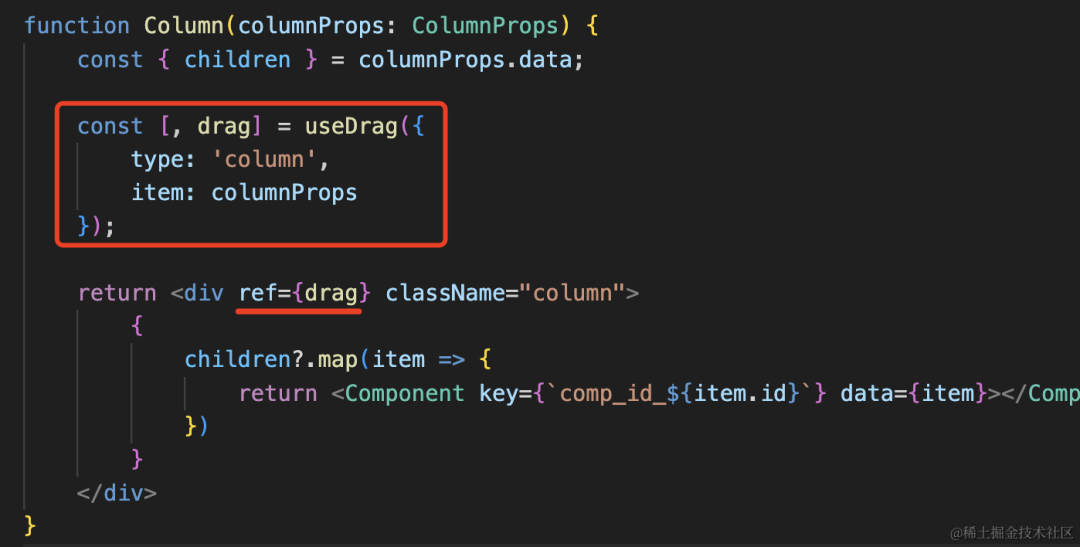

这样这些元素就都可以拖拽了:
不过现在看着不清晰,我们给加个白色背景:
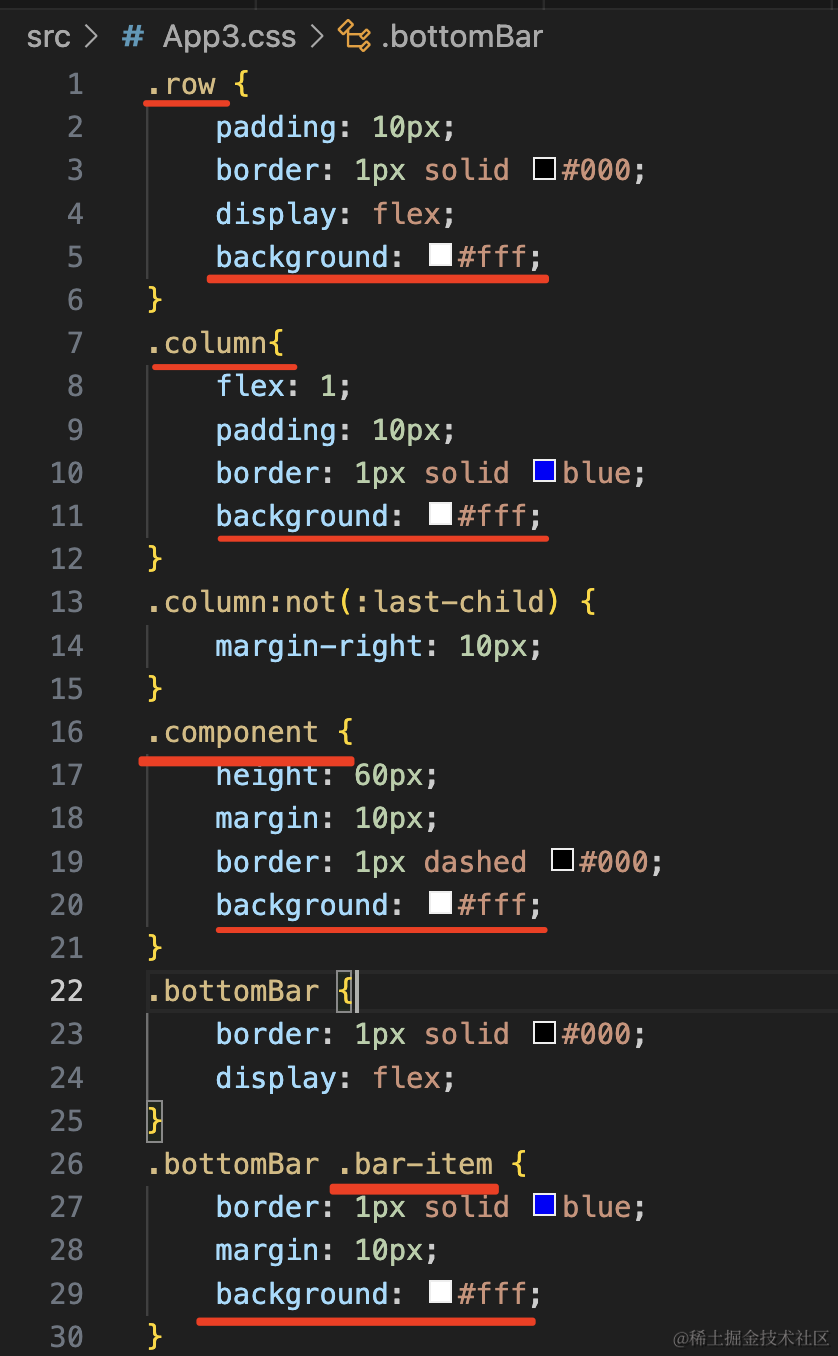
清晰多了。
然后空白区域可以 drop,但是现在我们空白区域是用 margin 隔开的,所以我们也得换成一个组件。
写个空白区域的组件:
interface DropZoneProps {
    className: string;
}
function DropZone(props: DropZoneProps) {
    return <div className={`drop-zone ${props.className}`}></div>
}
添加对应的样式:
.drop-zone {}
.drop-zone-horizental {
    height: 20px;
}
.drop-zone-vertical {
    width: 20px;
}
把前面设置的 margin 去掉:
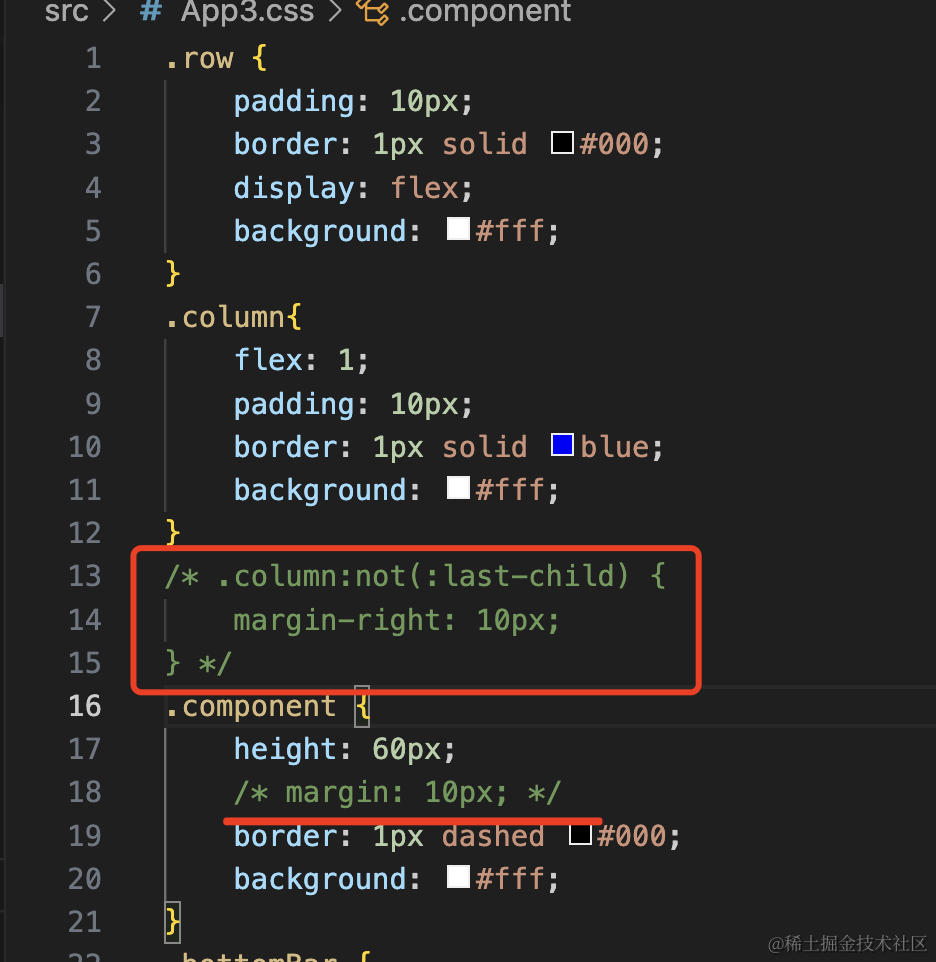
我们换成 DropZone 组件:
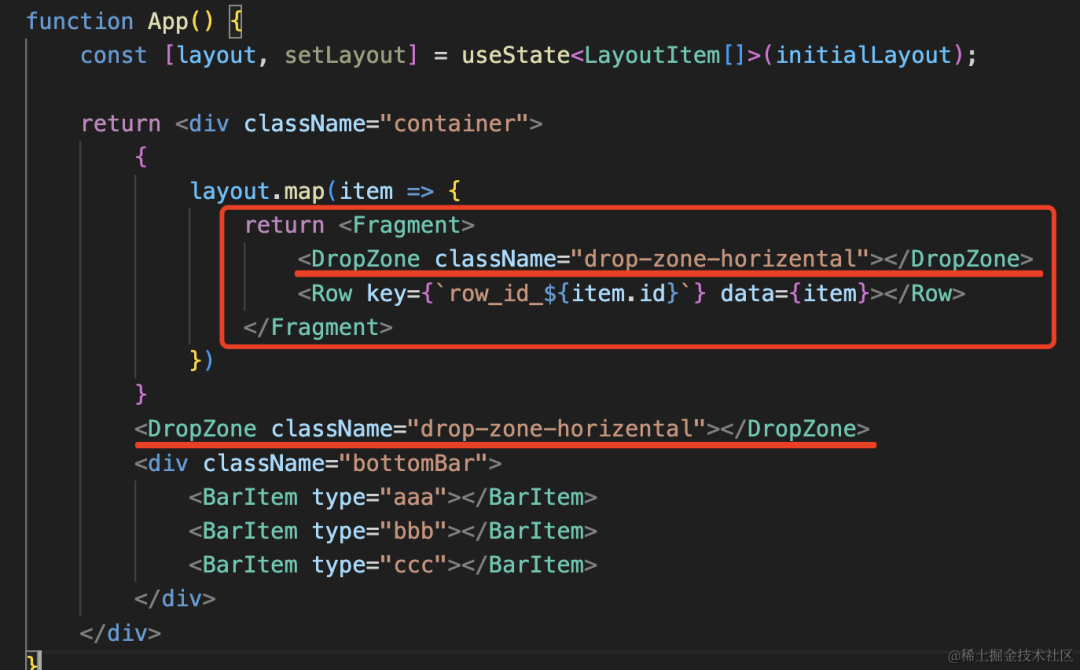
这样空白就是 DropZone 组件了:
打开 devtools 看一下:
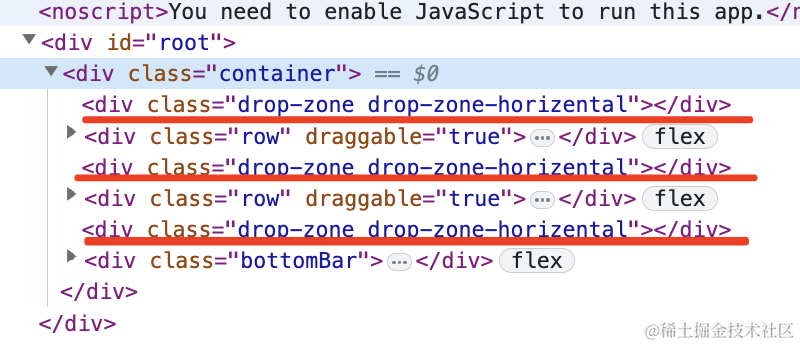
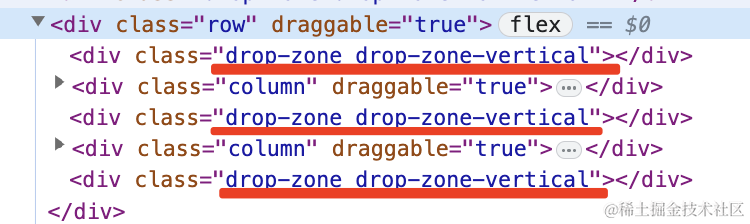
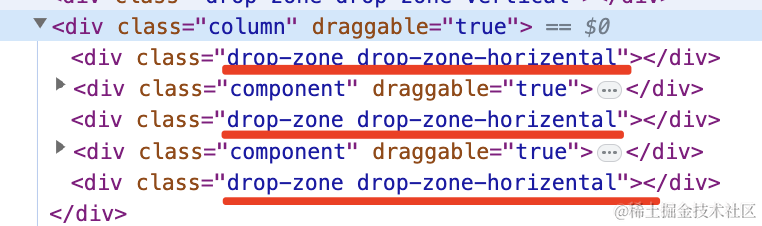
确实,DropZone 加到了正确的位置。
然后就可以在 DropZone 里加上 drop 的处理了:

function DropZone(props: DropZoneProps) {
    const [{ overing }, drop] = useDrop({
        accept: ['column', 'row', 'component', 'barItem'],
        drop(item) {
            console.log(item);
        },
        collect(monitor) {
            return {
                overing: monitor.isOver()
            }
        }
    });
    return <div ref={drop} className={`drop-zone ${props.className} ${overing ? 'focus' : ''}`}></div>
}
加上 useDrop,在 drop 的回调里打印下 item 的值。
并且在 collect 里通过 monitor 拿到是否 over,是的话就显示 focus 的 class。
我们加上 focus 的样式:
.drop-zone.focus {
    background: blue;
}
是不是有低代码编辑器的感觉了?
现在只差最后一步了:根据 drag 的元素和 drop 的位置,修改数据,触发重新渲染。
怎么知道什么元素从哪里拖拽到了哪里呢?
之前拖拽排序的时候比较简单,知道 index 然后互换位置就行。
现在变成三层的了,那是不是 3 个 index 就可以呢?
比如第 0 行第 0 列,第 0 个组件就是 0-0-0。
第 2 行第 0 列,第 1 个组件就是 2-0-1。
我们把这个叫做路径 path。
有了这个,不就知道元素从哪里移动到了哪里么?
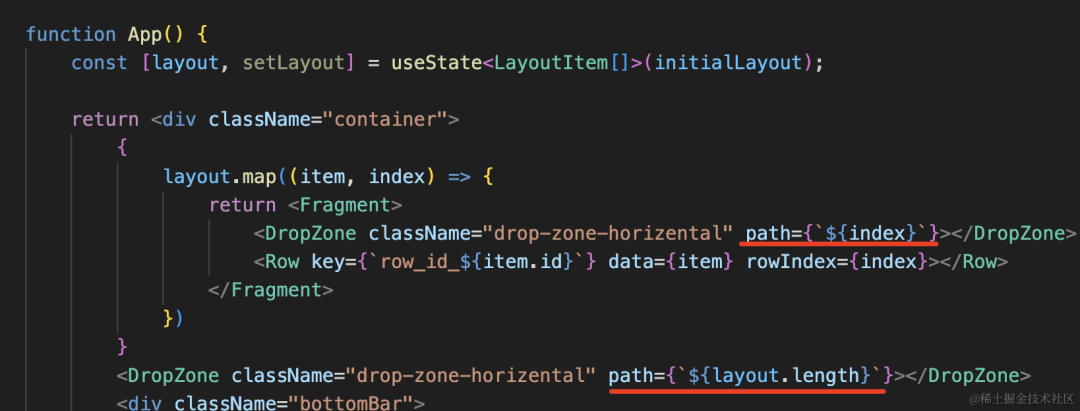
所以我们渲染的时候要把 index 传入:
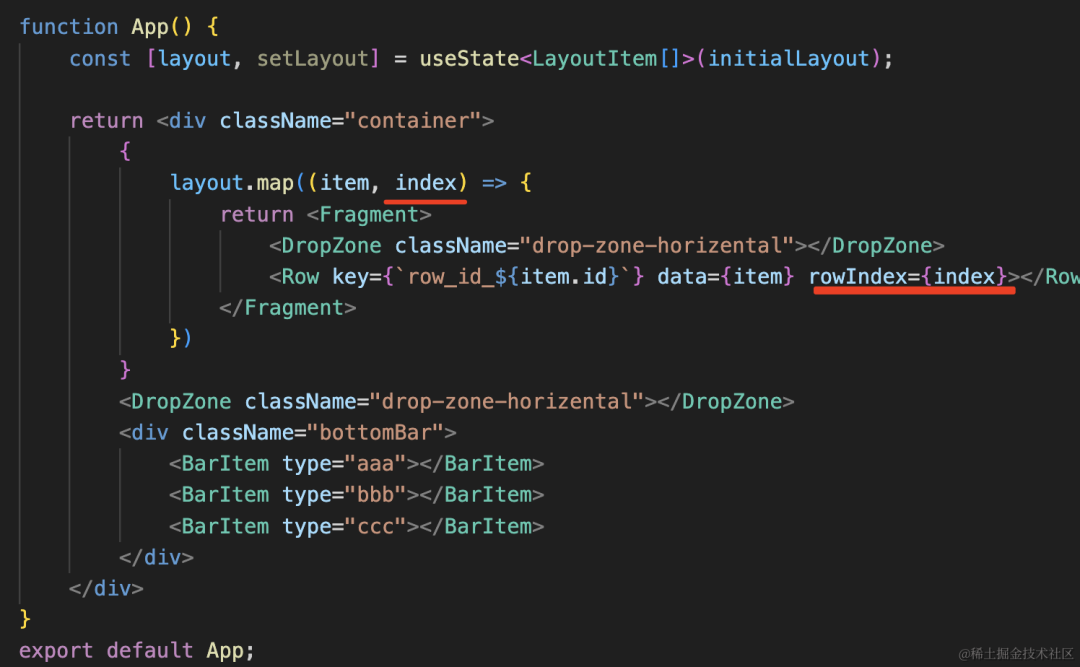
然后 useDrag 传递的 item 数据要带上 path:
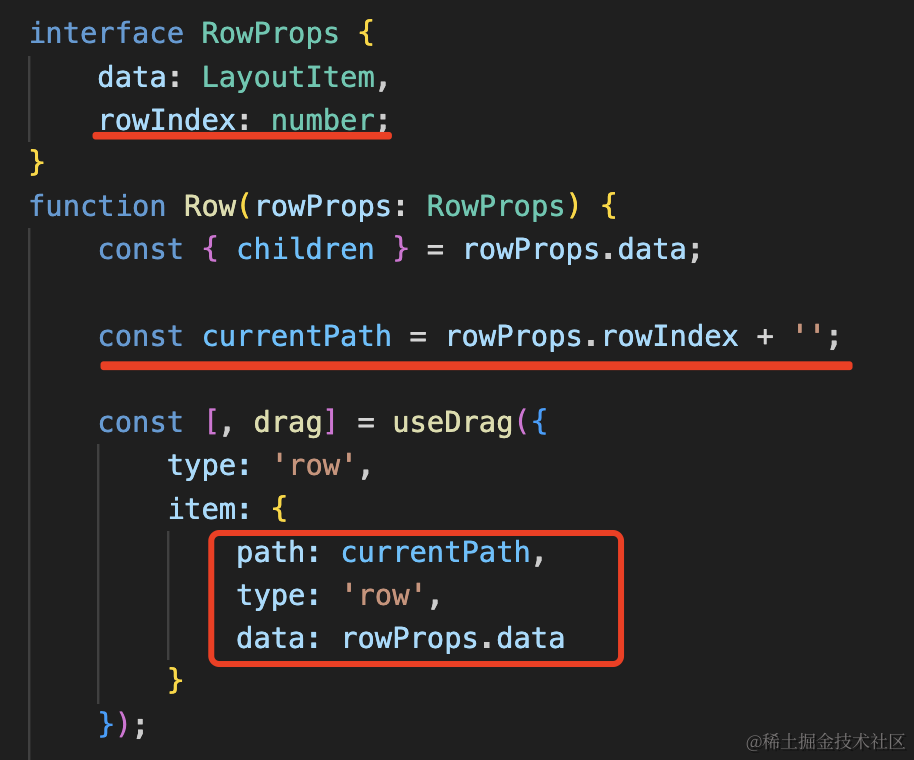
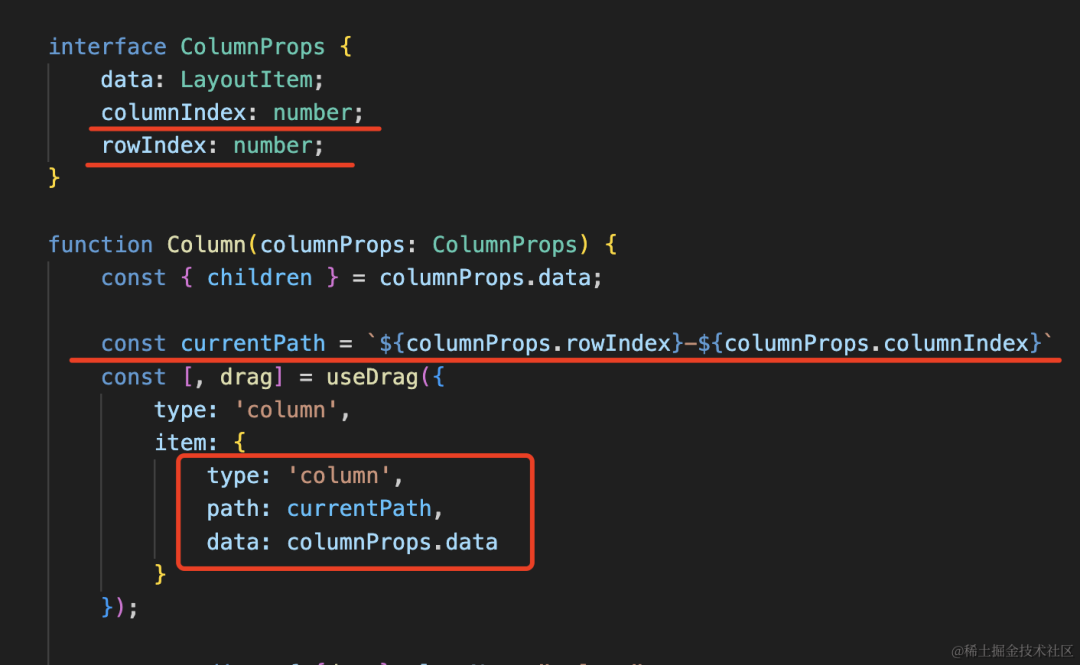
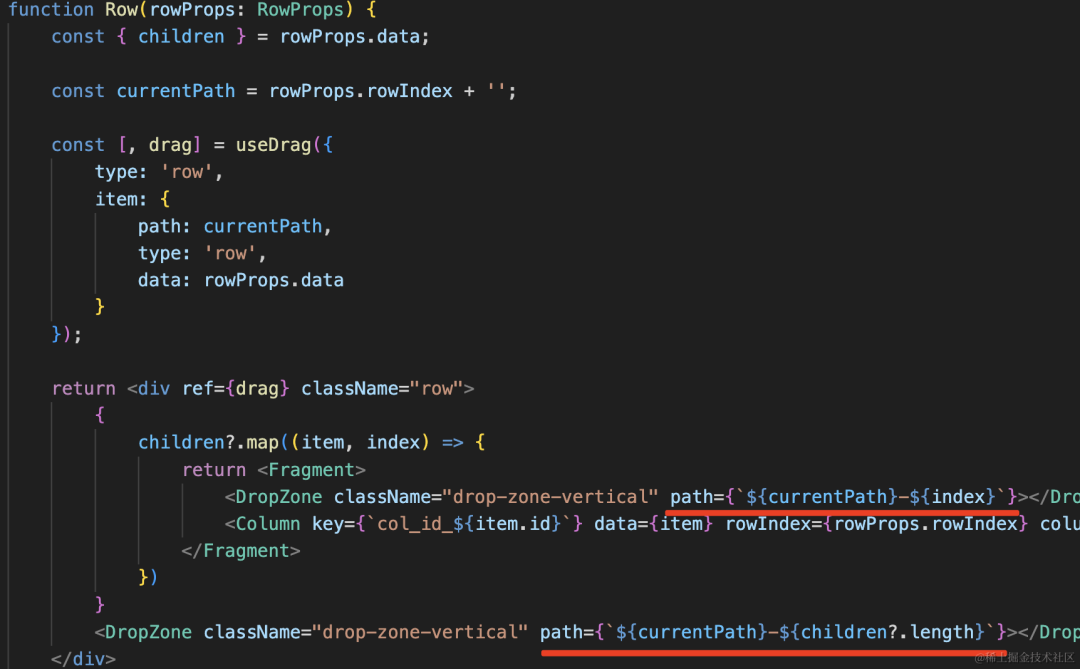
同理,渲染 Column 组件的时候要带上 row 和 column 的 index:

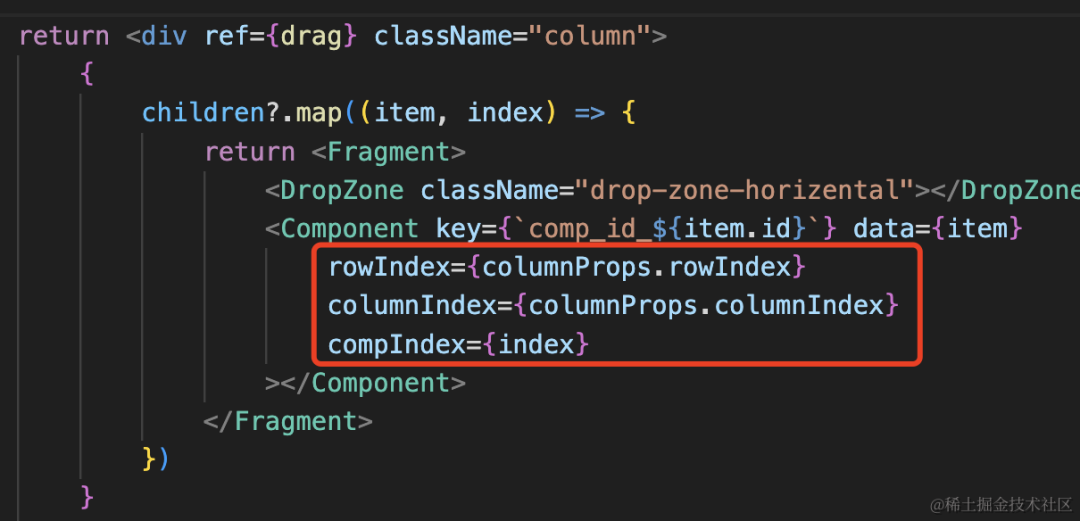
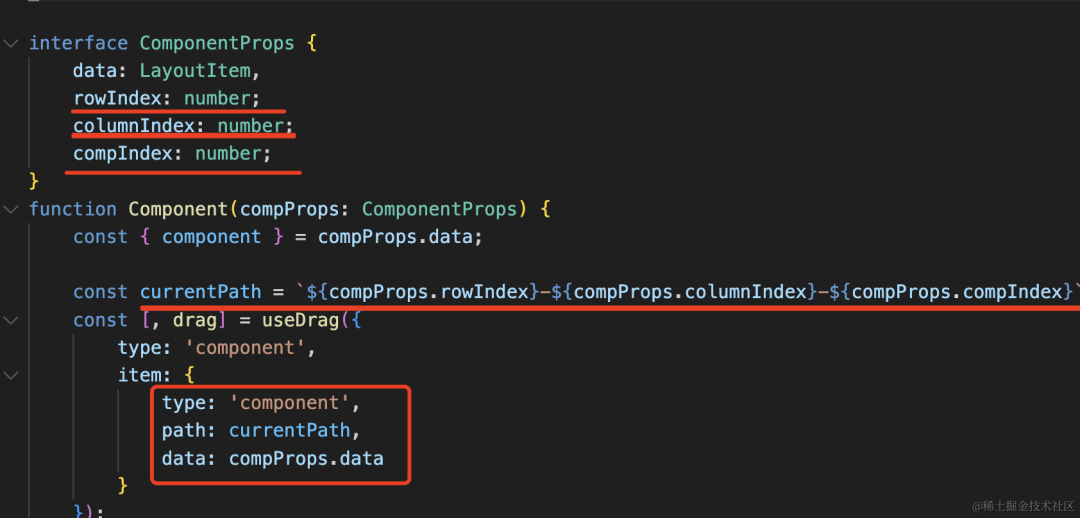
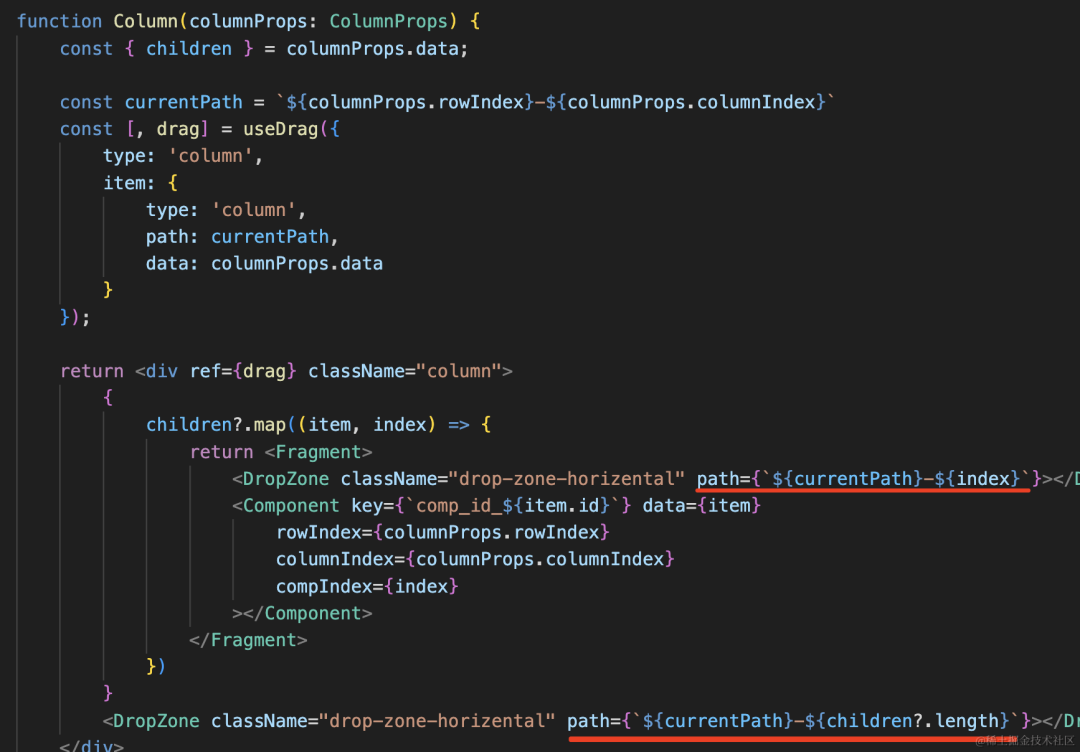
渲染 Component 组件的时候也是:
测试下:

分别拖拽了 3 个组件,path 都是对的。
我又测试了下 row 和 column 的拖拽,path 也是对的:
这样,我们就还差一个数据:拖拽到了什么位置。
显然,这里也是通过 path 标识。
在渲染 DropZone 的时候,也给它加上临近组件的 path:
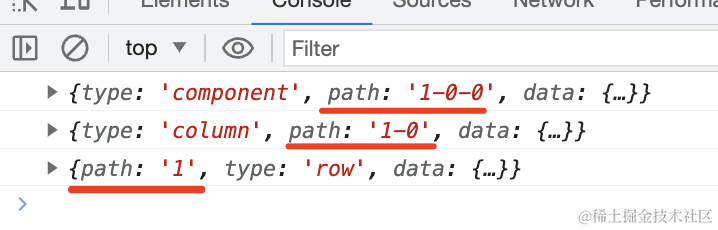
然后我们在 drop 的时候打印下 item 和 path:
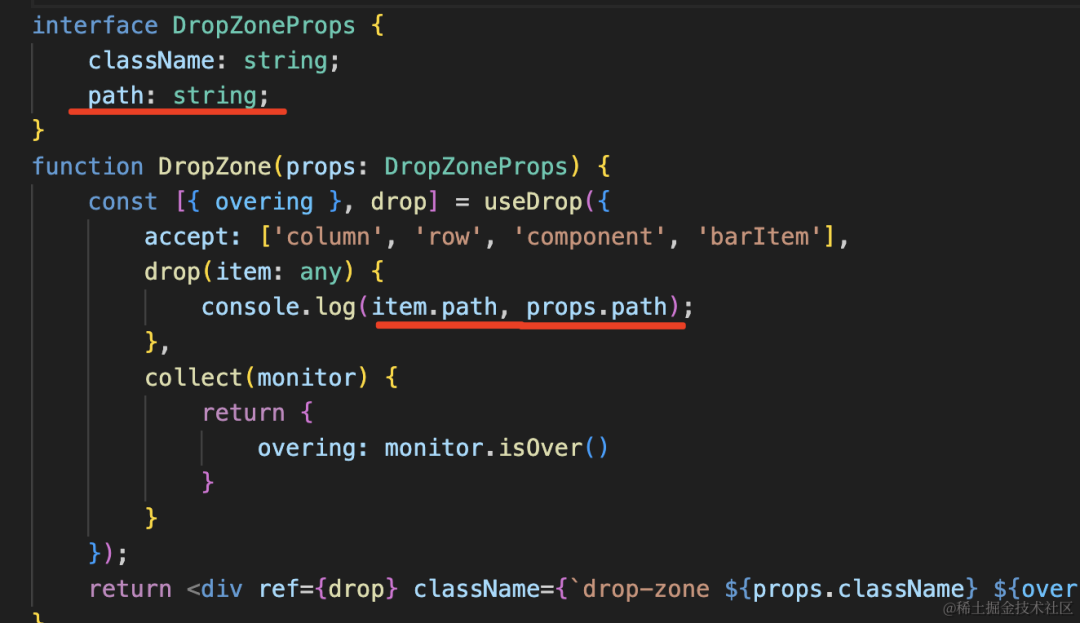
就知道从哪里拖拽到了哪里。
如图,我们把 1-0-0 的组件,拖拽到了 0-0-2 的位置。
接下来只要修改 layout,触发重新渲染就好了。
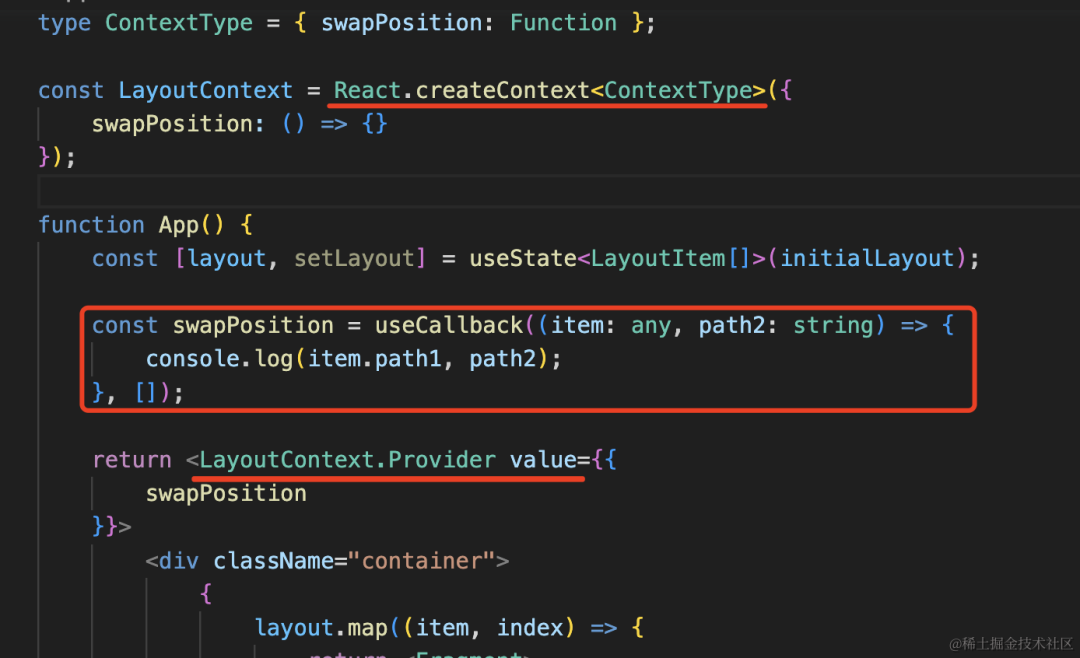
我们通过 context 来传递这个 swapPosition 方法:
在 DropZone 里取出来:
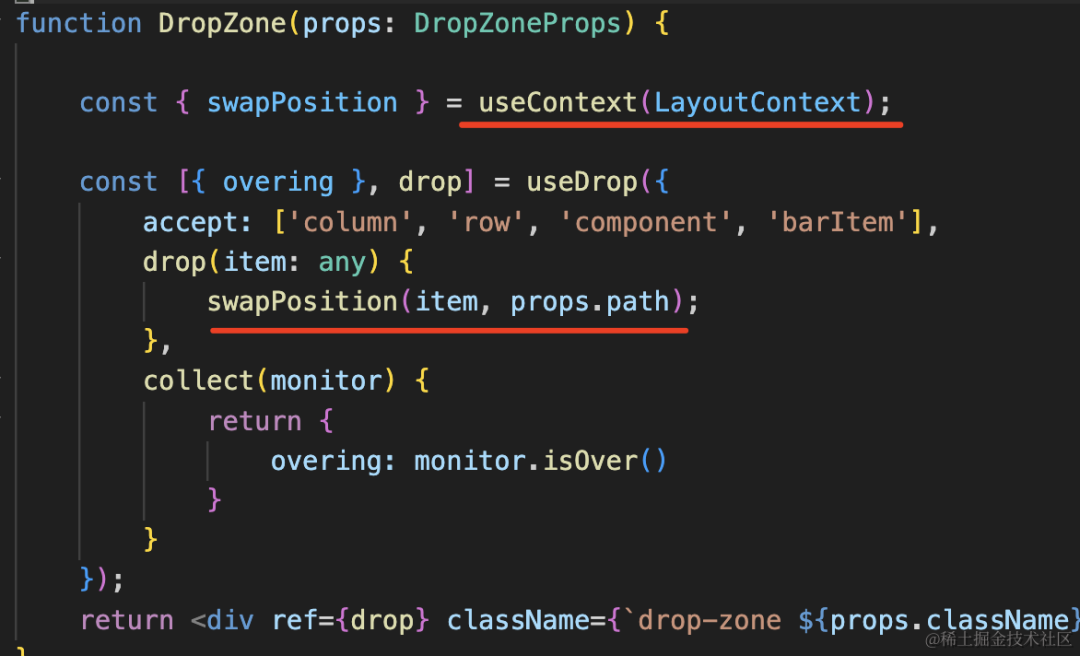
测试下:

调用成功了。
而这个函数里是可以拿到 layout 和 setLayout 的。
接下来只要修改 layout 之后调用下 setLayout 就好了。
具体的情况还是比较多的,这里就不全部实现了。
我们这里写死几种情况测试下:
比如从 1-0-0 拖拽到 0-1-1 的情况:
const swapPosition = useCallback((item: any, path2: string) => {
    const lay = layout as any;

    lay[1].children[0].children.splice(0, 1);
    lay[0].children[1].children.splice(1, 0, item.data);

    setLayout([...lay])
}, []);

然后从 0-0-1 到 0-1 的情况:
const swapPosition = useCallback((item: any, path2: string) => {
    const lay = layout as any;

    lay[0].children[0].children.splice(1, 1);
    lay[0].children.splice(1, 0, {
            type: COLUMN,
            children: [
                item.data
            ]
        }
    );
    setLayout([...lay])
}, []);
这种需要在外层补一个 column。
然后是从 bottomBar 拖到 1-0-2 的情况:
const swapPosition = useCallback((item: any, path2: string) => {
    const lay = layout as any;

    lay[1].children[0].children.splice(2, 0, {
            type: COMPONENT,
            component: {
                type: item.type
            }
        }
    );
    setLayout([...lay])
}, []);
通用的处理逻辑就是情况比较多,但是一样的实现思路。
这样,我们就实现了一个低代码的编辑器,对 react-dnd 算是有了比较好的掌握了。
这个案例的全部代码如下:
import React, { Fragment, useCallback, useContext, useState } from "react";
import './App3.css';
import { useDrag, useDrop } from "react-dnd";

const ROW = 'row';
const COLUMN = 'column';
const COMPONENT = 'component';

interface LayoutItem {
    type: string;
    id: string;
    children?: LayoutItem[];
    component?: {
        type: string;
    }
}
const initialLayout = [
    {
        type: ROW,
        id: "row0",
        children: [
            {
                type: COLUMN,
                id: "column0",
                children: [
                    {
                        type: COMPONENT,
                        id: "component0",
                        component: {
                            type: 'aaa'
                        }
                    },
                    {
                        type: COMPONENT,
                        id: "component1",
                        component: {
                            type: 'bbb'
                        }
                    }
                ]
            },
            {
                type: COLUMN,
                id: "column1",
                children: [
                    {
                        type: COMPONENT,
                        id: "component2",
                        component: {
                            type: 'aaa'
                        }
                    }
                ]
            }
        ]
    },
    {
        type: ROW,
        id: "row1",
        children: [
            {
                type: COLUMN,
                id: "column2",
                children: [
                    {
                        type: COMPONENT,
                        id: "component3",
                        component: {
                            type: 'bbb'
                        }
                    },
                    {
                        type: COMPONENT,
                        id: "component0",
                        component: {
                            type: 'aaa'
                        }
                    },
                    {
                        type: COMPONENT,
                        id: "component2",
                        component: {
                            type: 'bbb'
                        }
                    }
                ]
            }
        ]
    }
];

function Aaa() {
    return <button>aaa</button>
}
function Bbb() {
    return <img alt="哆啦A梦" width="50" height="50" src="https://img0.baidu.com/it/u=3610760552,2286123102&fm=253&fmt=auto&app=138&f=JPEG?w=500&h=500"/>
}

function Ccc() {
    return <input type="range"></input>
}

const registeredComponent: Record<string, any> = {
    aaa: Aaa,
    bbb: Bbb,
    ccc: Ccc
}

interface ComponentProps {
    data: LayoutItem,
    rowIndex: number;
    columnIndex: number;
    compIndex: number;
}
function Component(compProps: ComponentProps) {
    const { component } = compProps.data;

    const currentPath = `${compProps.rowIndex}-${compProps.columnIndex}-${compProps.compIndex}`;
    const [, drag] = useDrag({
        type: 'component',
        item: {
            type: 'component',
            path: currentPath,
            data: compProps.data
        }
    });

    const Comp = registeredComponent[component!.type];

    return <div ref={drag} className="component">
        {
            <Comp></Comp>
        }
    </div>
}

interface ColumnProps {
    data: LayoutItem;
    columnIndex: number;
    rowIndex: number;
}

function Column(columnProps: ColumnProps) {
    const { children } = columnProps.data;

    const currentPath = `${columnProps.rowIndex}-${columnProps.columnIndex}`
    const [, drag] = useDrag({
        type: 'column',
        item: {
            type: 'column',
            path: currentPath,
            data: columnProps.data
        }
    });

    return <div ref={drag} className="column">
        {
            children?.map((item, index) => {
                return <Fragment>
                    <DropZone className="drop-zone-horizental" path={`${currentPath}-${index}`}></DropZone>
                    <Component key={`comp_id_${item.id}`} data={item}
                        rowIndex={columnProps.rowIndex}
                        columnIndex={columnProps.columnIndex}
                        compIndex={index}
                    ></Component>
                </Fragment>
            })
        }
        <DropZone className="drop-zone-horizental" path={`${currentPath}-${children?.length}`}></DropZone>
    </div>
}

interface RowProps {
    data: LayoutItem,
    rowIndex: number;
}
function Row(rowProps: RowProps) {
    const { children } = rowProps.data;

    const currentPath = rowProps.rowIndex + '';

    const [, drag] = useDrag({
        type: 'row',
        item: {
            path: currentPath,
            type: 'row',
            data: rowProps.data
        }
    });

    return <div ref={drag} className="row">
        {
            children?.map((item, index) => {
                return <Fragment>
                    <DropZone className="drop-zone-vertical" path={`${currentPath}-${index}`}></DropZone>
                    <Column key={`col_id_${item.id}`} data={item} rowIndex={rowProps.rowIndex} columnIndex={index}></Column>
                </Fragment>
            })
        }
        <DropZone className="drop-zone-vertical" path={`${currentPath}-${children?.length}`}></DropZone>
    </div>
}

interface BarItemProps {
    type: string;
}
function BarItem(props: BarItemProps) {
    const Comp = registeredComponent[props.type];

    const [, drag] = useDrag({
        type: 'barItem',
        item: props
    });

    return <div ref={drag} className="bar-item">
        <Comp></Comp>
    </div>
}

interface DropZoneProps {
    className: string;
    path: string;
}
function DropZone(props: DropZoneProps) {

    const { swapPosition } = useContext(LayoutContext);

    const [{ overing }, drop] = useDrop({
        accept: ['column', 'row', 'component', 'barItem'],
        drop(item: any) {
            swapPosition(item, props.path);
        },
        collect(monitor) {
            return {
                overing: monitor.isOver()
            }
        }
    });
    return <div ref={drop} className={`drop-zone ${props.className} ${overing ? 'focus' : ''}`}></div>
}


type ContextType = { swapPosition: Function };

const LayoutContext = React.createContext<ContextType>({
    swapPosition: () => {}
});

function App() {
    const [layout, setLayout] = useState<LayoutItem[]>(initialLayout);

    const swapPosition = useCallback((item: any, path2: string) => {
        // const lay = layout as any;

        // lay[1].children[0].children.splice(0, 1);
        // lay[0].children[1].children.splice(1, 0, item.data);

        // setLayout([...lay])

        // const lay = layout as any;

        // lay[0].children[0].children.splice(1, 1);
        // lay[0].children.splice(1, 0, {
        //         type: COLUMN,
        //         children: [
        //             item.data
        //         ]
        //     }
        // );
        // setLayout([...lay])

        const lay = layout as any;

        lay[1].children[0].children.splice(2, 0, {
                type: COMPONENT,
                component: {
                    type: item.type
                }
            }
        );
        setLayout([...lay])

    }, []);

    return <LayoutContext.Provider value={{
        swapPosition
    }}>
        <div className="container">
            {
                layout.map((item, index) => {
                    return <Fragment>
                        <DropZone className="drop-zone-horizental" path={`${index}`}></DropZone>
                        <Row key={`row_id_${item.id}`} data={item} rowIndex={index}></Row>
                    </Fragment>
                })
            }
            <DropZone className="drop-zone-horizental" path={`${layout.length}`}></DropZone>
            <div className="bottomBar">
                <BarItem type="aaa"></BarItem>
                <BarItem type="bbb"></BarItem>
                <BarItem type="ccc"></BarItem>
            </div>
        </div>
    </LayoutContext.Provider>
}
export default App;
css:
.row {
    padding: 10px;
    border: 1px solid #000;
    display: flex;
    background: #fff;
}
.column{
    flex: 1;
    padding: 10px;
    border: 1px solid blue;
    background: #fff;
}
.component {
    height: 60px;
    border: 1px dashed #000;
    background: #fff;
}
.bottomBar {
    border: 1px solid #000;
    display: flex;
}
.bottomBar .bar-item {
    border: 1px solid blue;
    margin: 10px;
    background: #fff;
}
.drop-zone {
}
.drop-zone-horizental {
    height: 20px;
}
.drop-zone-vertical {
    width: 20px;
}
.drop-zone.focus {
    background: blue;
}
总结
我们学了 react-dnd 并用它实现了 3 个案例。
react-dnd 主要就是 useDrag、useDrop、useDragLayout 这 3 个 API。
useDrag 是给元素添加拖拽,指定 item、type、collect 等参数。
useDrop 是给元素添加 drop,指定 accepet、drop、hover、collect 等参数。
useDragLayout 是自定义预览,可以通过 monitor 拿到拖拽的实时位置。
此外,最外层还要加上 DndProvider,用来组件之间传递数据。
其实各种拖拽功能的实现思路比较固定:什么元素可以拖拽,什么元素可以 drop,drop 或者 hover 的时候修改数据触发重新渲染就好了。
拖拽排序就是 hover 的时候互换两个 index 的对应的数据,然后 setState 触发渲染。
低代码编辑器则是要记录两个 path,根据两个 path 来判断怎么修改数据触发渲染。
用 react-dnd,我们能实现各种基于拖拽的功能。