


1.spring是一个轻量级的开源的Javaee框架
2.spring可以解决企业应用开发的复杂性
3.spring有两个核心部分:IOC和AOP
(1)IOC英文全称Inversion of Control:控制反转,把创建对象的过程交给spring框架进行管理
(2)AOP英文全称Aspect-Oriented Programming:面向切面编程,不修改源代码进行功能的增强
4.spring的特点
(1)方便解耦,简化开发
(2)AOP编程支持
(3)方便程序的测试
(4)方便和其他框架进行整合
(5)方便进行事务操作
(6)降低API开发难度
先到官网下载jar包
www.spring.io ----> projects ----> spring framework ----> learn ----> 选择版本进行下载(也可以直接使用maven)
1.创建一个普通的Java工程
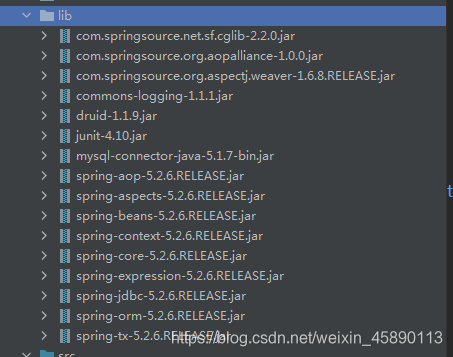
2.导入相关的jar包

3.创建一个实体类User,在里面写一个方法add()
public class User {
    public void add() {
        System.out.println("add......");
    }
}
4.创建spring的配置文件,在配置文件中配置要创建的对象
<?xml version="1.0" encoding="UTF-8"?>
<beans xmlns="http://www.springframework.org/schema/beans"
       xmlns:xsi="http://www.w3.org/2001/XMLSchema-instance"
       xsi:schemaLocation="http://www.springframework.org/schema/beans http://www.springframework.org/schema/beans/spring-beans.xsd">

<!--  配置User对象的创建  -->
    <bean id="user" class="cn.pdsu.wbb.entity.User"></bean>
</beans>
5.进行测试
import cn.pdsu.wbb.entity.User;
import org.junit.Test;
import org.springframework.context.ApplicationContext;
import org.springframework.context.support.ClassPathXmlApplicationContext;

public class Test01 {
    @Test
    public void testAdd() {
        // 加载配置文件
        ApplicationContext context = new ClassPathXmlApplicationContext("bean1.xml") ;
        // 获取配置创建的对象
        User user = context.getBean("user", User.class);

        System.out.println(user);
        user.add();
    }
}
(1)控制反转,把对象的创建和对象之间调用的过程交给spring进行管理
(2)使用IOC的目的:降低耦合度
(3)上面的入门案例就是IOC将进行实现的
(1)xml解析、工厂模式、反射
工厂模式:

(2)IOC接口(BeanFactory)
1.IOC的思想基于IOC的容器完成,IOC容器底层就是对象工厂
2.spring提供IOC容器实现两种方式(两个接口):
(1)BeanFactory:IOC容器基本实现,是由spring内部使用的接口,不提供开发人员使用
BeanFactory在加载配置文件的时候不回去创建对象,只会在使用时创建对象(2)ApplicationContext:BeanFactory接口的子接口,提供了更多更强大的功能,一般由开发人员进行使用
ApplicationContext在加载配置文件时就会把配置文件中的对象进行创建
public class Test01 {
    @Test
    public void testAdd() {
        // 加载配置文件
        // ApplicationContext context = new ClassPathXmlApplicationContext("bean1.xml") ;
        BeanFactory context= new ClassPathXmlApplicationContext("bean1.xml") ;
        // 获取配置创建的对象
        User user = context.getBean("user", User.class);

        System.out.println(user);
        user.add();
    }
}
(3)ApplicationContext中的接口
1.FileSystemXmlApplicationContext:需要写出文件的带盘符路径(文件的全路径)
2.ClassPathXmlApplicationContext:在src目录下时直接写出文件名即可
(1)spring创建对象
(2)spring注入属性
<!-- 配置User对象创建 -->
<bean id="user" class="cn.pdsu.wbb.entity.User">
①在spring配置文件中使用bean标签,标签中添加对应的属性就可以实现对象的创建
②在bean标签中常用的属性
id属性:获取对象的唯一标识
class属性:类的全路径
③创建对象时默认执行无参的构造方法
当我们在User类中创建一个有参数的构造方法后,没有无参构造,再次创建对象,它会提示在User类中没有对应的方法,不能创建对象
public class User {
    private String name ;
    public User(String name) {
        this.name = name ;
    }

    public void add() {
        System.out.println("add......");
    }
}

①DI:依赖注入,就是注入属性(注入属性要在创建对象的基础之上完成)
第一种注入方式:使用set方法进行注入
1.创建类,定义其属性和对应的set方法
/**
 * 演示使用set方法进行注入属性
 */
public class Book {
    // 设置属性
    private String name ;
    private String author ;

    // 创建set方法
    public void setName(String name) {
        this.name = name;
    }

    public void setAuthor(String author) {
        this.author = author;
    }

    @Override
    public String toString() {
        return "Book{" +
                "name='" + name + '\'' +
                ", author='" + author + '\'' +
                '}';
    }

    public void show() {
        System.out.println("name=" + name + ", author=" + author);
    }
}
2.在spring配置文件中配置对象创建,配置属性的注入
<!--  set方法注入属性  -->
    <bean id="book" class="cn.pdsu.wbb.entity.Book">
<!--
   使用property完成属性注入
   name:表示类中属性的名称
   value:表示向属性中注入的值
  -->
        <property name="name" value="西游记"></property>
        <property name="author" value="吴承恩"></property>
    </bean>
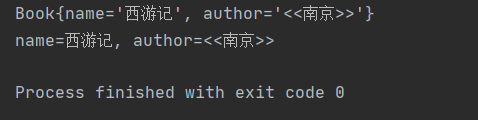
3.进行方法的测试
import cn.pdsu.wbb.entity.Book;
import org.junit.Test;
import org.springframework.context.ApplicationContext;
import org.springframework.context.support.ClassPathXmlApplicationContext;

public class Test01 {
    @Test
    public void testBook() {
        // 加载配置文件
        ApplicationContext context = new ClassPathXmlApplicationContext("bean1.xml") ;
        // 获取配置创建的对象
        Book book = context.getBean("book", Book.class);

        System.out.println(book);
        book.show();
    }
}
运行结果截图

第二种注入方式:通过有参构造进行注入
1.创建类,定义属性,创建有参数的构造方法
s.name = name;
        this.address = address;
    }

    @Override
    public String toString() {
        return "Order{" +
                "name='" + name + '\'' +
                ", address='" + address + '\'' +
                '}';
    }

    public void show() {
        System.out.println("name=" + name + ",address=" + address);
    }
}
2.在spring文件中进行配置
<!--  使用有参构造进行属性的注入  -->
    <bean id="order" class="cn.pdsu.wbb.entity.Order">
        <constructor-arg name="name" value="电脑"></constructor-arg>
        <constructor-arg name="address" value="北京"></constructor-arg>
    </bean>
还可以在constructor-arg使用index属性代替name,0表示类第一个属性
<constructor-arg index="0" value="电脑"></constructor-arg>
<constructor-arg index="1" value="北京"></constructor-arg>
3.测试
import cn.pdsu.wbb.entity.Order;
import org.junit.Test;
import org.springframework.context.ApplicationContext;
import org.springframework.context.support.ClassPathXmlApplicationContext;

public class Test01 {
    @Test
    public void testOrder() {
        // 加载配置文件
        ApplicationContext context = new ClassPathXmlApplicationContext("bean1.xml") ;
        // 获取配置创建的对象
        Order order = context.getBean("order", Order.class);

        System.out.println(order);
        order.show();
    }
}
4.运行结果

p名称空间注入(本质上还是set注入,可以用于简化xml配置方式)
第一步,在配置文件中添加p名称空间
<?xml version="1.0" encoding="UTF-8"?>
<beans xmlns="http://www.springframework.org/schema/beans"
       xmlns:xsi="http://www.w3.org/2001/XMLSchema-instance"
       xmlns:p="http://www.springframework.org/schema/p"
       xsi:schemaLocation="http://www.springframework.org/schema/beans http://www.springframework.org/schema/beans/spring-beans.xsd">
第二步,进行属性注入,在bean标签中进行操作
<!--  p名称空间注入  -->
<bean id="book" class="cn.pdsu.wbb.entity.Book" p:name="红楼梦" p:author="曹雪芹"></bean>
(1)null值
<property name="author">
    <null></null>
</property>
(2)属性值包含特殊符号
当代码如下时会报错,原因是含有‘<’、‘>’,
<property name="author" value="<<南京>>"></property>
1.将特殊符号进行转义
2.把带特殊符号的内容写到CDATA中,CDATA的格式   <![CDATA[要输出的内容]]>
<property name="author">
    <value><![CDATA[<<南京>>]]></value>
</property>
(1)创建两个类service类和dao类
import cn.pdsu.wbb.dao.UserDao;
public class UserService {
// 创建UserDao对应的属性,生成set方法
private UserDao userDao;
public void setUserDao(UserDao userDao) {
this.userDao = userDao;
}
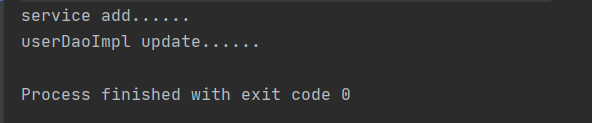
public void add() {
System.out.println("service add......");
userDao.update();
}
}
public interface UserDao {
    void update();
}
public class UserDaoImpl implements UserDao{
    @Override
    public void update() {
        System.out.println("userDaoImpl update......");
    }
}
(2)在service中调用dao里面的方法
(3)在spring配置文件中进行配置
<!--  1.service和dao对象的创建  -->
    <bean id="userService" class="cn.pdsu.wbb.service.UserService">
<!--
    注入userDao对象
    name属性:类里面的属性名称
    ref属性:创建userDao对象bean标签属性值
-->
        <property name="userDao" ref="userDao"></property>
    </bean>
    <bean id="userDao" class="cn.pdsu.wbb.dao.UserDaoImpl"></bean>
测试
import cn.pdsu.wbb.service.UserService;
import org.junit.Test;
import org.springframework.context.ApplicationContext;
import org.springframework.context.support.ClassPathXmlApplicationContext;

public class Test02 {

    @Test
    public void test() {
        ApplicationContext context = new ClassPathXmlApplicationContext("bean2.xml") ;
        UserService userService = context.getBean("userService",UserService.class) ;
        userService.add();
    }
}
结果
(1)一对多关系:部门和员工
一个部门有多个员工,一个员工属于一个部门
(2)在实体类中表示一对多的关系,员工表示所属部门用对象形式进行表示
// 部门类
public class Dept {
    private String name;

    public void setName(String name) {
        this.name = name;
    }

    @Override
    public String toString() {
        return "Dept{" +
                "name='" + name + '\'' +
                '}';
    }
}
// 员工类
public class Emp {
    private String name;
    private String gender;
    // 员工属于某一个部门,用对象形式进行标识
    private Dept dept ;

    public void setName(String name) {
        this.name = name;
    }

    public void setGender(String gender) {
        this.gender = gender;
    }

    public void setDept(Dept dept) {
        this.dept = dept;
    }

    @Override
    public String toString() {
        return "Emp{" +
                "name='" + name + '\'' +
                ", gender='" + gender + '\'' +
                ", dept=" + dept +
                '}';
    }
}
(3)在spring配置文件中进行相关配置
<!--  内部bean  -->
    <bean id="emp" class="cn.pdsu.wbb.entity.Emp">
<!--  设置两个普通属性  -->
        <property name="name" value="张三"></property>
        <property name="gender" value="男"></property>
<!--  设置对象类型属性  -->
        <property name="dept">
            <bean id="dept" class="cn.pdsu.wbb.entity.Dept">
                <property name="name" value="财务部"></property>
            </bean>
        </property>
    </bean>
(4)测试、结果
@Test
public void test1() {
    ApplicationContext context = new ClassPathXmlApplicationContext("bean3.xml") ;
    Emp emp = context.getBean("emp", Emp.class) ;
    System.out.println(emp);
}

级联赋值
第一种写法
<bean id="emp" class="cn.pdsu.wbb.entity.Emp">
    <!--  设置两个普通属性  -->
    <property name="name" value="张三"></property>
    <property name="gender" value="男"></property>
    <!--  设置对象类型属性  -->
    <property name="dept" ref="dept"></property>
</bean>
<bean id="dept" class="cn.pdsu.wbb.entity.Dept">
    <property name="name" value="安保部"></property>
</bean>
第二种写法(这种方法是先创建了对象,get拿到对象再进行赋值,所以需要设置要获取属性的get方法)
<bean id="emp" class="cn.pdsu.wbb.entity.Emp">
    <!--  设置两个普通属性  -->
    <property name="name" value="张三"></property>
    <property name="gender" value="男"></property>
    <!--  设置对象类型属性  -->
    <property name="dept" ref="dept"></property>
    <property name="dept.name" value="技术部"></property>
</bean>
<bean id="dept" class="cn.pdsu.wbb.entity.Dept">
    <property name="name" value=""></property>
</bean>
创建一个类,包含数组、list集合、map集合、set集合4种类型属性,并生成set方法
import java.util.Arrays;
import java.util.List;
import java.util.Map;
import java.util.Set;

public class Student {
    // 数组类型的属性
    private String[] courses;
    // list集合类型的属性
    private List<String> list ;
    // map集合类型的属性
    private Map<String,String> map;
    // set集合类型的属性
    private Set<String> set;

    public void setCourses(String[] courses) {
        this.courses = courses;
    }

    public void setList(List<String> list) {
        this.list = list;
    }

    public void setMap(Map<String, String> map) {
        this.map = map;
    }

    public void setSet(Set<String> set) {
        this.set = set;
    }

    @Override
    public String toString() {
        return "Student{" +
                "courses=" + Arrays.toString(courses) +
                "\n, list=" + list +
                "\n, map=" + map +
                "\n, set=" + set +
                '}';
    }
}
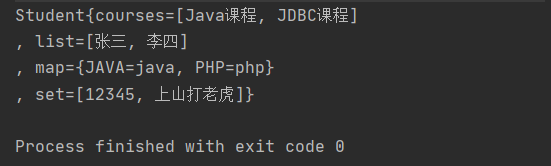
在spring配置文件中进行配置
<!--  集合类型属性注入  -->
    <bean id="student" class="cn.pdsu.wbb.collectiontype.Student">
<!--  数组类型属性注入  -->
        <property name="courses">
            <array>
                <value>Java课程</value>
                <value>JDBC课程</value>
            </array>
        </property>
<!--  list集合类型属性注入  -->
        <property name="list">
            <list>
                <value>张三</value>
                <value>李四</value>
            </list>
        </property>
<!--  map集合类型属性注入  -->
        <property name="map">
            <map>
                <entry key="JAVA" value="java"></entry>
                <entry key="PHP" value="php"></entry>
            </map>
        </property>
<!--  set集合类型属性注入  -->
        <property name="set">
            <set>
                <value>12345</value>
                <value>上山打老虎</value>
            </set>
        </property>
    </bean>
测试、结果
@Test
public void show() {
    ApplicationContext context = new ClassPathXmlApplicationContext("bean4.xml") ;
    Student student = context.getBean("student",Student.class) ;
    System.out.println(student);
}
创建一个课程类,在Student类中设置List集合类型的属性
public class Course {
    private String name ;

    public void setName(String name) {
        this.name = name;
    }

    @Override
    public String toString() {
        return "Course{" +
                "name='" + name + '\'' +
                '}';
    }
}
private List<Course> list1 ;

public void setList1(List<Course> list1) {
    this.list1 = list1;
}
在spring配置文件中进行配置
<!--  注入list集合属性,值是对象  -->
        <property name="list1">
            <list>
                <ref bean="course1"></ref>
                <ref bean="course2"></ref>
            </list>
        </property>
<!--  创建多个对象  -->
    <bean id="course1" class="cn.pdsu.wbb.entity.Course">
        <property name="name" value="Spring"></property>
    </bean>
    <bean id="course2" class="cn.pdsu.wbb.entity.Course">
        <property name="name" value="SpringMVC"></property>
    </bean>
把集合注入的部分抽取出来
(1)在spring配置文件中引入名称空间util
<?xml version="1.0" encoding="UTF-8"?>
<beans xmlns="http://www.springframework.org/schema/beans"
       xmlns:xsi="http://www.w3.org/2001/XMLSchema-instance"
       xmlns:util="http://www.springframework.org/schema/beans"
       xsi:schemaLocation="http://www.springframework.org/schema/beans http://www.springframework.org/schema/beans/spring-beans.xsd
                        http://www.springframework.org/schema/util http://www.springframework.org/schema/util/spring-util.xsd">

</beans>
创建一个Book类
import java.util.List;

public class Book {
    private List<String> list;

    public void setList(List<String> list) {
        this.list = list;
    }

    @Override
    public String toString() {
        return "Book{" +
                "list=" + list +
                '}';
    }
}
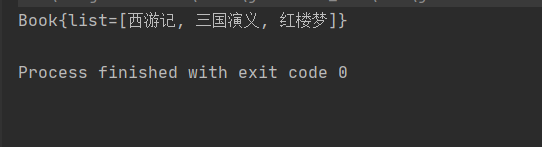
在spring配置文件中进行配置
<!--  提取list集合类型属性注入  -->
    <util:list id="bookList">
        <value>西游记</value>
        <value>三国演义</value>
        <value>红楼梦</value>
    </util:list>
<!--  提取list集合类型属性注入使用  -->
    <bean id="book" class="cn.pdsu.wbb.collectiontype.Book">
        <property name="list" ref="bookList"></property>
    </bean>
测试结果
1.Spring中有两种bean,一种是普通bean,一种是工厂bean(FactoryBean)
在配置文件中定义的bean类型就是返回值类型(我们上述的bean都属于普通bean)
在配置文件中定义的bean类型可以和返回值类型不同
(1)创建类,让这个类作为工厂bean,实现接口FactoryBean
(2)实现接口中的方法,在实现的方法中定义返回的bean类型
import cn.pdsu.wbb.entity.Course;
import org.springframework.beans.factory.FactoryBean;

public class MyBean implements FactoryBean<Course> {
    // 定义返回bean
    @Override
    public Course getObject() throws Exception {
        Course course = new Course();
        course.setName("course");
        return course;
    }

    @Override
    public Class<?> getObjectType() {
        return null;
    }

    @Override
    public boolean isSingleton() {
        return false;
    }
}
在spring配置文件中进行配置
<bean id="myBean" class="cn.pdsu.wbb.factorybean.MyBean"></bean>
测试类、结果
// 返回值类型是Course,但bean name是myBean
@Test
public void test() {
    ApplicationContext context = new ClassPathXmlApplicationContext("bean6.xml") ;
    Course course = context.getBean("myBean", Course.class) ;
    System.out.println(course);
}

1.在spring中,设置创建bean实例是单实例还是多实例
2.在默认情况下,bean是单实例
验证默认情况下的bean是单实例还是多实例
创建一个类
public class People{
}
在spring配置文件中对其进行实例化
<bean id="people" class="cn.pdsu.wbb.entity.People"></bean>
测试、结果
@Test
public void test() {
ApplicationContext context = new ClassPathXmlApplicationContext("bean6.xml") ;
People people1 = context.getBean("people", People.class) ;
People people2 = context.getBean("people", People.class) ;
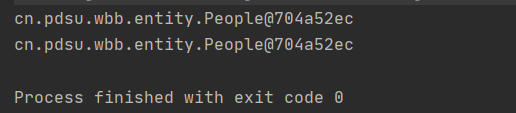
System.out.println(people1);
System.out.println(people2);
}
可以看到,所输出的结果是同一个对象
如何设置bean是单实例还是多实例
在spring配置文件bean标签中有一个scope属性用于设置单实例还是多实例
属性值:
singleton,表示创建单实例对象
prototype,表示创建多实例对象
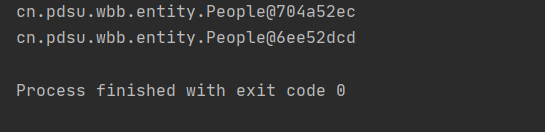
设置多实例对象
<bean id="people" class="cn.pdsu.wbb.entity.People" scope="prototype"></bean>
再次测试输出,可以看到是两个不同的对象的地址
singleton和prototype的区别
(1)singleton是单实例,prototype是多实例
(2)设置scope值是singleton时,在加载spring配置文件时就会创建单实例对象
设置scope值是prototype时,在调用getBean方法时创建多实例对象
从对象的创建到对象的销毁
(1)通过构造器创建bean实例(无参构造)
(2)为bean的属性设置值和对其他bean引用(调用set方法)
(3)调用bean的初始化方法(需要进行配置)
(4)bean可以进行使用了(对象获取到了)
(5)当容器关闭时,调用bean的销毁方法(销毁方法需要进行配置)
创建一个类
public class Orders {
    private String orderName ;

    public Orders() {
        System.out.println("第一步,执行无参构造创建bean实例");
    }
    public void setOrderName(String orderName) {
        this.orderName = orderName;
        System.out.println("第二步,调用set方法为bean属性赋值");
    }

    @Override
    public String toString() {
        return "Orders{" +
                "orderName='" + orderName + '\'' +
                '}';
    }

    // 创建初始化方法
    public void initMethod() {
        System.out.println("第三步,执行初始化方法");
    }

    // 创建销毁方法
    public void destroyMethod() {
        System.out.println("第五步,执行销毁方法");
    }
}
在spring配置文件中进行配置
<!-- 将初始化方法和销毁的方法配置到xml文件中 -->
<bean id="orders" class="beanlife.Orders" init-method="initMethod" destroy-method="destroyMethod">
    <property name="orderName" value="电脑"></property>
</bean>
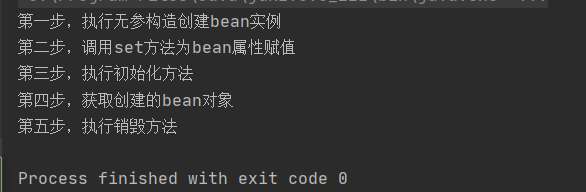
测试、结果
@Test
public void testBean() {
    ApplicationContext context = new ClassPathXmlApplicationContext("xml/bean5.xml") ;
    Orders orders = context.getBean("orders" , Orders.class) ;
    System.out.println("第四步,获取创建的bean对象");

    // 手动销毁bean实例,close()方法
    // applicationContext接口中没有close方法,需要用其子接口实现向下转型调用close方法
    ((ClassPathXmlApplicationContext)context).close();
  }
(1)通过构造器创建bean实例(无参构造)
(2)为bean的属性赋值(set方法)和对其他bean的引用
(3)把bean实例传递到bean的后置处理器的方法
(4)调用bean的初始化方法(初始化方法需要进行配置)
(5)把bean实例传递到bean的后置处理器的方法
(6)bean创建完成可以使用(对象已获取到)
(7)当容器关闭时,调用bean的销毁方法(销毁方法需要进行配置)
演示添加后置处理器的效果
(1)创建类,实现BeanPostProcessor,创建后置处理器
import org.springframework.beans.BeansException;
import org.springframework.beans.factory.config.BeanPostProcessor;

public class BeanPost implements BeanPostProcessor {
    // 初始化前执行
    @Override
    public Object postProcessBeforeInitialization(Object bean, String beanName) throws BeansException {
        System.out.println("初始化前执行");
        return bean ;
    }
    // 初始化后执行
    @Override
    public Object postProcessAfterInitialization(Object bean, String beanName) throws BeansException {
        System.out.println("初始化后执行");
        return bean ;
    }
}
在spring配置文件中进行配置,进行这个配置后,它会为当前配置文件中的所有bean实例都添加上后置处理器
<bean id="beanPost" class="beanlife.BeanPost"></bean>
运行结果

手动装配:通过value/ref属性设置属性值的方式
自动装配:根据指定的装配的规则(属性名称或属性值),spring自动匹配的属性注入
手动装配
<!--  手动装配  -->
    <bean id="dept" class="cn.pdsu.wbb.outowire.Dept"></bean>
    <bean id="emp" class="cn.pdsu.wbb.outowire.Emp">
        <property name="dept" ref="dept"></property>
    </bean>
自动装配,在bean标签中存在一个autowire属性,其用来配置bean的自动装配
<bean id="dept" class="cn.pdsu.wbb.outowire.Dept"></bean>
<bean id="emp" class="cn.pdsu.wbb.outowire.Emp" autowire="byName"></bean>
autowire属性有两个常用值:
       byName:根据属性名称进行注入,注入的bean的id值应于类中的属性名相同
       byType:根据属性类型进行注入,但是当容器中有多个类型相同的对象时,byType就不能再使用
(1)配置德鲁伊连接池
(2)引入德鲁伊连接池依赖jar包

<!-- 直接配置连接池 -->
    <bean id="dataSource" class="com.alibaba.druid.pool.DruidDataSource">
        <property name="driverClassName" value="com.mysql.jdbc.Driver"></property>
        <property name="url" value="jdbc:mysql://localhost:3306/userDb"></property>
        <property name="username" value="root"></property>
        <property name="password" value="123456"></property>
    </bean>
1)创建外部属性文件,properties格式文件,写入数据库信息
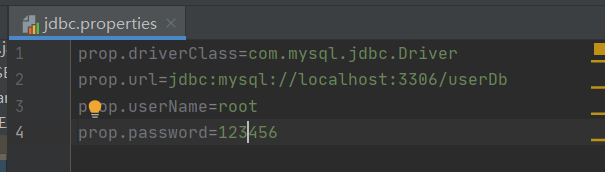
(2)把外部properties属性文件引入到spring配置文件中
*引入context名称空间
<?xml version="1.0" encoding="UTF-8"?>
<beans xmlns="http://www.springframework.org/schema/beans"
       xmlns:xsi="http://www.w3.org/2001/XMLSchema-instance"
       xmlns:context="http://www.springframework.org/schema/context"
       xsi:schemaLocation="http://www.springframework.org/schema/beans http://www.springframework.org/schema/beans/spring-beans.xsd
                        http://www.springframework.org/schema/context http://www.springframework.org/schema/context/spring-context.xsd">
*把外部properties属性文件引入到spring配置文件中
<!--    把外部properties属性文件引入到spring配置文件中  -->
    <context:property-placeholder location="classpath:jdbc.properties"></context:property-placeholder>
    <!-- 2.配置连接池-->
    <bean id="dataSource" class="com.alibaba.druid.pool.DruidDataSource">
        <property name="driverClassName" value="${prop.driverClass}"></property>
        <property name="url" value="${prop.url}"></property>
        <property name="username" value="${prop.userName}"></property>
        <property name="password" value="${prop.password}"></property>
    </bean>
(1)注解是代码中的特殊标记,格式:@注解名称(属性名称=属性值,属性名称=属性值)
(2)使用注解时,注解作用在类、方法或属性上面
(3)使用注解的目的是简化xml配置
(1)@Component:普通的注解
(2)@Service:建议用于service
(3)@Controller:建议用于web层
(4)@Repository:建议用于dao层
上面的四个注解功能一样,都可以用于创建bean实例
(1)引入依赖

(2)开启组件扫描(去看看哪个类上面有注解,有的话就去创建对象)
<context:component-scan base-package="cn.pdsu.wbb"></context:component-scan>
在context:component-scan标签中有一个base-package属性,用于配置需要扫描的包
    要扫描多个包的两种写法
        1.包名,包名...      包与包之间用逗号','进行隔开
        2.直接填写要扫描的包的上层目录
(3)创建类,在类上面添加注解
在注解后括号中的value只可以不写,其默认值就是首字母小写的类名称 PeopleService -> peopleService
@Component(value = "peopleService") // 这个注解相当于我们之前在xml文件中所写的<bean id="userService" class="...."></bean>
public class PeopleService {
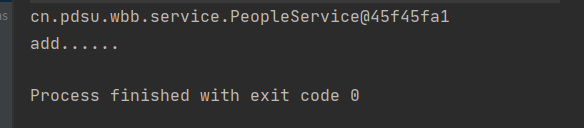
public void add() {
System.out.println("add......");
}
}
测试、结果
@Test
public void testService() {
    ApplicationContext context = new ClassPathXmlApplicationContext("bean9.xml") ;
    PeopleService peopleService = context.getBean("peopleService" , PeopleService.class) ;
    System.out.println(peopleService);
    peopleService.add();
}
当我们将一个包写入到base-package中时,它会默认扫描包中的所有类
但在context:component-scan标签中有一个user-default-filters属性,它默认值为true,表示扫描所给包中的所有文件
当我们设置其为false时,要用到一个context:include-filter标签进行配置需要扫描的内容
如示例1所示只扫描带Controller注解的类 include-filter 仅包括
<!-- 示例1 -->
<context:component-scan base-package="annotate.test">
    <context:include-filter type="annotation"
                           expression="org.springframework.stereotype.Controller"/>
 </context:component-scan>
如示例2所示只不扫描带Controller注解的类 exclude-filter 不包括
<!-- 示例2 -->
<context:component-scan base-package="annotate.test">
    <context:exclude-filter type="annotation"
                            expression="org.springframework.stereotype.Controller"/>
</context:component-scan>
(1)@AutoWored:根据属性类型进行自动装配
第一步 创建service类和dao类,把service和dao对象创建,在service和dao类中添加创建对象注解
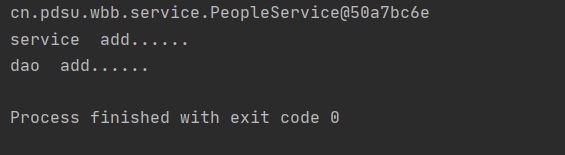
第二步 在service类中注入dao对象,在service类中添加dao类型属性,在属性上面使用注解
import cn.pdsu.wbb.dao.PeopleDao;
import org.springframework.beans.factory.annotation.Autowired;
import org.springframework.context.ApplicationContext;
import org.springframework.context.support.ClassPathXmlApplicationContext;

@Service(value = "peopleService")
public class PeopleService {
    // 这里不需要添加set方法
    @Autowired  // 添加注入属性注解
    private PeopleDao peopleDao ;

    public void add() {
        System.out.println("add......");
        people.add();
    }
}
public interface PeopleDao {
    public void add();
}
import org.springframework.stereotype.Repository;

@Repository
public class PeopleDaoImpl implements PeopleDao {
    @Override
    public void add() {
        System.out.println("add......");
    }
}
测试、结果
@Test
public void testService() {
    ApplicationContext context = new ClassPathXmlApplicationContext("bean9.xml") ;
    PeopleService peopleService = context.getBean("peopleService" , PeopleService.class) ;
    System.out.println(peopleService);
    peopleService.add();
}
(2)@Qualifier:根据属性名称进行注入
@Qualifier注解需要和@AutoWired一起使用
当一个接口有多个实现类时,需要用到Qualifier的名称注入找到你所要注入的类
@Autowired  // 添加注入属性注解
@Qualifier(value="peopleDaoImpl")   // 根据名称进行注入
private PeopleDao peopleDao ;
(3)@Resource:可以根据类型注入,也可以根据名称注入
//    @Resource   // 根据类型进行注入
@Resource(name = "userDaoImpl")
private PeopleDao peopleDao ;
Resource注解是javax.annotation.Resource;包下的
它不属于spring,是javax扩展包下的注解,spring官方不建议用@Resource
(4)@Value:注入普通类型属性
在属性上添加@Value注解,它的属性value是我们要设置的属性值
@Value(value = "tom")
private String name ;
(1)创建配置类,替代xml配置文件
添加注解@Configuration作为配置类替代xml配置文件
添加@ComponentScanc创建组件扫描 basePackage中填写要扫描的包(数组形式)
import org.springframework.context.annotation.ComponentScan;
import org.springframework.context.annotation.Configuration;

@Configuration  // 作为注解类代替xml配置文件
@ComponentScan(basePackages = {"cn.pdsu.wbb"})     // 注解扫描
public class SpringConfig {
}
(2)编写测试类
ClassPathXmlApplicationContext("bean9.xml")改为
AnnotationConfigApplicationContext(SpringConfig.class)
@Test
public void test() {
    // 换成配置类的实现
    ApplicationContext context = new AnnotationConfigApplicationContext(SpringConfig.class) ;
    PeopleService peopleService = context.getBean("peopleService " , PeopleService.class) ;
    System.out.println(peopleService );
    peopleService .add();
}
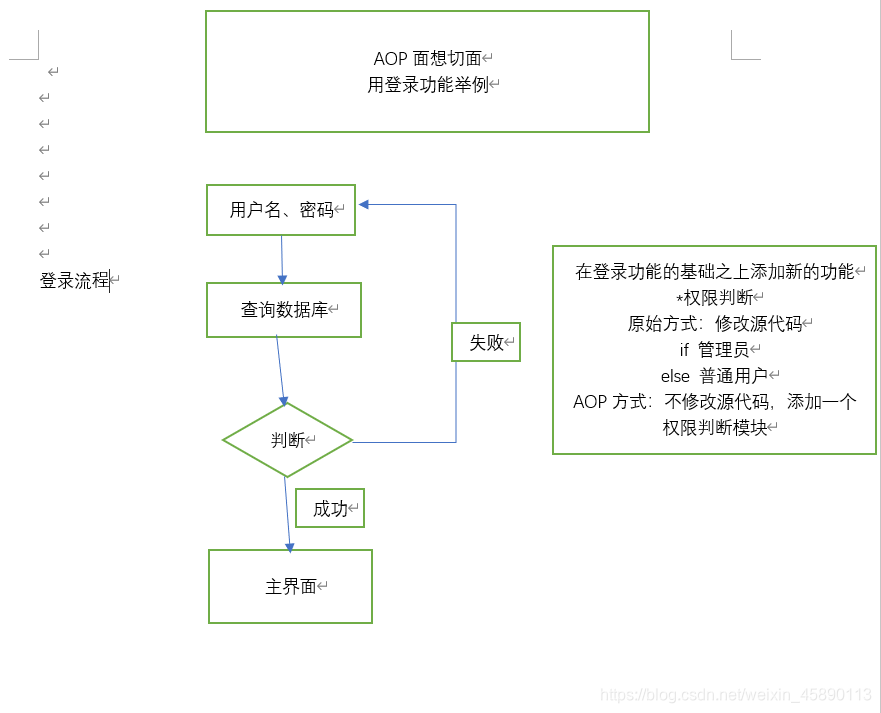
1.aop意为面向切面编程,利用aop可以对业务逻辑的各个部分进行隔离,从而使得业务逻辑各部分之间的耦合度降低,提高程序的可重用性,同时提高了开发的效率
2.通俗的讲就是通过不修改源代码的方式再主干功能中添加新的功能
3.使用登录的例子来说明aop
第一种,有接口情况,使用JDK动态代理
 // 接口
     interface UserDao {
        public void login();
    }
// 实现接口
    class UserDaoImpl UserDao() {
        public void login() {
            // 登录实现过程
        }
    }
JDK动态代理
创建UserDao接口实现代理对象,通过代理对象去增强类里面的方法
第二种,没有接口的情况
class User {
    public void add() {
        ......
    }
}
要想增强其方法,我们可以创建它的子类
class Person extends User{
    public void add() {
        super.add
        // 增强的逻辑
        ......
    }
}
1.使用JDK动态代理,使用Proxy类中的方法创建代理对象
java.lang.reflect包下的Proxy类
调用newProxyInstance方法
newProxyInstance(classloader loader , 类<?>[] interface , InvocationHandler h)
方法中的三个参数
第一个参数,类加载器
第二个参数,增强方法所在的类,这个类实现的接口,支持多个接口
第三个参数,实现InvocationHandler这个接口,创建代理对象,写增强的方法
2.编写JDK动态代理的代码
(1)创建接口,自定义方法
public interface UserDao {
    public int add(int a, int b) ;

    public String update(String str) ;
}
(2)创建接口实现类,实现方法
public class UserDaoImpl implements UserDao{

    @Override
    public int add(int a, int b) {
        System.out.println("add.....");
        return a+b;
    }

    @Override
    public String update(String str) {
        System.out.println("update....");
        return str;
    }
}
(3)使用Proxy类实现增强功能
import cn.pdsu.dff.dao.UserDao;
import cn.pdsu.dff.dao.UserDaoImpl;
import cn.pdsu.wbb.entity.User;

import java.lang.reflect.InvocationHandler;
import java.lang.reflect.Method;
import java.lang.reflect.Proxy;
import java.util.Arrays;

public class JDKProxy {
    public static void main(String[] args) {
        // 创建接口实现类代理对象
        Class[] interfaces = { UserDao.class } ;
        UserDaoImpl userDao = new UserDaoImpl();
        UserDao dao = (UserDao) Proxy.newProxyInstance(JDKProxy.class.getClassLoader(),interfaces ,new UserDaoProxy(userDao) ) ;
        int result = dao.add(1,2) ;
        System.out.println(result);
    }
}

// 创建代理对象代码
class UserDaoProxy implements InvocationHandler {

    // 把创建的是谁的代理对象,将其传过来
    // 有参构造传递
    private Object obj ;
    public UserDaoProxy(Object obj) {
        this.obj=obj ;
    }

    // 增强逻辑
    @Override
    public Object invoke(Object proxy, Method method, Object[] args) throws Throwable {
        // 增强add方法
        // 在方法之前增强的一个步骤
        System.out.println("方法执行之前...." + method.getName() + ":传递的参数..." + Arrays.toString(args));
        // 被增强的方法执行
        Object res = method.invoke(obj , args) ;
        // 方法执行后
        System.out.println("方法执行后...." + obj);
        return res;
    }
}
class User {
    add() {}

    update() {}

    select() {}

    delete() {}
}
类中可以增强的方法
在上面的User类中,add、update、select、delete方法都可以被增强,他们都是连接点
实际被增强的方法,比如说我只增强了add方法,那么add就是切入点
实际增强的逻辑部分被称为通知(增强)
通知(增强)有多种类型
①前置通知:方法前执行
②后置通知:方法后执行
③环绕通知:方法前后都执行
④异常通知:出现异常会执行
⑤最终通知:类似于try...catch中的finally
切面是一个动作,把通知应用到切入点的过程叫做切面
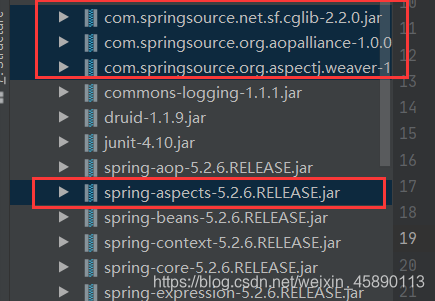
AspectJ不是Spring的组成部分,其独立于AOP框架,一般把AspectJ和Spring框架一起使用,进行AOP操作
1)基于xml配置文件实现
2)基于注解方式实现(使用)
(1)切入点表达式的作用:知道对哪个类的哪个方法进行增强
(2)语法结构:
execution([权限修饰符][返回类型] [类全路径][方法名称] ([参数列表]))
权限修饰符:public/private/…,可以省略不写默认是public
    例:对cn.edu.pdsu.People类里面的add方法进行增强
        execution(*cn.edu.pdsu.People.add(..))
(这里的权限修饰符被省略了,其中‘ * ’表示匹配所有返回值类型,‘. .’表示参数列表,参数列表就是两个点)
    例:对cn.edu.pdsu.People类里面的全部方法进行增强
        execution(* cn.edu.pdsu.People.*(..))
    例:对cn.edu.pdsu包下的所有类的所有方法进行增强
        execution(* cn.edu.pdsu.*.*(..))
public class User {
    public void add() {
        System.out.println("add......");
    }
}
在增强类中定义方法,不同的类表示不同的通知类型
// 增强类
public class UserProxy {
    // 前置通知
    public void before() {
        System.out.println("before......");
    }
}
(1)在spring配置文件中开启注解扫描
<?xml version="1.0" encoding="UTF-8"?>
<beans xmlns="http://www.springframework.org/schema/beans"
       xmlns:xsi="http://www.w3.org/2001/XMLSchema-instance"
       xmlns:context="http://www.springframework.org/schema/context"
       xmlns:aop="http://www.springframework.org/schema/aop"
       xsi:schemaLocation="http://www.springframework.org/schema/beans http://www.springframework.org/schema/beans/spring-beans.xsd
                        http://www.springframework.org/schema/context http://www.springframework.org/schema/context/spring-context.xsd
                        http://www.springframework.org/schema/aop http://www.springframework.org/schema/aop/spring-aop.xsd">

<!--  引入context、aop名称空间  -->
<!--  开启注解扫描  -->
    <context:component-scan base-package="cn.pdsu.dff"></context:component-scan>
</beans>
(2)使用注解创建User和UserProxy对象
(3)在增强类上面添加注解@Aspect
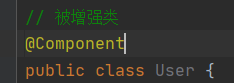
// 被增强类
@Component
@Aspect
public class User {
    public void add() {
        System.out.println("add......");
    }
}
(4)在spring配置文件中开启生成代理对象
<!--  开启AspectJ生成代理对象  -->
    <aop:aspectj-autoproxy></aop:aspectj-autoproxy>
(1)在增强类的里面,在作为通知方法上面添加通知类型注解,使用切入点表达式配置
import org.aspectj.lang.ProceedingJoinPoint;
import org.aspectj.lang.annotation.*;
import org.springframework.stereotype.Component;
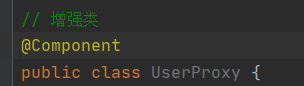
// 增强类
@Component
@Aspect
public class UserProxy {
// 前置通知
// @Before注解表示前置通知
@Before(value = "execution(* cn.pdsu.dff.dao.User.add(..))")
public void before() {
System.out.println("before......");
}
// 最终通知
@After(value = "execution(* cn.pdsu.dff.dao.User.add(..))")
public void after() {
System.out.println("after......");
}
// 后置通知(返回通知)
@AfterReturning(value = "execution(* cn.pdsu.dff.dao.User.add(..))")
public void afterReturning() {
System.out.println("afterReturning......");
}
// 异常通知
@AfterThrowing(value = "execution(* cn.pdsu.dff.dao.User.add(..))")
public void afterThrowing() {
System.out.println("afterThrowing......");
}
// 环绕通知
@Around(value = "execution(* cn.pdsu.dff.dao.User.add(..))")
public void around(ProceedingJoinPoint proceedingJoinPoint) throws Throwable {
System.out.println("around前......");
// 被增强的方法执行
proceedingJoinPoint.proceed() ;
System.out.println("around后......");
}
}
测试、结果
import cn.pdsu.dff.dao.User;
import org.junit.Test;
import org.springframework.context.ApplicationContext;
import org.springframework.context.support.ClassPathXmlApplicationContext;

public class TestAop {
    @Test
    public void test() {
        ApplicationContext context = new ClassPathXmlApplicationContext("bean10.xml") ;
        User user = context.getBean("user",User.class) ;
        user.add();
    }
}
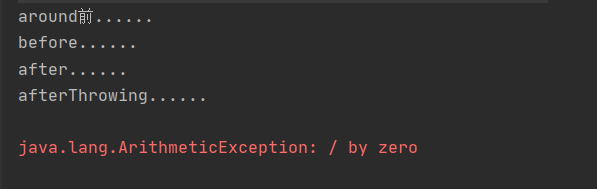
此时的异常通知并未执行

我们来人为的制造一个异常
public void add() {
    int a = 10 / 0 ;    // 异常
    System.out.println("add......");
}
异常通知执行,afterReturning、around后没执行
// 相同切入点的抽取
@Pointcut(value ="execution(* cn.pdsu.dff.dao.User.add(..))")
public void pointDemo() {

}

// 前置通知
// @Before注解表示前置通知
@Before(value = "pointDemo()")
public void before() {
    System.out.println("before......");
}
这样做的好处是当我们需要进行切入表达式的修改时,只需要修改一处即可
有多个增强类对同一个方法做增强,可以设置增强类的优先级
(1)在增强类的上面添加注解@Order(数字),数字越小,优先级越高就会被越先执行
@Component
@Aspect
@Order(1)
public class PeopleProxy {
创建配置类,不需要创建xml配置文件
import org.springframework.context.annotation.ComponentScan;
import org.springframework.context.annotation.Configuration;
import org.springframework.context.annotation.EnableAspectJAutoProxy;

@Configuration
@ComponentScan(basePackages = {"cn.pdsu.dff"})
@EnableAspectJAutoProxy(proxyTargetClass = true)
public class ConfigAop {
}
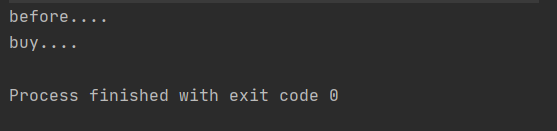
public class Book {
    public void buy() {
        System.out.println("buy....");
    }
}
public class BookProxy {
    public void before() {
        System.out.println("before....");
    }
}
<?xml version="1.0" encoding="UTF-8"?>
<beans xmlns="http://www.springframework.org/schema/beans"
       xmlns:xsi="http://www.w3.org/2001/XMLSchema-instance"
       xmlns:aop="http://www.springframework.org/schema/aop"
       xsi:schemaLocation="http://www.springframework.org/schema/beans http://www.springframework.org/schema/beans/spring-beans.xsd
                                                http://www.springframework.org/schema/aop http://www.springframework.org/schema/aop/spring-aop.xsd">

<!--  创建对象  -->
    <bean id="book" class="cn.pdsu.dff.aopxml.Book"></bean>
    <bean id="bookProxy" class="cn.pdsu.dff.aopxml.BookProxy"></bean>
<!--  配置aop的增强  -->
    <aop:config>
<!--    切入点    -->
        <aop:pointcut id="p" expression="execution(* cn.pdsu.dff.aopxml.Book.buy(..))"/>
<!--    配置切面    -->
        <aop:aspect ref="bookProxy">
<!--    增强作用在具体的方法上        -->
            <aop:before method="before" pointcut-ref="p"></aop:before>
        </aop:aspect>
    </aop:config>
@Test
public void test() {
    ApplicationContext context = new ClassPathXmlApplicationContext("bean11.xml") ;
    Book book = context.getBean("book",Book.class) ;
    book.buy();
}
Spring框架对JDBC进行的封装,使用JdbcTemplate方便实现对数据库的操作
<!-- 数据库连接池 -->
<bean id="dataSource" class="com.alibaba.druid.pool.DruidDataSource"
      destroy-method="close">
    <property name="url" value="jdbc:mysql:///book_db" />
    <property name="username" value="root" />
    <property name="password" value="123456" />
    <property name="driverClassName" value="com.mysql.jdbc.Driver" />
</bean>
<!--  JdbcTemplate对象  -->
    <bean id="jdbcTemplate" class="org.springframework.jdbc.core.JdbcTemplate">
<!--    注入dataSource    -->
        <property name="dataSource" ref="dataSource"></property>
    </bean>
配置文件
<!--  开启组件扫描  -->
    <context:component-scan base-package="cn.pdsu.wbb"></context:component-scan>
@Service
public class BookService {
    // 注入dao
    @Autowired
    private BookDao bookDao ;
}
public interface BookDao {
}
@Service
public class BookDaoImpl implements BookDao{
    // 注入JdbcTemplate对象
    @Autowired
    private JdbcTemplate jdbcTemplate ;

}
public class Book {
    private String id ;
    private String name ;
    private String status ;

    public String getId() {
        return id;
    }

    public void setId(String id) {
        this.id = id;
    }

    public String getName() {
        return name;
    }

    public void setName(String name) {
        this.name = name;
    }

    public String getStatus() {
        return status;
    }

    public void setStatus(String status) {
        this.status = status;
    }

    @Override
    public String toString() {
        return "Book{" +
                "id='" + id + '\'' +
                ", name='" + name + '\'' +
                ", status='" + status + '\'' +
                '}';
    }
}
(1)在dao中进行数据库添加操作
(2)调用jdbcTemplate对象里面的update方法实现添加操作

两个参数:
第一个参数:sql语句
第二个参数:可变参数,设置sql语句的值
@Service
public class BookService {
    // 注入dao
    @Autowired
    private BookDao bookDao ;

    // 添加的方法
    public void addBook(Book book) {
        bookDao.addBook(book);
    }
}
public interface BookDao {
    void addBook(Book book);
}
@Service
public class BookDaoImpl implements BookDao{
    @Autowired
    private JdbcTemplate jdbcTemplate ;

    @Override
    public void addBook(Book book) {
        // 创建sql语句
        String sql = "insert into book values(?,?,?)" ;
        // 调用方法实现
        int update = jdbcTemplate.update(sql,book.getId(),book.getName(),book.getStatus()) ;
        System.out.println(update);
    }
}
public class TestBook {
    @Test
    public void Test() {
        ApplicationContext context = new ClassPathXmlApplicationContext("bean1.xml") ;
        BookService bookService = context.getBean("bookService" , BookService.class) ;
        Book book = new Book();
        book.setId("1");
        book.setName("zhangsan");
        book.setStatus("a");
        bookService.addBook(book);
    }
}

// 修改的方法
@Override
public void update(Book book) {
    String sql = "update book set name=? , status=? where id=?" ;
    int update = jdbcTemplate.update(sql,book.getName(),book.getStatus(),book.getId()) ;
    System.out.println(update);
}

// 删除的方法
@Override
public void delete(Book book) {
    String sql = "delete from book where id=?" ;
    int update = jdbcTemplate.update(sql,book.getId()) ;
    System.out.println(update);
}
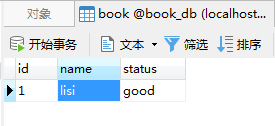
测试修改操作、结果
@Test
    public void Test() {
    ApplicationContext context = new ClassPathXmlApplicationContext("bean1.xml") ;
    BookService bookService = context.getBean("bookService" , BookService.class) ;
        Book book = new Book();
        book.setId("1");
        book.setName("lisi");
        book.setStatus("good");
        bookService.update(book);
    }
测试删除操作、结果
@Test
public void Test() {
    ApplicationContext context = new ClassPathXmlApplicationContext("bean1.xml") ;
    BookService bookService = context.getBean("bookService" , BookService.class) ;
    Book book = new Book();
    book.setId("1");
    bookService.deleteBook(book);
}
1.查询表中有多少条数据,返回某个值
2.使用JdbcTemplate实现数据查询返回某个值的代码

两个参数
第一个参数表示sql语句
第二个参数表示返回类型的Class
@Override
public int findCount() {
    String sql = "select count(*) from book" ;
    int count = jdbcTemplate.queryForObject(sql,Integer.class);
    return count;
}
1.场景:查询图书的详情页面
2.JdbcTemplate实现查询返回对象

三个参数
第一个参数表示sql语句
第二个参数表示RowMapper,是一个接口,返回不同类型的数据,使用这个接口里面的实现类完成数据的封装
第三个参数表示sql语句的值
@Override
public Book findObject(int id) {
    String sql = "select * from book where id=?" ;
    Book book = jdbcTemplate.queryForObject(sql, new BeanPropertyRowMapper<Book>(Book.class),id) ;
    return book;
}

1.场景:查询图书列表、分页
2.调用jdbcTemplate方法实现查询返回集合
 有三个参数
有三个参数
第一个参数:sql语句
第二个参数:RowMapper,是一个接口,返回不同类型的数据,使用这个接口里面的实现类完成数据的封装
第三个参数:sql语句的值
// 返回list集合
@Override
public List<Book> findAll() {
    String sql = "select * from book" ;
    List<Book> list = jdbcTemplate.query(sql,new BeanPropertyRowMapper<Book>(Book.class));
    return list;
}

1.批量操作

两个参数
第一个参数:sql语句
第二个参数:List集合,添加多条记录数据
// 批量添加
@Override
public void batchAdd(List<Object[]> batchArgs) {
    String sql = "insert into book value(?,?,?)" ;
    int[] ints = jdbcTemplate.batchUpdate(sql,batchArgs) ;
    System.out.println(ints);
}
测试
@Test
public void Test() {
    ApplicationContext context = new ClassPathXmlApplicationContext("cn\\pdsu\\jdbcTemplate\\xml\\bean1.xml") ;
    BookService bookService = context.getBean("bookService" , BookService.class) ;
    List<Object[]> batchArgs = new ArrayList<>() ;
    Object[] o1 = {3,"java","a"};
    Object[] o2 = {4,"c","b"};
    Object[] o3 = {5,"python","c"};
    batchArgs.add(o1);
    batchArgs.add(o2);
    batchArgs.add(o3);
    bookService.batchAdd(batchArgs);
}
// 批量修改
@Override
public void batchUpdate(List<Object[]> batchArgs) {
    String sql = "update book set name=? , status=? where id=?" ;
    int[] ints = jdbcTemplate.batchUpdate(sql,batchArgs) ;
    System.out.println(Arrays.toString(ints));
}
测试
@Test
public void Test() {
	ApplicationContext context = new ClassPathXmlApplicationContext("cn\\pdsu\\jdbcTemplate\\xml\\bean1.xml") ;
    BookService bookService = context.getBean("bookService" , BookService.class) ;
    List<Object[]> batchArgs = new ArrayList<>() ;
    Object[] o1 = {"JAVA","a",3};
    Object[] o2 = {"C","b",4};
    Object[] o3 = {"PYTHON","c",5};
    batchArgs.add(o1);
    batchArgs.add(o2);
    batchArgs.add(o3);
    bookService.batchUpdate(batchArgs);
}
@Override
public void batchDelete(List<Object[]> batchArgs) {
    String sql = "delete from book where id=?" ;
    int[] ints = jdbcTemplate.batchUpdate(sql,batchArgs) ;
    System.out.println(Arrays.toString(ints));
}
测试
@Test
public void Test() {
    ApplicationContext context = new ClassPathXmlApplicationContext("cn\\pdsu\\jdbcTemplate\\xml\\bean1.xml") ;
    BookService bookService = context.getBean("bookService" , BookService.class) ;
    List<Object[]> batchArgs = new ArrayList<>() ;
    Object[] o1 = {3};
    Object[] o2 = {4};
    batchArgs.add(o1);
    batchArgs.add(o2);
    bookService.batchDelete(batchArgs);
}
(1)事务是数据库操作的基本单元,逻辑上的一组操作,要么都成功,有一个失败就都失败
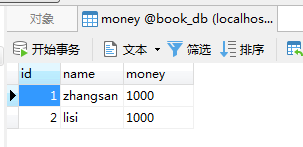
(2)典型的场景:银行转账
zhangsan转账100给lisi
zhangsan少100,lisi多100
(1)原子性(Atomicity):操作这些指令时,要么全部执行成功,要么全部不执行。只要其 中一个指令执行失败,所有的指令都执行失败,数据进行回滚,回到执行指令前的数据状态。
(2)一致性(Consistency):事务的执行使数据从一个状态转换为另一个状态,但是对于整个数据的完整性保持稳定。
(3)隔离性(Isolation):隔离性是当多个用户并发访问数据库时,比如操作同一张表时,数据库为每一个用户开启的事务,不能被其他事务的操作所干扰,多个并发事务之间要相互隔离。
(4)持久性(Durability):当事务正确完成后,它对于数据的改变是永久性的。
service注入dao,在dao中注入JdbcTemplate,在JdbcTemplate中注入DataScurce
UserDao接口
public interface UserDao {
}
UserDaoImpl类
@Repository
public class UserDaoImpl implements UserDao{
    @Autowired
    private JdbcTemplate jdbcTemplate ;
}
UserService类
@Service
public class UserService {
    @Autowired
    private UserDao userDao;
}
spring配置文件
<?xml version="1.0" encoding="UTF-8"?>
<beans xmlns="http://www.springframework.org/schema/beans"
       xmlns:xsi="http://www.w3.org/2001/XMLSchema-instance"
       xmlns:context="http://www.springframework.org/schema/context"
       xsi:schemaLocation="http://www.springframework.org/schema/beans http://www.springframework.org/schema/beans/spring-beans.xsd
                            http://www.springframework.org/schema/context http://www.springframework.org/schema/context/spring-context.xsd">

<!--  组件扫描  -->
    <context:component-scan base-package="cn.edu.pdsu.work1"></context:component-scan>


    <!-- 数据库连接池 -->
    <bean id="dataSource" class="com.alibaba.druid.pool.DruidDataSource"
          destroy-method="close">
        <property name="url" value="jdbc:mysql:///book_db" />
        <property name="username" value="root" />
        <property name="password" value="123456" />
        <property name="driverClassName" value="com.mysql.jdbc.Driver" />
    </bean>
<!--  创建JdbcTemplate对象  -->
    <bean id="jdbcTemplate" class="org.springframework.jdbc.core.JdbcTemplate">
<!--    注入dataSource    -->
        <property name="dataSource" ref="dataSource"></property>
    </bean>
</beans>
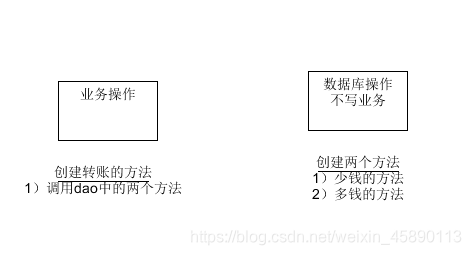
多钱和少钱的方法,在service中创建转账的方法
UserDao
// 多钱
public void addMoney() ;
// 少钱
public void reduceMoney() ;
UserDaoImpl
// zhangsan转账100给lisi
// 多钱
@Override
public void addMoney() {
    String sql = "update money set money=money+? where name=?" ;
    jdbcTemplate.update(sql,100,"lisi") ;
}

// 少钱
@Override
public void reduceMoney() {
    String sql = "update money set money=money-? where name=?" ;
    jdbcTemplate.update(sql,100,"zhangsan") ;
}
测试、结果
@Test
public void test() {
    ApplicationContext context = new ClassPathXmlApplicationContext("bean3.xml") ;
    UserService userService = context.getBean("userService",UserService.class) ;
    userService.accountMoney();
}
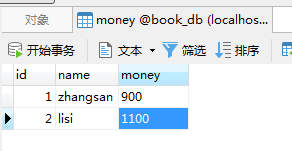
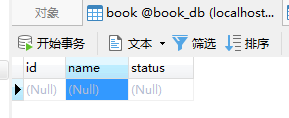
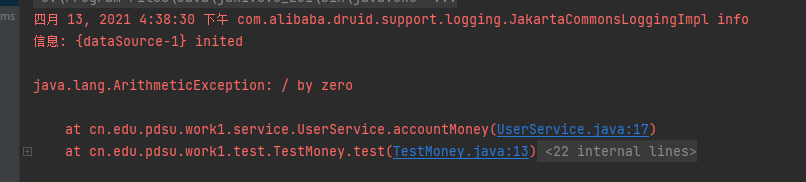
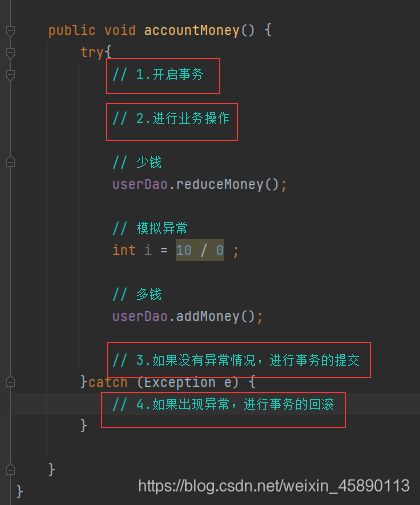
上面的代码正常执行的情况下是没有问题的,但是如果在代码执行过程中出现了异常,则就会出现转账的问题
public void accountMoney() {
    // 少钱
    userDao.reduceMoney();

    // 模拟异常
    int i = 10 / 0 ;

    // 多钱
    userDao.addMoney();
}
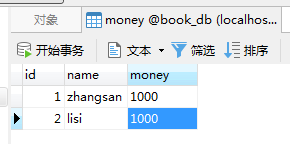
将数据库中的数据都还原到1000,再次模拟转账。结果如下
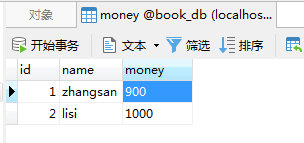
可以看到,异常出现后,zhangsan的钱确实少了,但是钱并没有转到lisi的账户下
(1)如何解决上面的问题?
使用事务
(2)事务操作过程
1.事务添加到javaee三层结构的Service层(业务逻辑层)
2.在Spring中进行事务管理操作
两种方式:编程式事务管理和声明式事务管理(使用)
3.声明式事务管理
(1)基于注解(使用)
(2)基于xml配置文件
4.在spring中进行声明式事务管理,底层使用AOP原理
5.spring事务管理API
提供的接口,代表事务管理器,这个接口针对不同的框架提供了不同的实现类

<!--  创建事务管理器  -->
    <bean id="transactionManager" class="org.springframework.jdbc.datasource.DataSourceTransactionManager">
<!--    注入数据源    -->
        <property name="dataSource" ref="dataSource"></property>
    </bean>
(1)在spring配置文件中引入tx名称空间
<?xml version="1.0" encoding="UTF-8"?>
<beans xmlns="http://www.springframework.org/schema/beans"
       xmlns:xsi="http://www.w3.org/2001/XMLSchema-instance"
       xmlns:context="http://www.springframework.org/schema/context"
       xmlns:aop="http://www.springframework.org/schema/aop"
       xmlns:tx="http://www.springframework.org/schema/tx"
       xsi:schemaLocation="http://www.springframework.org/schema/beans http://www.springframework.org/schema/beans/spring-beans.xsd
                            http://www.springframework.org/schema/context http://www.springframework.org/schema/context/spring-context.xsd
                            http://www.springframework.org/schema/aop http://www.springframework.org/schema/aop/spring-aop.xsd
                            http://www.springframework.org/schema/tx http://www.springframework.org/schema/tx/spring-tx.xsd">
(2)开启事务的注解
<!--  开启事务的注解  -->
    <tx:annotation-driven transaction-manager="transactionManager"></tx:annotation-driven>
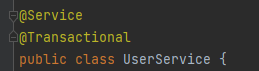
(1)@Transactional,这个注解既可以添加到类上面,也可以添加到方法上面
(2)添加到类上面表示类中的所有方法都添加了事务
(3)添加到方法上面表示只一个方法添加了事务
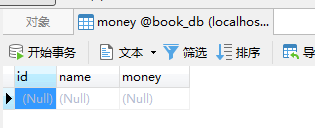
代码执行前表中数据
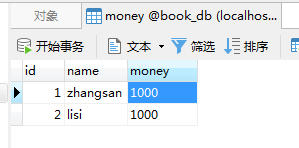
执行代码

代码执行后表中数据

在service类上面添加注解@Transactional,在这个注解中可以配置事务相关参数
多事务方法之间进行调用,这个过程中事务是如何进行管理的

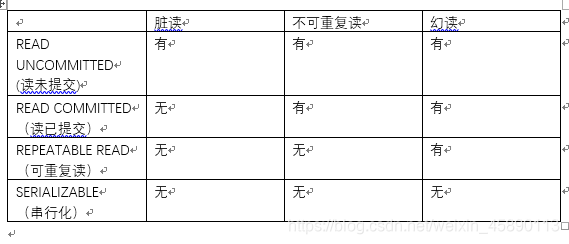
1.事务里面有一个特性,多事务操作之间不会互相影响,不考虑隔离性会产生很多问题
2.三个问题:脏读、不可重复读、虚(幻)读
脏读:一个未提交事务读取到另外一个未提交事务的数据
不可重复读:一个未提交的事务读取到另外一个提交事务修改的数据
幻读:一个未提交事务读取到另外一个提交事务的数据
(3)通过事务的隔离级别来解决问题

事务需要在一定的时间内进行提交,否则将进行回滚。默认情况下其值为-1,也就是没有设置超时时间,设置时间以秒为单位进行计算
1.读:查询操作 写:增删改操作
2.readOnly的默认值是false,表示增删改查都可以进行操作
3.设置readOnly的值为true后只能进行查询
设置出现了哪些异常进行回滚
设置出现了哪些异常不进行回滚
(1)第一步配置事务管理器
(2)第二步配置通知
(3)第三步配置切入点和切面
<!--  1.配置事务管理器  -->
    <bean id="transactionManager" class="org.springframework.jdbc.datasource.DataSourceTransactionManager">
<!--    注入数据源    -->
        <property name="dataSource" ref="dataSource"></property>
    </bean>
<!--  2.配置通知  -->
    <tx:advice id="txAdvice">
<!--    配置事务参数    -->
        <tx:attributes>
        <!-- 指定哪种规则的方法上添加事务 -->
            <tx:method name="accountMoney" propagation="REQUIRED"/>  <!-- 表示在accountMoney方法上添加事务 -->
            <tx:method name="account*"/>       <!-- 表示在以account开头的方法上添加事务 -->
        </tx:attributes>
    </tx:advice>
<!--  3.配置切入点和切面  -->
    <aop:config>
        <!-- 配置切入点 -->
        <aop:pointcut id="p" expression="execution(* cn.edu.pdsu.work1.service.UserService.*(..))"/>
        <!-- 配置切面 -->
        <aop:advisor advice-ref="txAdvice" pointcut-ref="p"></aop:advisor>
    </aop:config>
Config配置类
import com.alibaba.druid.pool.DruidDataSource;
import org.springframework.beans.factory.annotation.Configurable;
import org.springframework.context.annotation.Bean;
import org.springframework.context.annotation.ComponentScan;
import org.springframework.context.annotation.Configuration;
import org.springframework.jdbc.core.JdbcTemplate;
import org.springframework.jdbc.datasource.DataSourceTransactionManager;
import org.springframework.transaction.annotation.EnableTransactionManagement;

import javax.sql.DataSource;

@Configuration  // 声明配置类
@ComponentScan(basePackages = "cn.edu.pdsu.work1")  // 组件扫描
@EnableTransactionManagement    // 开启事务
public class Config {
    // 创建数据库的连接池
    @Bean
    public DruidDataSource getDruidDataSource() {
        DruidDataSource druidDataSource = new DruidDataSource() ;
        druidDataSource.setDriverClassName("com.mysql.jdbc.Driver");
        druidDataSource.setUrl("jdbc:mysql:///book_db");
        druidDataSource.setUsername("root");
        druidDataSource.setPassword("123456");
        return druidDataSource ;
    }

    // 创建Jdbc模板对象
    @Bean
    public JdbcTemplate getJdbcTemplate(DataSource dataSource) {
        // 到ioc容器中根据类型找到dataSource
        JdbcTemplate jdbcTemplate = new JdbcTemplate() ;
        // 注入dataSource
        jdbcTemplate.setDataSource(dataSource);
        return jdbcTemplate ;
    }

    // 创建事务管理器
    @Bean
    public DataSourceTransactionManager getDataSourceTransactionManager(DataSource dataSource) {
        DataSourceTransactionManager transactionManager = new DataSourceTransactionManager() ;
        transactionManager.setDataSource(dataSource);
        return transactionManager;
    }
}
测试,结果
@Test
public void test2() {
    ApplicationContext context = new AnnotationConfigApplicationContext(Config.class) ;
    UserService userService = context.getBean("userService",UserService.class) ;
    userService.accountMoney();
}
测试前数据库数据
执行代码

测试后数据库数据


深or浅拷贝 深浅拷贝 前言 一、深浅拷贝哪家强 二、写时拷贝 总结 前言 之前我们...
今天在做项目时,在页面中用ajax返回了另一个页面,突然发现返回页面中的表格把...
我们知道今年微软会发布Windows10 21H2,新的Windows10系统会全面使用Fluent Des...
ajax简介 AJAX即“Asynchronous Javascript And XML”(异步JavaScript和XML),...
本文实例讲述了ajax遍历xml文档的方法。分享给大家供大家参考。具体分析如下: X...
ansible自动化运维 一、ansible简介 二、ansible环境安装和部署 环境准备 免交互...
在访问现在很火的google plus时,细心的用户也许会发现页面之间的点击是通过ajax...
1、注册时验证数据库用户名是否存在。 2、输入密码时提示密码强度和验证2次密码...
创建多个带有不同参数的存储过程(stored procedure)来完成同一个任务总是一个...
前言 最近项目要使用RabbitMQ,网上已经有很多优秀的文章了,百度百科对RabbitMQ...

