组件交互
本文包含了常见的组件通讯场景,也就是让两个或多个组件之间共享信息的方法。
通过输入型绑定把数据从父组件传到子组件。
HeroChildComponent 有两个输入型属性,它们通常带@Input 装饰器。
component-interaction/src/app/hero-child.component.ts
content_copyimport { Component, Input } from '@angular/core';?import { Hero } from './hero';?@Component({ selector: 'app-hero-child', template: ` <h3>{{hero.name}} says:</h3> <p>I, {{hero.name}}, am at your service, {{masterName}}.</p> `})export class HeroChildComponent { @Input() hero: Hero; @Input('master') masterName: string;}第二个 @Input 为子组件的属性名 masterName 指定一个别名 master(译者注:不推荐为起别名,请参见风格指南).
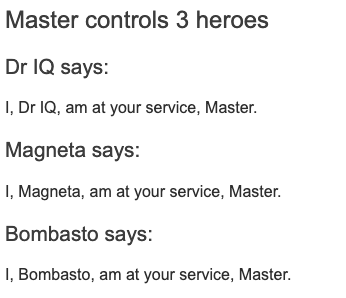
父组件 HeroParentComponent 把子组件的 HeroChildComponent 放到 *ngFor循环器中,把自己的 master 字符串属性绑定到子组件的 master 别名上,并把每个循环的 hero 实例绑定到子组件的 hero 属性。
component-interaction/src/app/hero-parent.component.ts
content_copyimport { Component } from '@angular/core';?import { HEROES } from './hero';?@Component({ selector: 'app-hero-parent', template: ` <h2>{{master}} controls {{heroes.length}} heroes</h2> <app-hero-child *ngFor="let hero of heroes" [hero]="hero" [master]="master"> </app-hero-child> `})export class HeroParentComponent { heroes = HEROES; master = 'Master';}运行应用程序会显示三个英雄:
测试一下!
端到端测试,用于确保所有的子组件都像所期待的那样被初始化并显示出来。
component-interaction/e2e/src/app.e2e-spec.ts
content_copy// ...let _heroNames = ['Mr. IQ', 'Magneta', 'Bombasto'];let _masterName = 'Master';?it('should pass properties to children properly', function () { let parent = element.all(by.tagName('app-hero-parent')).get(0); let heroes = parent.all(by.tagName('app-hero-child'));? for (let i = 0; i < _heroNames.length; i++) { let childTitle = heroes.get(i).element(by.tagName('h3')).getText(); let childDetail = heroes.get(i).element(by.tagName('p')).getText(); expect(childTitle).toEqual(_heroNames[i] + ' says:'); expect(childDetail).toContain(_masterName); }});// ...通过 setter 截听输入属性值的变化
使用一个输入属性的 setter,以拦截父组件中值的变化,并采取行动。
子组件 NameChildComponent 的输入属性 name 上的这个 setter,会 trim 掉名字里的空格,并把空值替换成默认字符串。
component-interaction/src/app/name-child.component.ts
content_copyimport { Component, Input } from '@angular/core';?@Component({ selector: 'app-name-child', template: '<h3>"{{name}}"</h3>'})export class NameChildComponent { private _name = '';? @Input() set name(name: string) { this._name = (name && name.trim()) || '<no name set>'; }? get name(): string { return this._name; }}下面的 NameParentComponent 展示了各种名字的处理方式,包括一个全是空格的名字。
component-interaction/src/app/name-parent.component.ts
content_copyimport { Component } from '@angular/core';?@Component({ selector: 'app-name-parent', template: ` <h2>Master controls {{names.length}} names</h2> <app-name-child *ngFor="let name of names" [name]="name"></app-name-child> `})export class NameParentComponent { // Displays 'Mr. IQ', '<no name set>', 'Bombasto' names = ['Mr. IQ', ' ', ' Bombasto '];}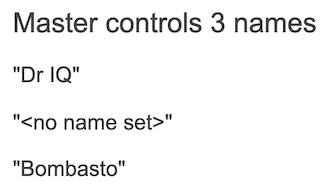
测试一下!
端到端测试:输入属性的 setter,分别使用空名字和非空名字。
component-interaction/e2e/src/app.e2e-spec.ts
content_copy// ...it('should display trimmed, non-empty names', function () { let _nonEmptyNameIndex = 0; let _nonEmptyName = '"Mr. IQ"'; let parent = element.all(by.tagName('app-name-parent')).get(0); let hero = parent.all(by.tagName('app-name-child')).get(_nonEmptyNameIndex);? let displayName = hero.element(by.tagName('h3')).getText(); expect(displayName).toEqual(_nonEmptyName);});?it('should replace empty name with default name', function () { let _emptyNameIndex = 1; let _defaultName = '"<no name set>"'; let parent = element.all(by.tagName('app-name-parent')).get(0); let hero = parent.all(by.tagName('app-name-child')).get(_emptyNameIndex);? let displayName = hero.element(by.tagName('h3')).getText(); expect(displayName).toEqual(_defaultName);});// ...通过ngOnChanges()来截听输入属性值的变化
使用 OnChanges 生命周期钩子接口的 ngOnChanges() 方法来监测输入属性值的变化并做出回应。
当需要监视多个、交互式输入属性的时候,本方法比用属性的 setter 更合适。
学习关于 ngOnChanges() 的更多知识,参见生命周期钩子一章。
component-interaction/src/app/version-child.component.ts
content_copyimport { Component, Input, OnChanges, SimpleChange } from '@angular/core';?@Component({ selector: 'app-version-child', template: ` <h3>Version {{major}}.{{minor}}</h3> <h4>Change log:</h4> <ul> <li *ngFor="let change of changeLog">{{change}}</li> </ul> `})export class VersionChildComponent implements OnChanges { @Input() major: number; @Input() minor: number; changeLog: string[] = [];? ngOnChanges(changes: {[propKey: string]: SimpleChange}) { let log: string[] = []; for (let propName in changes) { let changedProp = changes[propName]; let to = JSON.stringify(changedProp.currentValue); if (changedProp.isFirstChange()) { log.push(`Initial value of ${propName} set to ${to}`); } else { let from = JSON.stringify(changedProp.previousValue); log.push(`${propName} changed from ${from} to ${to}`); } } this.changeLog.push(log.join(', ')); }}component-interaction/src/app/version-parent.component.ts
content_copyimport { Component } from '@angular/core';?@Component({ selector: 'app-version-parent', template: ` <h2>Source code version</h2> <button (click)="newMinor()">New minor version</button> <button (click)="newMajor()">New major version</button> <app-version-child [major]="major" [minor]="minor"></app-version-child> `})export class VersionParentComponent { major = 1; minor = 23;? newMinor() { this.minor++; }? newMajor() { this.major++; this.minor = 0; }}下面是点击按钮的结果。

测试一下!
测试确保这两个输入属性值都被初始化了,当点击按钮后,ngOnChanges 应该被调用,属性的值也符合预期。
component-interaction/e2e/src/app.e2e-spec.ts
content_copy// ...// Test must all execute in this exact orderit('should set expected initial values', function () { let actual = getActual();? let initialLabel = 'Version 1.23'; let initialLog = 'Initial value of major set to 1, Initial value of minor set to 23';? expect(actual.label).toBe(initialLabel); expect(actual.count).toBe(1); expect(actual.logs.get(0).getText()).toBe(initialLog);});?it('should set expected values after clicking \'Minor\' twice', function () { let repoTag = element(by.tagName('app-version-parent')); let newMinorButton = repoTag.all(by.tagName('button')).get(0);? newMinorButton.click().then(function() { newMinorButton.click().then(function() { let actual = getActual();? let labelAfter2Minor = 'Version 1.25'; let logAfter2Minor = 'minor changed from 24 to 25';? expect(actual.label).toBe(labelAfter2Minor); expect(actual.count).toBe(3); expect(actual.logs.get(2).getText()).toBe(logAfter2Minor); }); });});?it('should set expected values after clicking \'Major\' once', function () { let repoTag = element(by.tagName('app-version-parent')); let newMajorButton = repoTag.all(by.tagName('button')).get(1);? newMajorButton.click().then(function() { let actual = getActual();? let labelAfterMajor = 'Version 2.0'; let logAfterMajor = 'major changed from 1 to 2, minor changed from 25 to 0';? expect(actual.label).toBe(labelAfterMajor); expect(actual.count).toBe(4); expect(actual.logs.get(3).getText()).toBe(logAfterMajor); });});?function getActual() { let versionTag = element(by.tagName('app-version-child')); let label = versionTag.element(by.tagName('h3')).getText(); let ul = versionTag.element((by.tagName('ul'))); let logs = ul.all(by.tagName('li'));? return { label: label, logs: logs, count: logs.count() };}// ...父组件监听子组件的事件
子组件暴露一个 EventEmitter 属性,当事件发生时,子组件利用该属性 emits(向上弹射)事件。父组件绑定到这个事件属性,并在事件发生时作出回应。
子组件的 EventEmitter 属性是一个输出属性,通常带有@Output 装饰器,就像在 VoterComponent 中看到的。
component-interaction/src/app/voter.component.ts
content_copyimport { Component, EventEmitter, Input, Output } from '@angular/core';?@Component({ selector: 'app-voter', template: ` <h4>{{name}}</h4> <button (click)="vote(true)" [disabled]="didVote">Agree</button> <button (click)="vote(false)" [disabled]="didVote">Disagree</button> `})export class VoterComponent { @Input() name: string; @Output() voted = new EventEmitter<boolean>(); didVote = false;? vote(agreed: boolean) { this.voted.emit(agreed); this.didVote = true; }}点击按钮会触发 true 或 false(布尔型有效载荷)的事件。
父组件 VoteTakerComponent 绑定了一个事件处理器(onVoted()),用来响应子组件的事件($event)并更新一个计数器。
component-interaction/src/app/votetaker.component.ts
content_copyimport { Component } from '@angular/core';?@Component({ selector: 'app-vote-taker', template: ` <h2>Should mankind colonize the Universe?</h2> <h3>Agree: {{agreed}}, Disagree: {{disagreed}}</h3> <app-voter *ngFor="let voter of voters" [name]="voter" (voted)="onVoted($event)"> </app-voter> `})export class VoteTakerComponent { agreed = 0; disagreed = 0; voters = ['Mr. IQ', 'Ms. Universe', 'Bombasto'];? onVoted(agreed: boolean) { agreed ? this.agreed++ : this.disagreed++; }}框架(Angular)把事件参数(用 $event 表示)传给事件处理方法,这个方法会处理:
测试一下!
测试确保点击 Agree 和 Disagree 按钮时,计数器被正确更新。
component-interaction/e2e/src/app.e2e-spec.ts
content_copy// ...it('should not emit the event initially', function () { let voteLabel = element(by.tagName('app-vote-taker')) .element(by.tagName('h3')).getText(); expect(voteLabel).toBe('Agree: 0, Disagree: 0');});?it('should process Agree vote', function () { let agreeButton1 = element.all(by.tagName('app-voter')).get(0) .all(by.tagName('button')).get(0); agreeButton1.click().then(function() { let voteLabel = element(by.tagName('app-vote-taker')) .element(by.tagName('h3')).getText(); expect(voteLabel).toBe('Agree: 1, Disagree: 0'); });});?it('should process Disagree vote', function () { let agreeButton1 = element.all(by.tagName('app-voter')).get(1) .all(by.tagName('button')).get(1); agreeButton1.click().then(function() { let voteLabel = element(by.tagName('app-vote-taker')) .element(by.tagName('h3')).getText(); expect(voteLabel).toBe('Agree: 1, Disagree: 1'); });});// ...父组件与子组件通过本地变量互动
父组件不能使用数据绑定来读取子组件的属性或调用子组件的方法。但可以在父组件模板里,新建一个本地变量来代表子组件,然后利用这个变量来读取子组件的属性和调用子组件的方法,如下例所示。
子组件 CountdownTimerComponent 进行倒计时,归零时发射一个导弹。start 和 stop 方法负责控制时钟并在模板里显示倒计时的状态信息。
component-interaction/src/app/countdown-timer.component.ts
content_copyimport { Component, OnDestroy, OnInit } from '@angular/core';?@Component({ selector: 'app-countdown-timer', template: '<p>{{message}}</p>'})export class CountdownTimerComponent implements OnInit, OnDestroy {? intervalId = 0; message = ''; seconds = 11;? clearTimer() { clearInterval(this.intervalId); }? ngOnInit() { this.start(); } ngOnDestroy() { this.clearTimer(); }? start() { this.countDown(); } stop() { this.clearTimer(); this.message = `Holding at T-${this.seconds} seconds`; }? private countDown() { this.clearTimer(); this.intervalId = window.setInterval(() => { this.seconds -= 1; if (this.seconds === 0) { this.message = 'Blast off!'; } else { if (this.seconds < 0) { this.seconds = 10; } // reset this.message = `T-${this.seconds} seconds and counting`; } }, 1000); }}计时器组件的宿主组件 CountdownLocalVarParentComponent 如下:
component-interaction/src/app/countdown-parent.component.ts
content_copyimport { Component } from '@angular/core';import { CountdownTimerComponent } from './countdown-timer.component';?@Component({ selector: 'app-countdown-parent-lv', template: ` <h3>Countdown to Liftoff (via local variable)</h3> <button (click)="timer.start()">Start</button> <button (click)="timer.stop()">Stop</button> <div class="seconds">{{timer.seconds}}</div> <app-countdown-timer #timer></app-countdown-timer> `, styleUrls: ['../assets/demo.css']})export class CountdownLocalVarParentComponent { }父组件不能通过数据绑定使用子组件的 start 和 stop 方法,也不能访问子组件的 seconds 属性。
把本地变量(#timer)放到(<countdown-timer>)标签中,用来代表子组件。这样父组件的模板就得到了子组件的引用,于是可以在父组件的模板中访问子组件的所有属性和方法。
这个例子把父组件的按钮绑定到子组件的 start 和 stop 方法,并用插值表达式来显示子组件的 seconds 属性。
下面是父组件和子组件一起工作时的效果。
测试一下!
测试确保在父组件模板中显示的秒数和子组件状态信息里的秒数同步。它还会点击 Stop 按钮来停止倒计时:
component-interaction/e2e/src/app.e2e-spec.ts
content_copy// ...it('timer and parent seconds should match', function () { let parent = element(by.tagName(parentTag)); let message = parent.element(by.tagName('app-countdown-timer')).getText(); browser.sleep(10); // give `seconds` a chance to catchup with `message` let seconds = parent.element(by.className('seconds')).getText(); expect(message).toContain(seconds);});?it('should stop the countdown', function () { let parent = element(by.tagName(parentTag)); let stopButton = parent.all(by.tagName('button')).get(1);? stopButton.click().then(function() { let message = parent.element(by.tagName('app-countdown-timer')).getText(); expect(message).toContain('Holding'); });});// ...父组件调用@ViewChild()
这个本地变量方法是个简单便利的方法。但是它也有局限性,因为父组件-子组件的连接必须全部在父组件的模板中进行。父组件本身的代码对子组件没有访问权。
如果父组件的类需要读取子组件的属性值或调用子组件的方法,就不能使用本地变量方法。
当父组件类需要这种访问时,可以把子组件作为 ViewChild,注入到父组件里面。
下面的例子用与倒计时相同的范例来解释这种技术。 它的外观或行为没有变化。子组件CountdownTimerComponent也和原来一样。
由本地变量切换到 ViewChild 技术的唯一目的就是做示范。
下面是父组件 CountdownViewChildParentComponent:
component-interaction/src/app/countdown-parent.component.ts
content_copyimport { AfterViewInit, ViewChild } from '@angular/core';import { Component } from '@angular/core';import { CountdownTimerComponent } from './countdown-timer.component';?@Component({ selector: 'app-countdown-parent-vc', template: ` <h3>Countdown to Liftoff (via ViewChild)</h3> <button (click)="start()">Start</button> <button (click)="stop()">Stop</button> <div class="seconds">{{ seconds() }}</div> <app-countdown-timer></app-countdown-timer> `, styleUrls: ['../assets/demo.css']})export class CountdownViewChildParentComponent implements AfterViewInit {? @ViewChild(CountdownTimerComponent) private timerComponent: CountdownTimerComponent;? seconds() { return 0; }? ngAfterViewInit() { // Redefine `seconds()` to get from the `CountdownTimerComponent.seconds` ... // but wait a tick first to avoid one-time devMode // unidirectional-data-flow-violation error setTimeout(() => this.seconds = () => this.timerComponent.seconds, 0); }? start() { this.timerComponent.start(); } stop() { this.timerComponent.stop(); }}把子组件的视图插入到父组件类需要做一点额外的工作。
首先,你要使用 ViewChild 装饰器导入这个引用,并挂上 AfterViewInit生命周期钩子。
接着,通过 @ViewChild 属性装饰器,将子组件 CountdownTimerComponent注入到私有属性 timerComponent 里面。
组件元数据里就不再需要 #timer 本地变量了。而是把按钮绑定到父组件自己的 start 和 stop 方法,使用父组件的 seconds 方法的插值表达式来展示秒数变化。
这些方法可以直接访问被注入的计时器组件。
ngAfterViewInit() 生命周期钩子是非常重要的一步。被注入的计时器组件只有在 Angular 显示了父组件视图之后才能访问,所以它先把秒数显示为 0.
然后 Angular 会调用 ngAfterViewInit 生命周期钩子,但这时候再更新父组件视图的倒计时就已经太晚了。Angular 的单向数据流规则会阻止在同一个周期内更新父组件视图。应用在显示秒数之前会被迫再等一轮。
使用 setTimeout() 来等下一轮,然后改写 seconds() 方法,这样它接下来就会从注入的这个计时器组件里获取秒数的值。
测试一下!
使用和之前一样的倒计时测试。
父组件和子组件通过服务来通讯
父组件和它的子组件共享同一个服务,利用该服务在家庭内部实现双向通讯。
该服务实例的作用域被限制在父组件和其子组件内。这个组件子树之外的组件将无法访问该服务或者与它们通讯。
这个 MissionService 把 MissionControlComponent 和多个 AstronautComponent 子组件连接起来。
component-interaction/src/app/mission.service.ts
content_copyimport { Injectable } from '@angular/core';import { Subject } from 'rxjs';?@Injectable()export class MissionService {? // Observable string sources private missionAnnouncedSource = new Subject<string>(); private missionConfirmedSource = new Subject<string>();? // Observable string streams missionAnnounced$ = this.missionAnnouncedSource.asObservable(); missionConfirmed$ = this.missionConfirmedSource.asObservable();? // Service message commands announceMission(mission: string) { this.missionAnnouncedSource.next(mission); }? confirmMission(astronaut: string) { this.missionConfirmedSource.next(astronaut); }}MissionControlComponent 提供服务的实例,并将其共享给它的子组件(通过 providers 元数据数组),子组件可以通过构造函数将该实例注入到自身。
component-interaction/src/app/missioncontrol.component.ts
content_copyimport { Component } from '@angular/core';?import { MissionService } from './mission.service';?@Component({ selector: 'app-mission-control', template: ` <h2>Mission Control</h2> <button (click)="announce()">Announce mission</button> <app-astronaut *ngFor="let astronaut of astronauts" [astronaut]="astronaut"> </app-astronaut> <h3>History</h3> <ul> <li *ngFor="let event of history">{{event}}</li> </ul> `, providers: [MissionService]})export class MissionControlComponent { astronauts = ['Lovell', 'Swigert', 'Haise']; history: string[] = []; missions = ['Fly to the moon!', 'Fly to mars!', 'Fly to Vegas!']; nextMission = 0;? constructor(private missionService: MissionService) { missionService.missionConfirmed$.subscribe( astronaut => { this.history.push(`${astronaut} confirmed the mission`); }); }? announce() { let mission = this.missions[this.nextMission++]; this.missionService.announceMission(mission); this.history.push(`Mission "${mission}" announced`); if (this.nextMission >= this.missions.length) { this.nextMission = 0; } }}AstronautComponent 也通过自己的构造函数注入该服务。由于每个 AstronautComponent 都是 MissionControlComponent 的子组件,所以它们获取到的也是父组件的这个服务实例。
component-interaction/src/app/astronaut.component.ts
content_copyimport { Component, Input, OnDestroy } from '@angular/core';?import { MissionService } from './mission.service';import { Subscription } from 'rxjs';?@Component({ selector: 'app-astronaut', template: ` <p> {{astronaut}}: <strong>{{mission}}</strong> <button (click)="confirm()" [disabled]="!announced || confirmed"> Confirm </button> </p> `})export class AstronautComponent implements OnDestroy { @Input() astronaut: string; mission = '<no mission announced>'; confirmed = false; announced = false; subscription: Subscription;? constructor(private missionService: MissionService) { this.subscription = missionService.missionAnnounced$.subscribe( mission => { this.mission = mission; this.announced = true; this.confirmed = false; }); }? confirm() { this.confirmed = true; this.missionService.confirmMission(this.astronaut); }? ngOnDestroy() { // prevent memory leak when component destroyed this.subscription.unsubscribe(); }}注意,这个例子保存了 subscription 变量,并在 AstronautComponent 被销毁时调用 unsubscribe() 退订。 这是一个用于防止内存泄漏的保护措施。实际上,在这个应用程序中并没有这个风险,因为 AstronautComponent 的生命期和应用程序的生命期一样长。但在更复杂的应用程序环境中就不一定了。
不需要在 MissionControlComponent 中添加这个保护措施,因为它作为父组件,控制着 MissionService 的生命期。
History 日志证明了:在父组件 MissionControlComponent 和子组件 AstronautComponent 之间,信息通过该服务实现了双向传递。
测试一下!
测试确保点击父组件 MissionControlComponent 和子组件 AstronautComponent 两个的组件的按钮时,History 日志和预期的一样。
component-interaction/e2e/src/app.e2e-spec.ts
content_copy// ...it('should announce a mission', function () { let missionControl = element(by.tagName('app-mission-control')); let announceButton = missionControl.all(by.tagName('button')).get(0); announceButton.click().then(function () { let history = missionControl.all(by.tagName('li')); expect(history.count()).toBe(1); expect(history.get(0).getText()).toMatch(/Mission.* announced/); });});?it('should confirm the mission by Lovell', function () { testConfirmMission(1, 2, 'Lovell');});?it('should confirm the mission by Haise', function () { testConfirmMission(3, 3, 'Haise');});?it('should confirm the mission by Swigert', function () { testConfirmMission(2, 4, 'Swigert');});?function testConfirmMission(buttonIndex: number, expectedLogCount: number, astronaut: string) { let _confirmedLog = ' confirmed the mission'; let missionControl = element(by.tagName('app-mission-control')); let confirmButton = missionControl.all(by.tagName('button')).get(buttonIndex); confirmButton.click().then(function () { let history = missionControl.all(by.tagName('li')); expect(history.count()).toBe(expectedLogCount); expect(history.get(expectedLogCount - 1).getText()).toBe(astronaut + _confirmedLog); });}// ...本文档系腾讯云开发者社区成员共同维护,如有问题请联系 cloudcommunity@tencent.com