

为保证运行镜像的ECS实例能成功完成初始化配置,建议您在制作Linux类型自定义镜像时,在源服务器上安装cloud-init。本文介绍安装阿里云版cloud-init和社区版cloud-init的操作步骤。
背景信息
cloud-init是云平台为Linux操作系统的虚拟机做系统初始化配置的开源服务软件。阿里云、AWS、Azure和OpenStack等主流云平台均支持cloud-init。阿里云版cloud-init能在ECS实例启动阶段完成系统初始化配置,包括NTP、软件源、主机名和SSH密钥对等,同时执行实例自定义数据(User data)脚本。更多详情,请参见cloud-init官方文档。
阿里云所有公共镜像默认安装cloud-init。为保证使用自定义镜像创建的ECS实例能自动初始化系统配置,建议您在以下场景中为Linux服务器安装阿里云版cloud-init。
- 准备迁移上云的,但未安装cloud-init的Linux服务器。
说明 不准备迁移上云的服务器需谨慎安装。
- 已安装cloud-init,但版本低于0.7.9的Linux服务器。
- 已在阿里云运行的,但未安装cloud-init的ECS实例。
版本说明
不同云平台及不同版本之间的cloud-init不完全兼容,请选择合适的版本并配置合适的数据源(datasource)。其中,阿里云cloud-init的最新版本为19.1.7,数据源为Aliyun。
注意 安装后,cloud-init默认开机自启动,若您选择的版本不兼容或数据源配置不当,下次重启服务器时可能导致cloud-init运行异常、系统启动缓慢,甚至无法正常启动系统。因此,请选择较高版本,以及合适的数据源(如
Aliyun)。
使用cloud-init时,您需要注意以下版本区别。
- 0.7.6a版本:初期的阿里云版本cloud-init,在Python环境上依赖于python2.7。部分低版本操作系统的公共镜像仍旧保持该版本cloud-init。如果您所使用的镜像需要安装cloud-init
0.7.6a版本,请参见(可选)安装阿里云版cloud-init 0.7.6a15。
说明 由于Python社区停止对python2.7的技术支持,建议您尽量使用高版本cloud-init,避免依赖库隐患。
- 低于社区0.7.9版本:初期的社区版cloud-init,不适用于初始化ECS实例,必须升级至较高版本。
- 18版本:高于18版本的cloud-init会自动完成网络的初始化配置,自动配置的网络为
BOOTPROTO=dhcp DEVICE=eth0 ONBOOT=yes STARTMODE=auto TYPE=Ethernet USERCTL=no。如果您安装了cloud-init后有自定义网络配置的需求,请参见(可选)自定义网络配置。 - 19.1版本:阿里云公共镜像将逐步升级到cloud-init 19.1版本,在Python环境上依赖于python3.6。
检查cloud-init版本
(推荐)安装阿里云版cloud-init 19.1.7
按以下步骤,下载数据源为Aliyun的19.1.7版本cloud-init。
- 确认cloud-init是否安装成功。若返回
"description": "success",表示安装成功。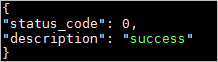
不同Linux发行平台安装阿里云cloud-init的shell脚本示例如下,供您参考。实际安装时,请根据您的操作系统适当调整脚本。
- CentOS 6/7
# 检查安装python3-pip if ! python3 -c 'import setuptools' >& /dev/null; then yum -y install python3-pip fi # 备份旧版cloud-init test -d /etc/cloud && mv /etc/cloud /etc/cloud-old # 下载并解压阿里云版cloud-init wget https://ecs-image-tools.oss-cn-hangzhou.aliyuncs.com/cloud-init-19.1.7.tgz tar -zxvf ./cloud-init-19.1.7.tgz # 安装cloud-init issue_major=$( cat /etc/redhat-release | grep -Eo '[0-9]+\.?[0-9]+' | head -1 | awk -F'.' '{printf $1}') bash ./cloud-init-*/tools/deploy.sh centos "$issue_major" - Red Hat Enterprise Linux 6/7
# 检查安装python3-pip if ! python3 -c 'import setuptools' >& /dev/null; then yum -y install python3-pip fi # 备份旧版cloud-init test -d /etc/cloud && mv /etc/cloud /etc/cloud-old # 下载并解压阿里云版cloud-init wget https://ecs-image-tools.oss-cn-hangzhou.aliyuncs.com/cloud-init-19.1.7.tgz tar -zxvf ./cloud-init-19.1.7.tgz # 安装cloud-init issue_major=$( cat /etc/os-release | grep VERSION_ID | grep -Eo '[0-9]+\.?[0-9]+' | head -1 | awk -F'.' '{printf $1}') bash ./cloud-init-*/tools/deploy.sh rhel "$issue_major" - Ubuntu 14/16/18
# 检查安装python3-pip if ! python3 -c 'import setuptools' >& /dev/null; then apt-get install python36 python3-pip -y fi # 备份旧版cloud-init test -d /etc/cloud && mv /etc/cloud /etc/cloud-old # 下载并解压阿里云版cloud-init wget https://ecs-image-tools.oss-cn-hangzhou.aliyuncs.com/cloud-init-19.1.7.tgz tar -zxvf ./cloud-init-19.1.7.tgz # 安装cloud-init issue_major=$( cat /etc/os-release | grep VERSION_ID | grep -Eo '[0-9]+\.?[0-9]+' | head -1 | awk -F'.' '{printf $1}') bash ./cloud-init-*/tools/deploy.sh ubuntu "$issue_major" - Debian 8/9
# 检查安装python3-pip if ! python3 -c 'import setuptools' >& /dev/null; then apt-get -y install python3-pip fi # 备份旧版cloud-init test -d /etc/cloud && mv /etc/cloud /etc/cloud-old # 下载并解压阿里云版cloud-init wget https://ecs-image-tools.oss-cn-hangzhou.aliyuncs.com/cloud-init-19.1.7.tgz tar -zxvf ./cloud-init-19.1.7.tgz # 安装cloud-init issue_major=$( cat /etc/os-release | grep VERSION_ID | grep -Eo '[0-9]+\.?[0-9]+' | head -1 | awk -F'.' '{printf $1}') bash ./cloud-init-*/tools/deploy.sh debian "$issue_major" - SUSE 11/12
# 检查安装python3-pip if ! python3 -c 'import setuptools'>& /dev/null; then zypper -n install python3-pip fi # 备份旧版cloud-init test -d /etc/cloud && mv /etc/cloud/etc/cloud-old # 下载并解压阿里云版cloud-init wget https://ecs-image-tools.oss-cn-hangzhou.aliyuncs.com/cloud-init-19.1.7.tgz tar -zxvf ./cloud-init-19.1.7.tgz # 安装cloud-init issue_major=$( cat /etc/os-release | grep VERSION_ID | grep -Eo '[0-9]+\.?[0-9]+' | head -1 | awk -F'.' '{printf $1}') bash ./cloud-init-*/tools/deploy.sh sles "$issue_major" - OpenSUSE 13/42
# 检查安装python3-pip
if ! python3 -c 'import setuptools'>& /dev/null; then
  zypper -n install python3-pip
fi
# 备份旧版cloud-init
test -d /etc/cloud && mv /etc/cloud/etc/cloud-old
# 下载并解压阿里云版cloud-init
wget https://ecs-image-tools.oss-cn-hangzhou.aliyuncs.com/cloud-init-19.1.7.tgz
tar -zxvf ./cloud-init-19.1.7.tgz
# 安装cloud-init
issue_major=$( cat /etc/os-release | grep VERSION_ID | grep -Eo '[0-9]+\.?[0-9]+' | head -1 | awk -F'.' '{printf $1}')
bash ./cloud-init-*/tools/deploy.sh opensuse"$issue_major"
(可选)安装阿里云版cloud-init 0.7.6a15
部分低版本操作系统仍旧保持该版本cloud-init。例如,CentOS 6、Debian 9及SUSE Linux Enterprise Server 12等。
说明 阿里云公共镜像CentOS 6、Debian 9及SUSE Linux Enterprise Server 12默认已安装
cloud-init-0.7.6a15.tgz。如果您需要进行测试,请先运行命令mv /etc/cloud/cloud.cfg /etc/cloud/cloud.cfg_bak备份配置文件。
(可选)安装社区版cloud-init
- 修改配置文件cloud.cfg。
- 打开配置文件。
vi /etc/cloud/cloud.cfg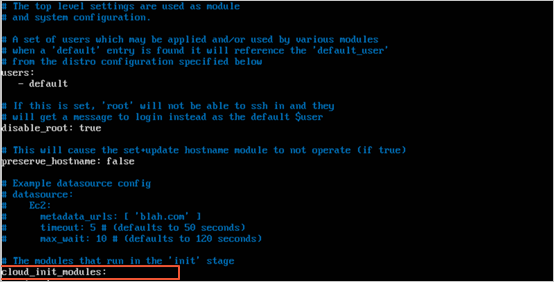
- 打开配置文件。
(可选)自定义网络配置
- 在
Example datasource config之前增加disabled配置。network: config: disabled
说明 增加该配置之后,cloud-init不会管理/etc/sysconfig/network-scripts/下网络配置,需要您自行管理。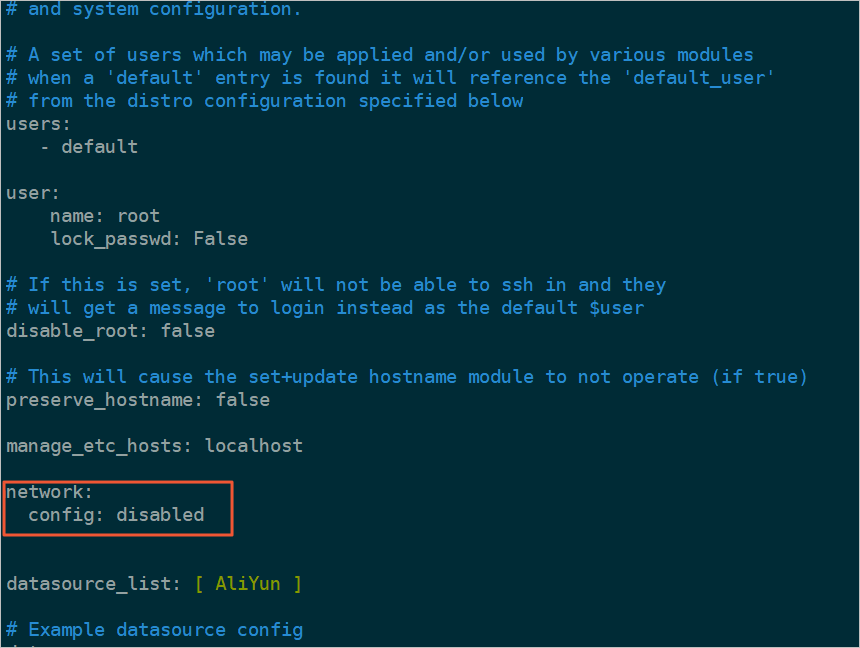
故障排查
- 不同镜像缺少的库可能不同,您都可以通过pip安装,之后再次安装cloud-init。
- 如果系统默认软件包管理器(例如yum)和pip管理器分别安装过不同版本的依赖库,可能造成库版本冲突,导致cloud-init运行异常。建议您根据报错信息按需下载依赖库。
| 报错信息 | 原因 | 排错命令 |
|---|---|---|
no setuptools module in python |
缺失模块python setuptools | 以python3.6为例:
|
File "/root/cloud-init/cloudinit/log.py", line 19, in <module>
      import six
ImportError: No module named six ) |
缺失依赖库six | |
File "/root/cloud-init/cloudinit/url_helper.py", line 20, in <module>
      import oauthlib.oauth1 as oauth1
ImportError: No module named oauthlib.oauth1 ) |
缺失依赖库oauthlib | |
| 报错时没有明确缺少的依赖库 | 未映射相关错误信息 | 根据cloud-init的requirements.txt文件里显示的库,运行以下命令安装所有依赖库: |
后续步骤
- 对于准备迁移上云的Linux服务器:
- 对于已在阿里云上运行Linux自定义镜像的ECS实例:
您可以重启系统验证结果。如果系统自动配置了主机名、软件源和NTP等配置,则表示已成功安装cloud-init。例如,查看网络配置文件。
[root@iZbp1ios3psx4hoi******Z ~]# cat /etc/sysconfig/network-scripts/ifcfg-eth0
# Created by cloud-init on instance boot automatically, do not edit.
#
BOOTPROTO=dhcp
DEVICE=eth0
ONBOOT=yes
STARTMODE=auto
TYPE=Ethernet
USERCTL=no


